Believing in this myth as long as it will last, because, afterwards, when you will actually tie the knots and see ( or even measure ) how wrong you were, you will remember it ! : ) ![]()
Start by comparing the Simplest hitch (1), with the Simplest Tackled hitch. I use to judge tightness by sound ( ![]() ), but you can use the other method I had proposed : their efficiency in an lengthwise pull.
), but you can use the other method I had proposed : their efficiency in an lengthwise pull.
So, tie TWO Simplest ( un-tackled ) one-wrap hitches side by side, at the one end of a pole, and ONE Simplest Tackled hitch, at the other, and drag them simultaneously, towards the middle. Then, report your findings here. Only do not tell me that I had told you what you will tell us ! ![]()
And, when you will find any pair of one-wrap hitches, or any two-wrap hitch, which will be able to strangle as ferociously the poor pole as a Butterfly Tackled hitch, please, tell it to me, to throw this jungle of ropes around me out of the window : it will make all members of my family, and most members of the Forum, really happy - and save my spinal cord at the same time ! ![]()
![]()
![]()
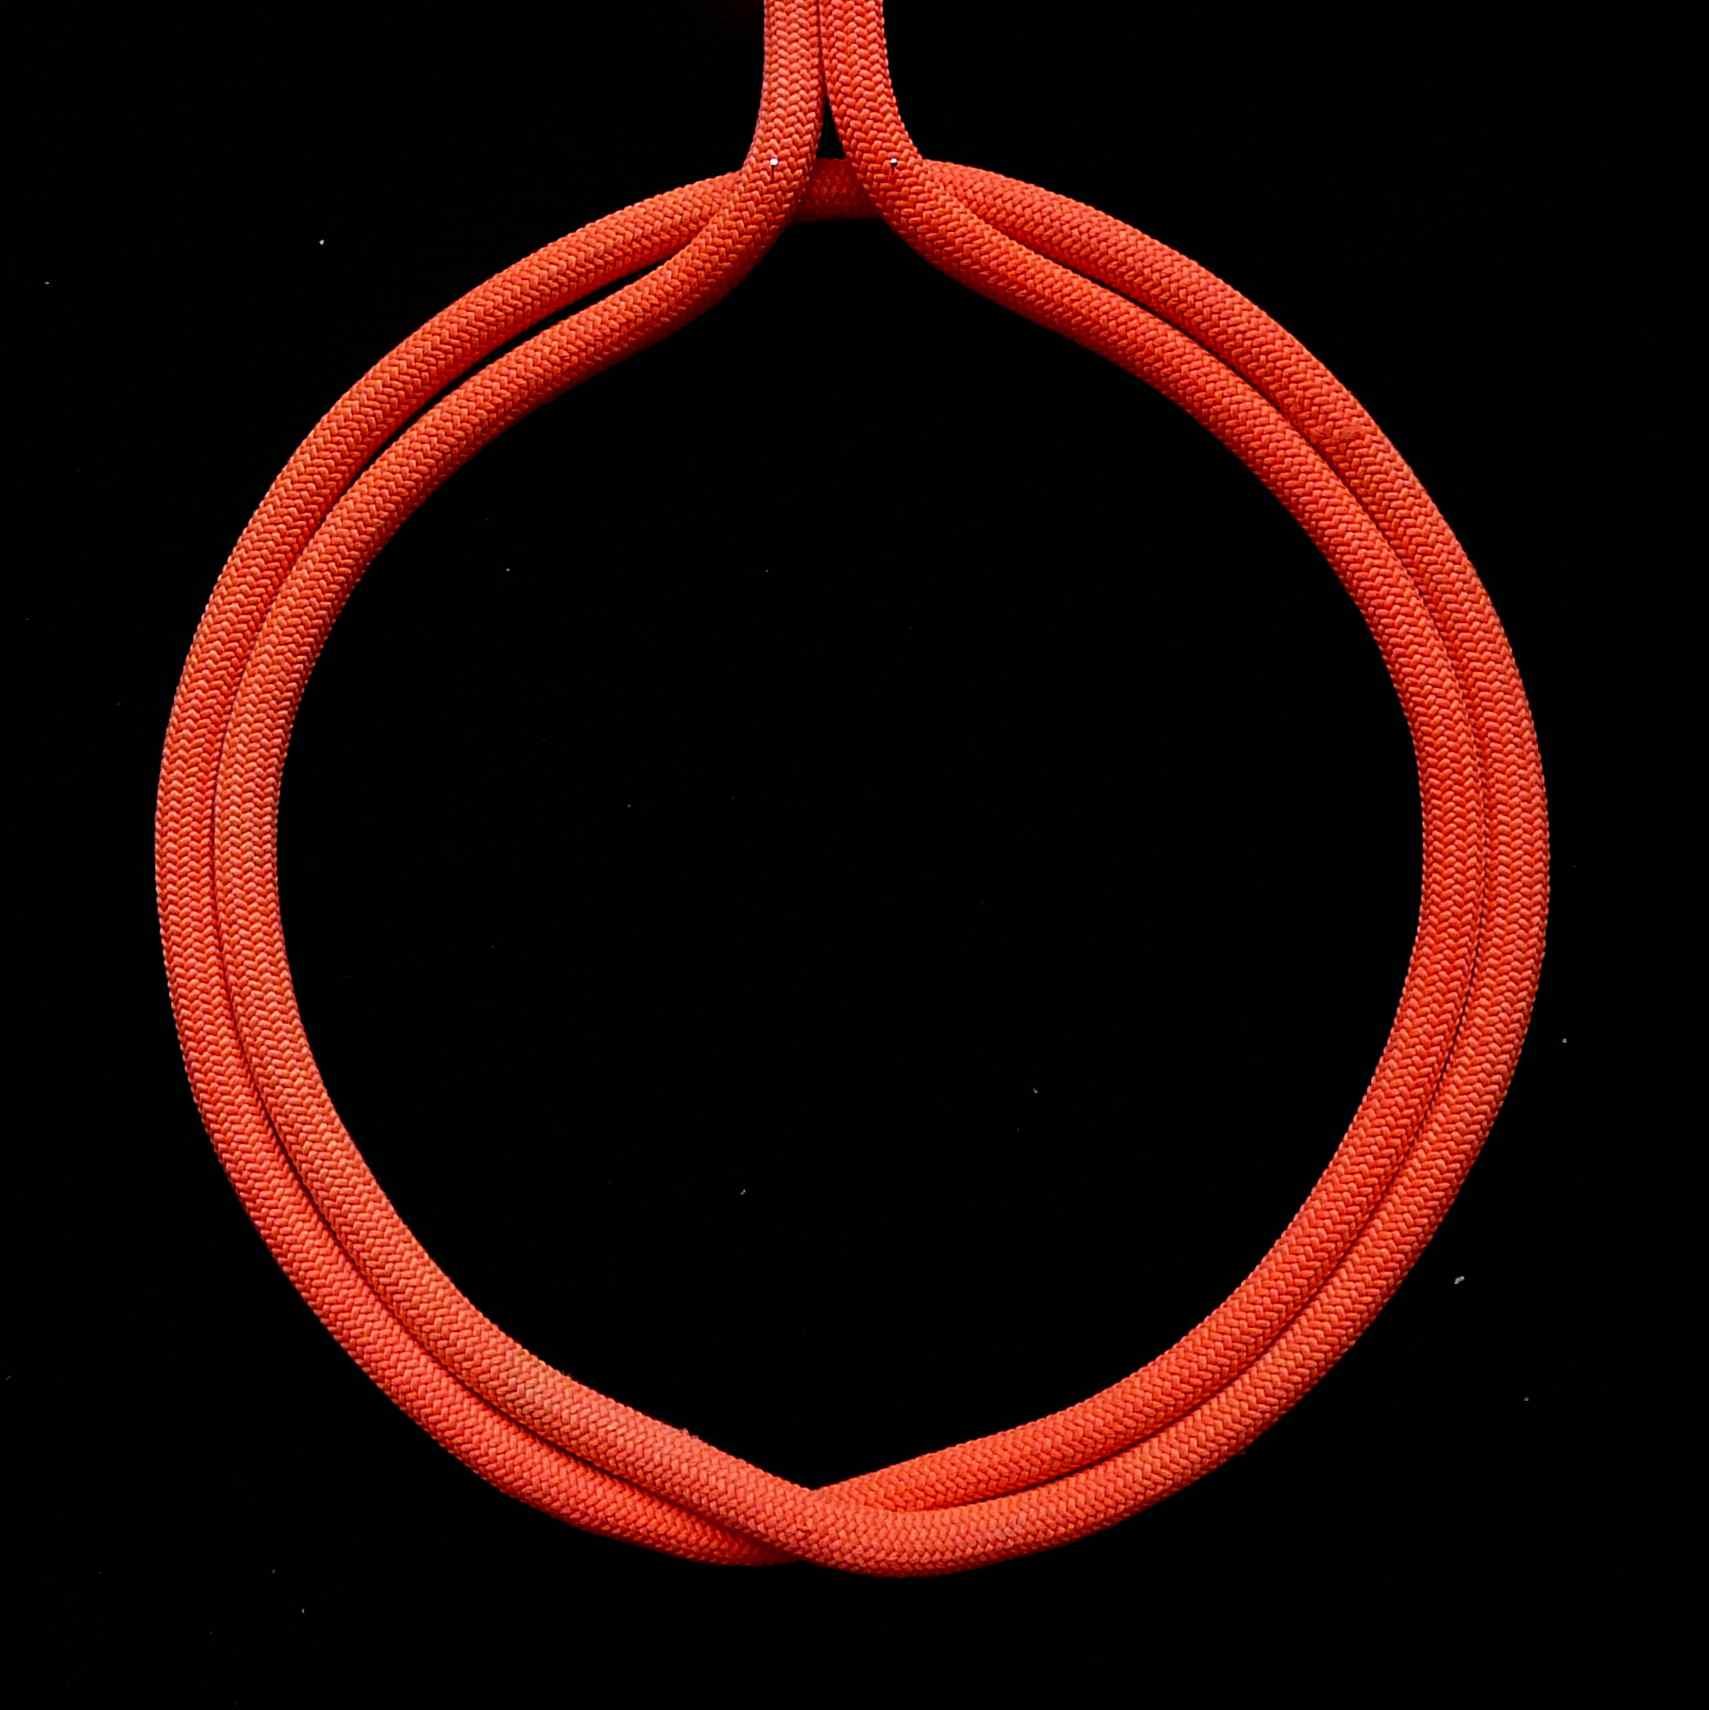
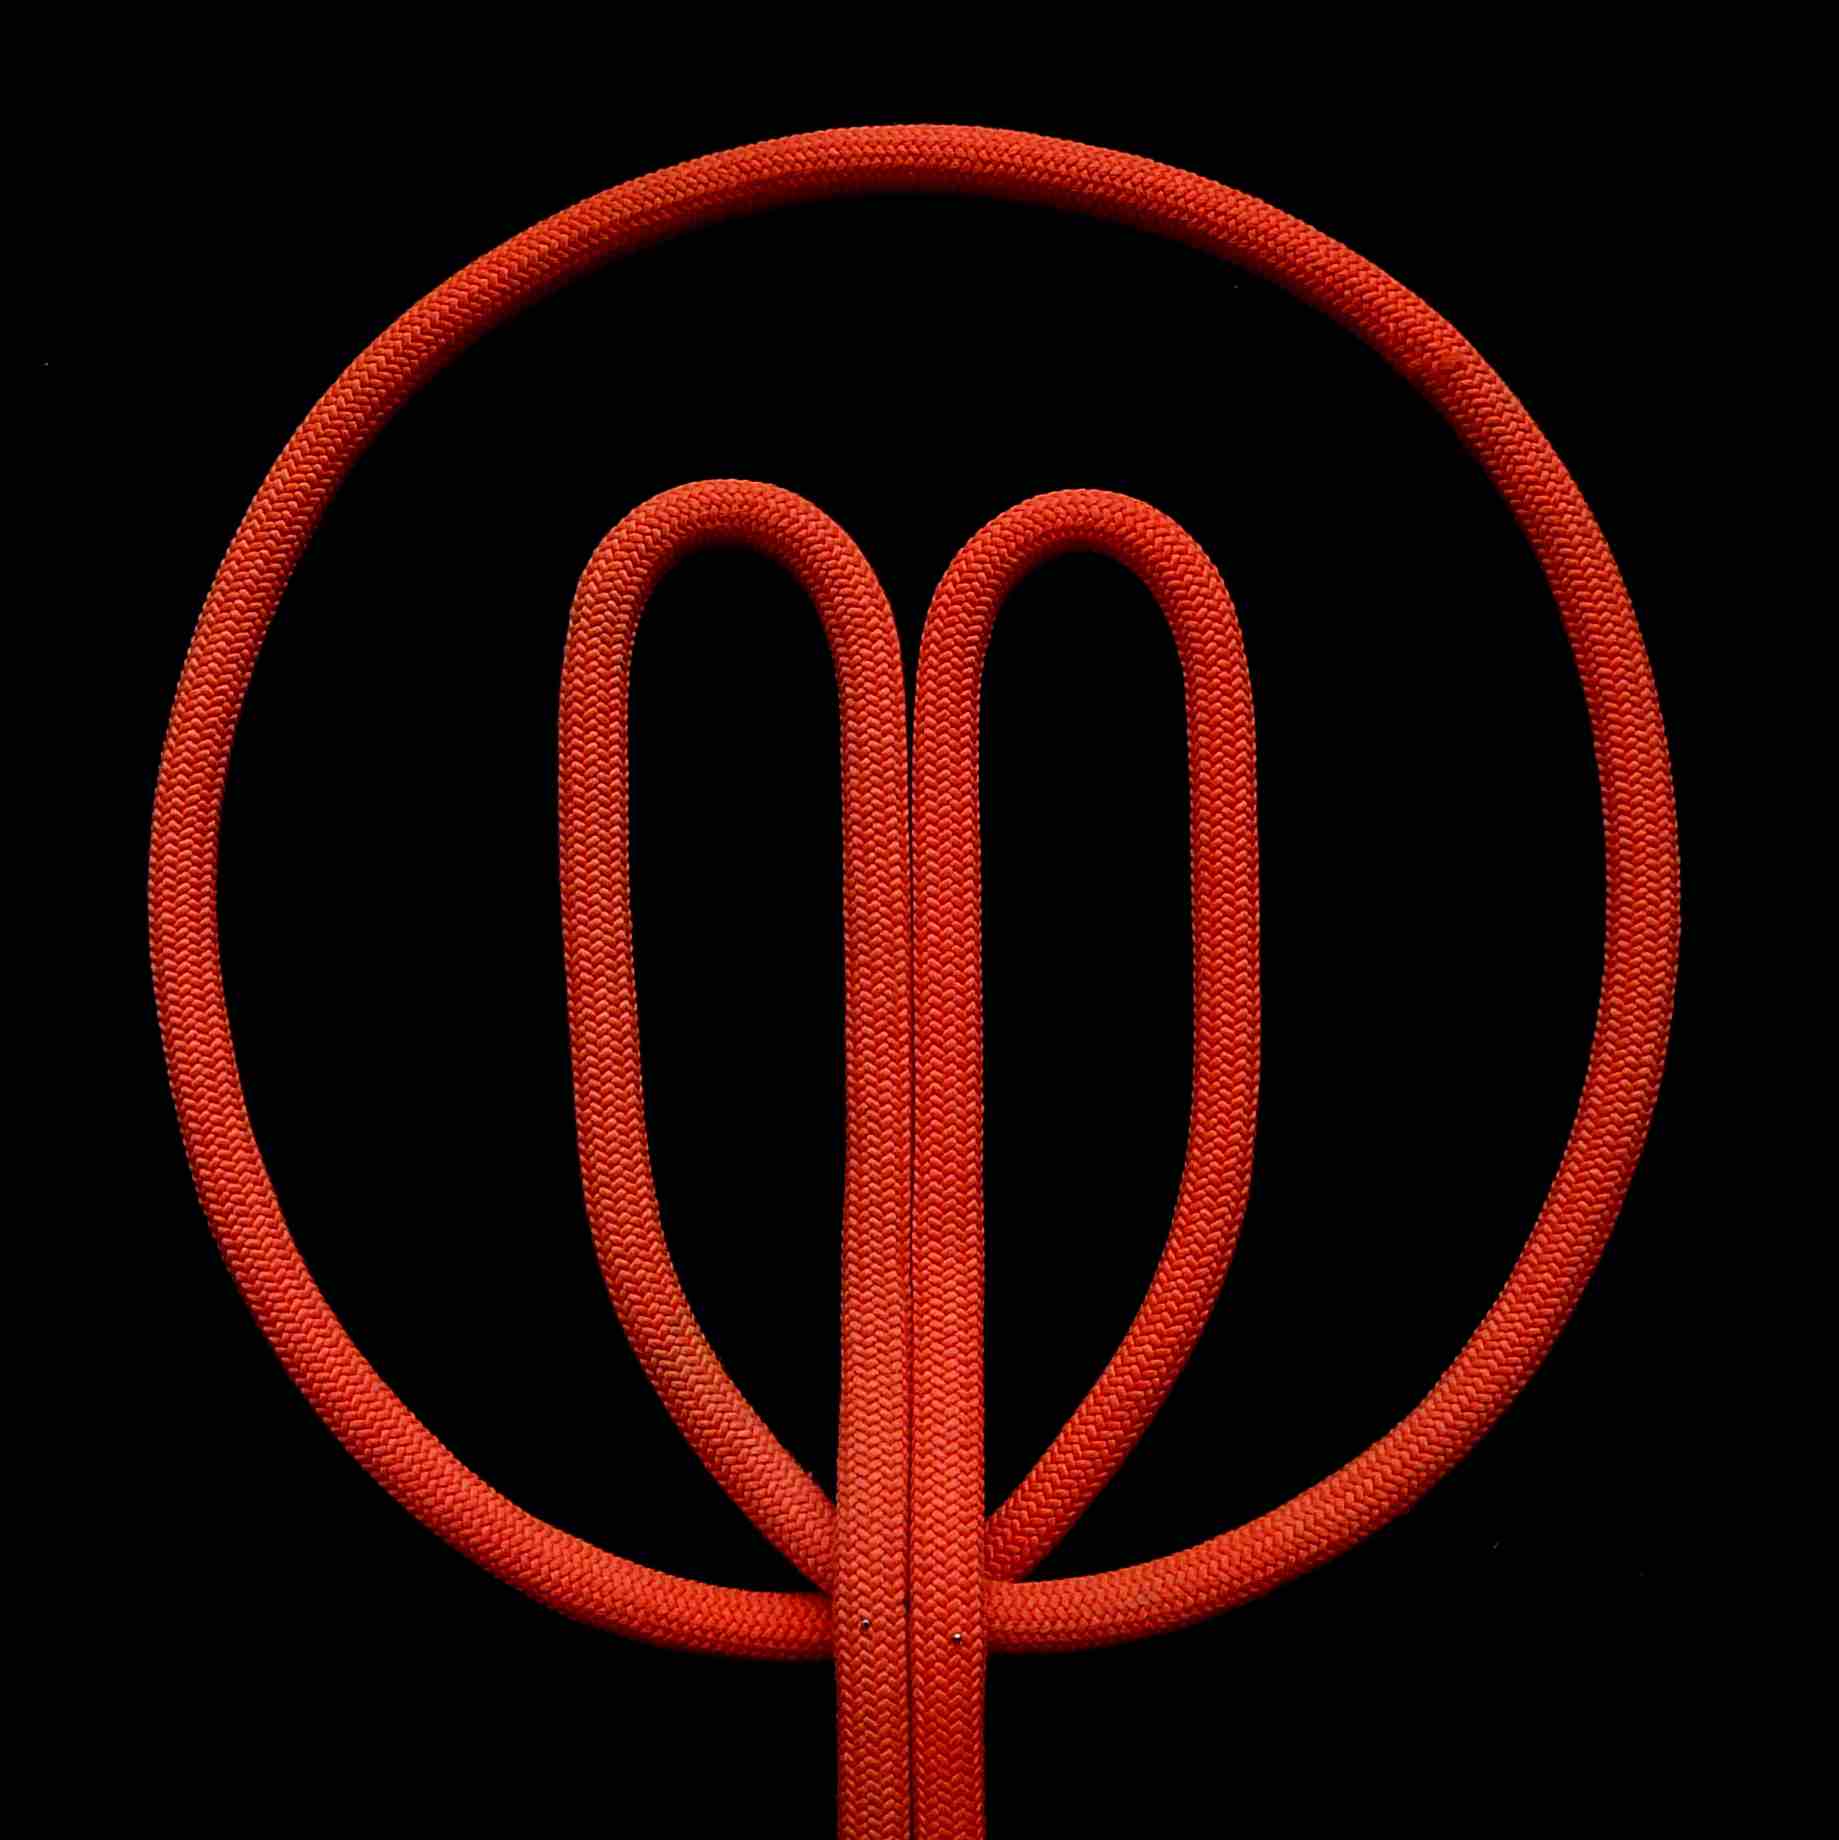
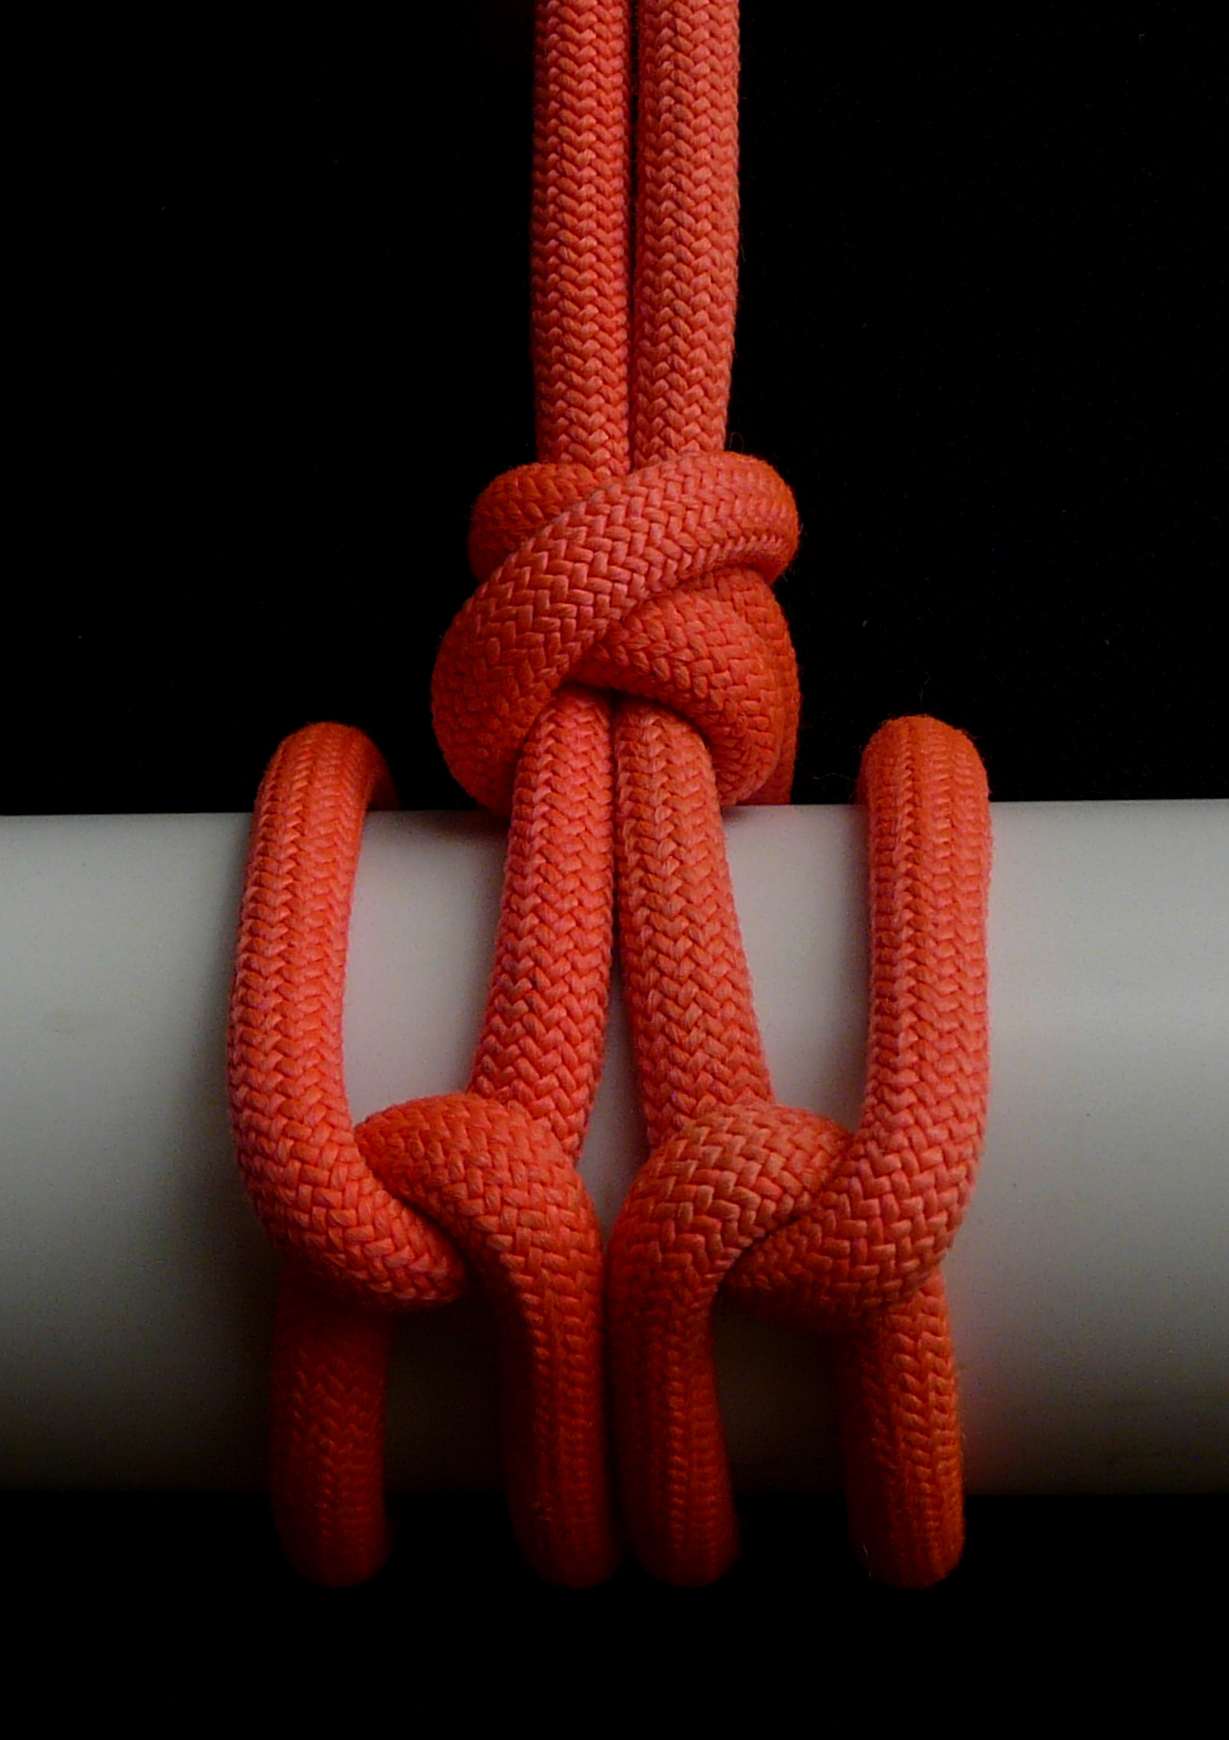
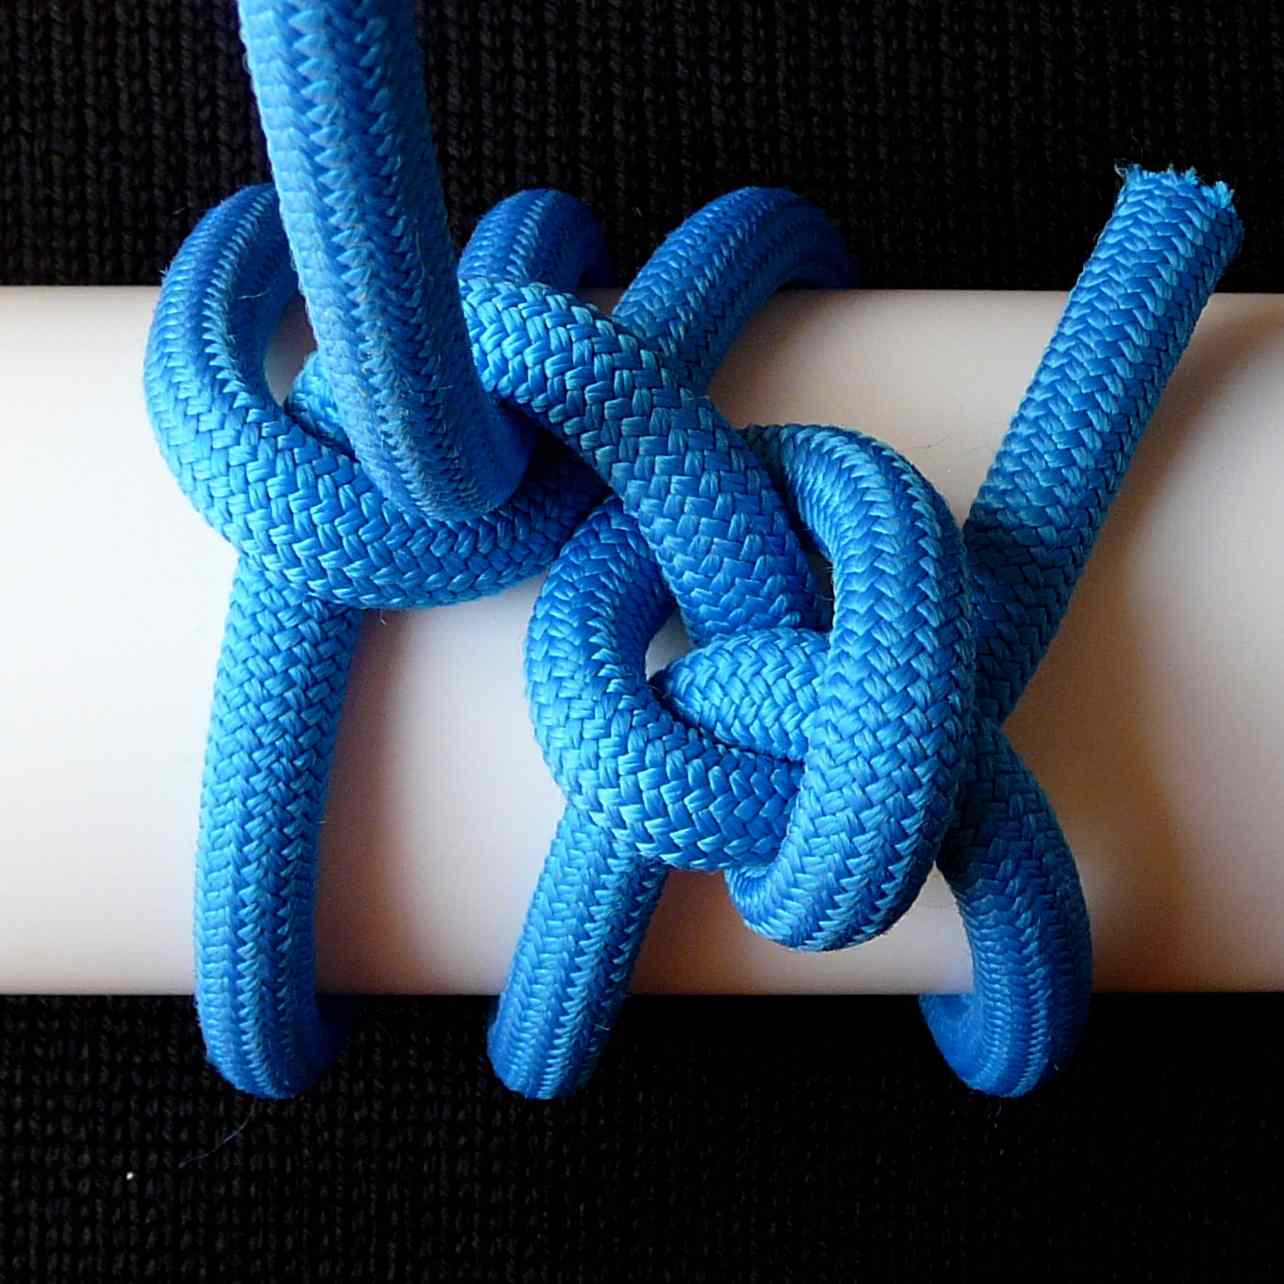
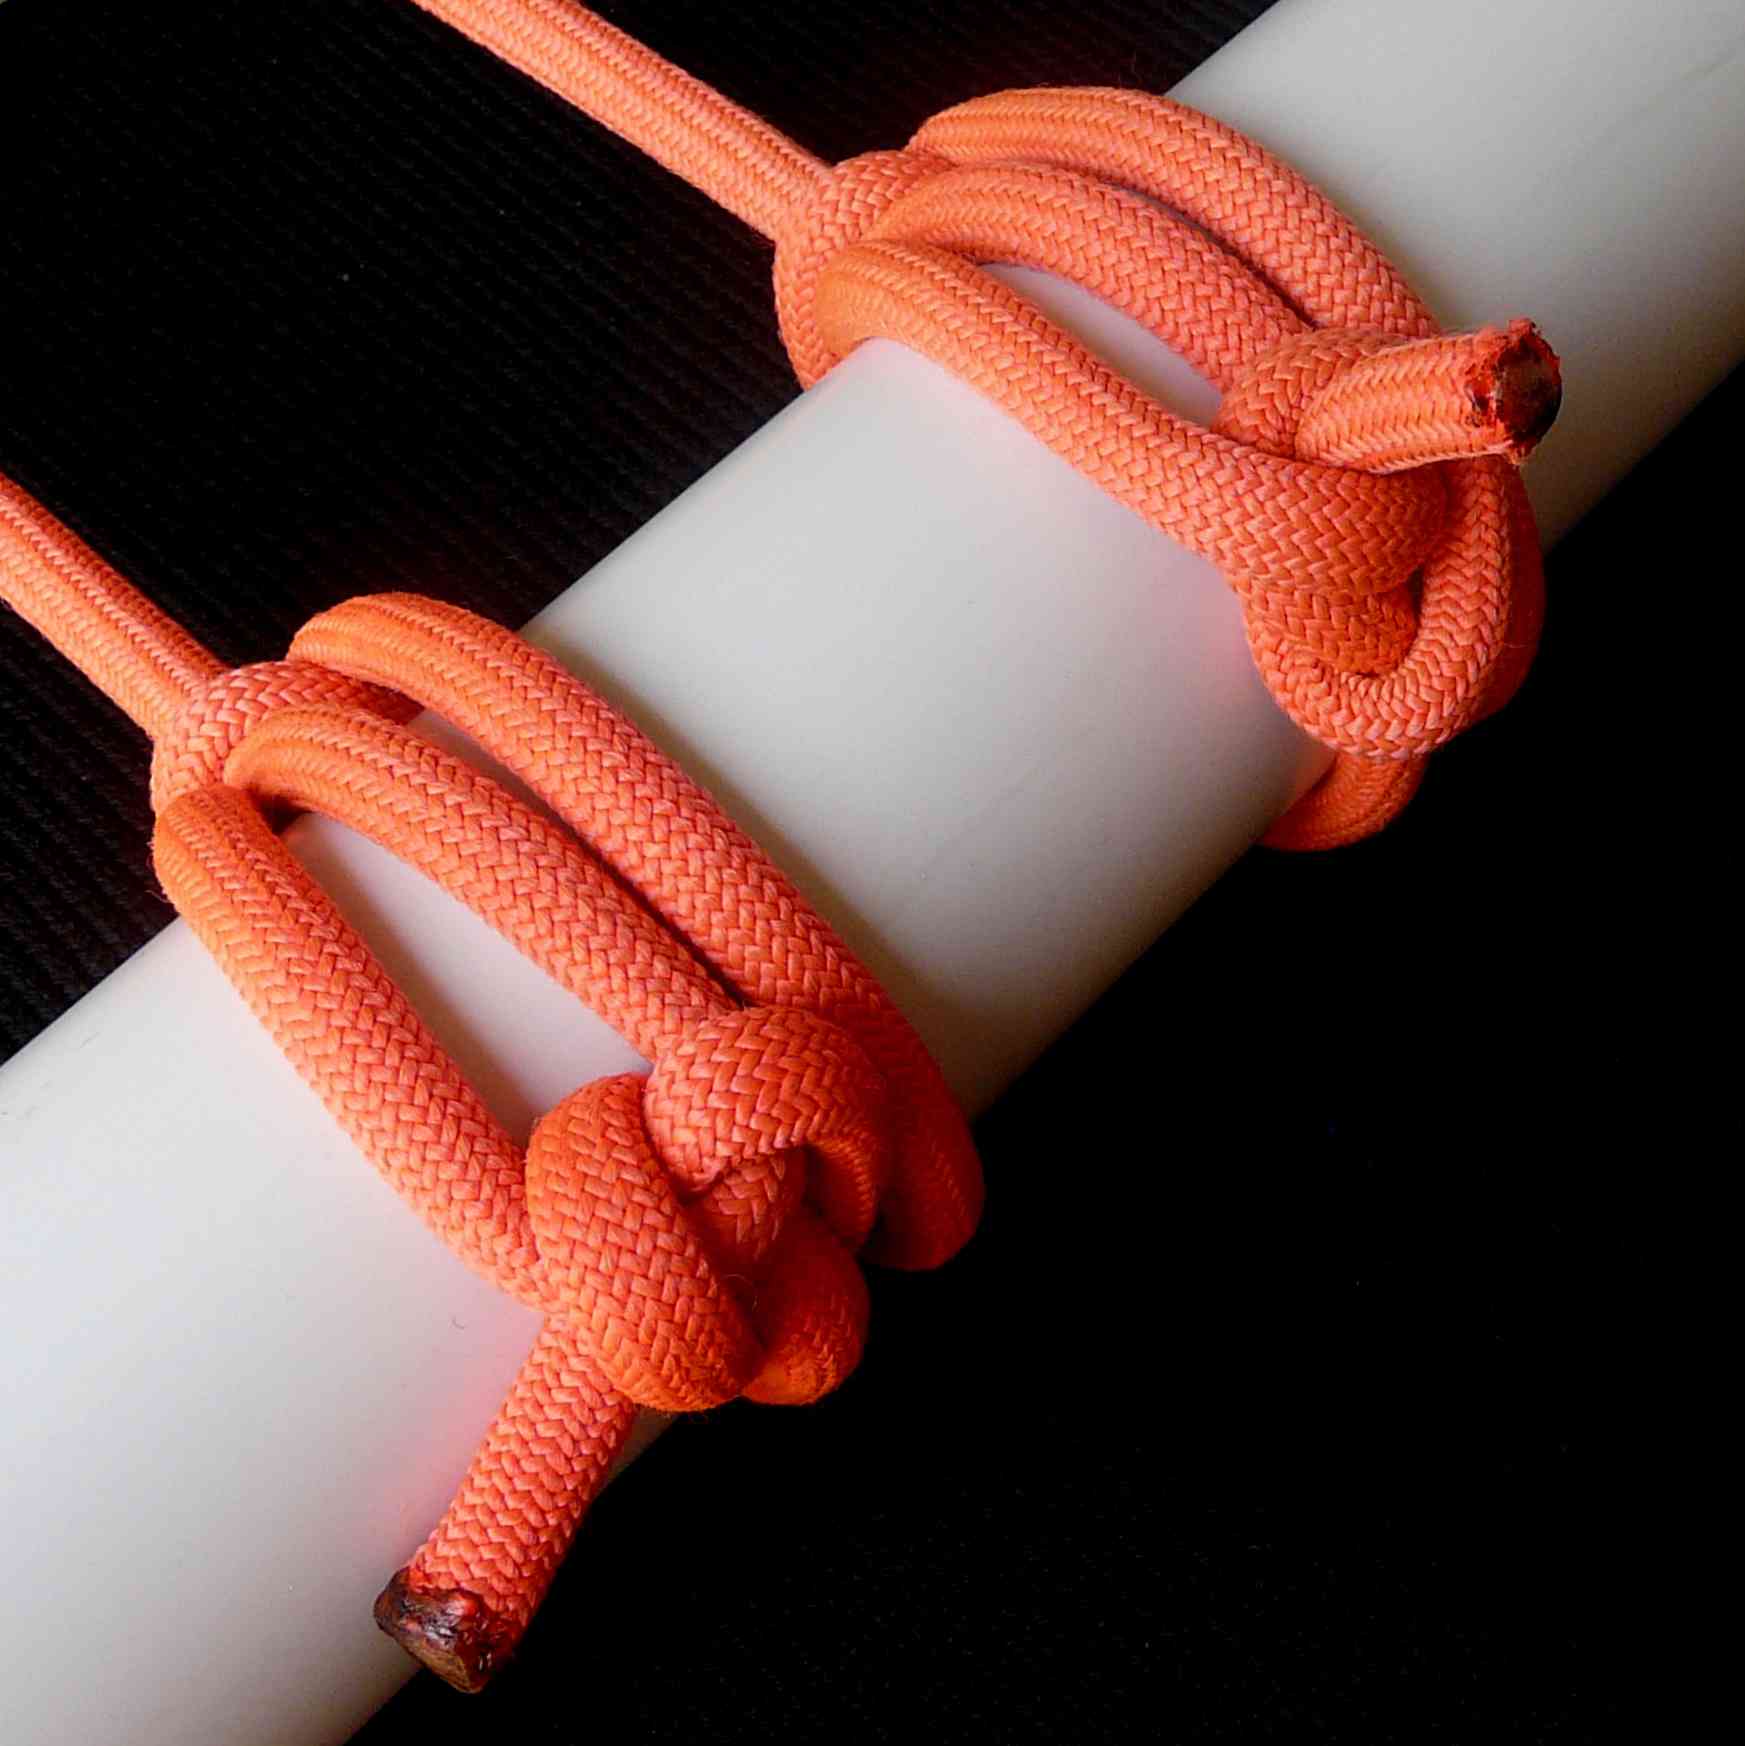
Perhaps ( = PERHAPS ! :)), to tie the Butterfly Tackled hitch in-the-bight more easily / quickly, he/she should better start from the double loop shown at pict.#1.
Then :
1 : Flip the inner circle, and both ends leading to it, horizontally, to arrive at the shape shown at pict.#2
2 : Flip the outer circle, and twist its legs, vertically, to arrive at the shape shown at pict.#3.
Pay attention to ONE things :
After stage #2, the crossing point of the legs of the outer circle ( after the flip / twist ), should now be at the OTHER side than the crossing point of the legs of the inner circle. ( In the attached picture#3, it is at the “front” side ). This way the ends of the hitch will become encircled by both sides, as they should.
3 : Insert the left semicircle into the left inner loop, and the right semicircle into the right inner loop, to arrive at the shape shown at pict.#4.
You are done - as shown in the not-so-clear picture of Reply#4.
With repetition and experience, I believe one would find out the correct/optimum relation between the diameter of the initial double loop he should form and the diameter of the pole he wants to encircle.

HOWEVER, and I want to underline it, there are MANY other, different ways one can tie this knot in-the-bight - I can not know, in advance, which will suit whom better. In the sequence I had shown, I had tried to retain a correspondence to the general mental image of this double loop with communicating bights, which one may consider as the "base" of this hitch. One may also start different initial basic shapes, and make different transformations. Contrary of how it may look at the first sight, this knot is NOT very convoluted : it has only a small number of tucks and twists, and that is why it can become so tightly wiven around the ends we want to immobilize and "lock".
This is an old misconception people had, and I thought I had made it clear, and would not come back again to it…
I am not talking about tensioning by hands for its own sake ! I am talking about pre-tensioning by hands, so the wraps will not become very elongated / oval / elliptically shaped if/when/while, later, there will be a tensioning by a load even much heavier than the force delivered by hands.
In short : There are two kinds of hitches able to withstand a lengthwise pull : the hitches with cross-gathered wraps ( like the rat-tail stopper, and others shown by Ashley in his relevant chapter ), and the hitches with tightly woven wraps. If the wraps are not cross-gartered, or not tightly woven, they will slip, unless they are MANY - but we are talking about few-wrap hitches here : ANY hitch, even if it is not knotted, will hold ANY lengthwise pull, however strong, if it has a sufficiently big number of wraps…
So, we want to tighten the wraps, just for this : to “pretension” the hitch, just as the civil engineers pre-tension their concrete. If we do this, the wraps will become less oblique, if/when/while this hitch will be loaded by a lengthwise pull, and so they will slip less easily, and also, during some moments of extreme loading, they will be translated along the pole less than the looser wraps of a less pre-tightened hitch.
As I had mentioned in a previous post, in those two-wrap tackled hitches, when you pull the one end (= the one leg of the one U, linked to the tip of the main bight), both legs of the other U continue to pull the main bight “your” end is pulling : they remain tensioned at all times, they never become slack - so they “help” you, increasing the effective mechanical advantage, which, this way, comes closer to 4:1 than to 2:1, as one may had supposed. However, there is another possible advantage in this configuration, which I had also tried to exploit in the Butterfly Tackled hitch : the two “returning” legs of the two Us, are parallel, adjacent, and also squeezed upon each other by the two legs of the main bight, at their one end, and by the main nub of the hitch, at their other - AND, they are squeezed onto the surface of the pole at the same time. So, they “lock” each other, and the burden the nub of the hitch has to bear to immobilize any one of them, is distributed and lessened. Even if we UNTIE the one of the two interlinked loops which form the nub of the hitch, both adjacent ends of both Us remain tensioned, and in their former place. An additional advantage, regarding security, this twin configuration offers.
The “full”, more “fat”/bulky Butterfly Tackled hitch, shown in previous posts, can be tied even more easily, and in a conceptually simpler way, starting from a common Butterfly loop. To see how, do some “reverse engineering” : Tie the Tacled variation in-the-end, as you see it in the pictures, and then perform this tricky transformation : make the two Us, which turn around the tip of the main bight, be “swallowed” by the “mouth” of the nub, and get out of the other side all the way. You will be surprized : What you will get, after some redressing, will also be a Butterfly loop, with the ends going through its eye this time. Now, you can make a loop / collar encircle the ends of a loop, when they do not, or vice versa, by implementing the “haltering the collar” method. So, you can, in one move, have this “second” Butterfly loop, become a normal loop, without its ends going through its eye. Now, following the exact time-reversed sequence of the above described moves, you can go from one common Butterfly loop to its “Tackled” variation, following the steps, in reverse, you had followed to de-Tackle it ! ![]()
( I have not shown this method, because I want to promote the “slimmer” version, which can not be tied so easily using it - the nub is simpler, and one can easily lose the control of the many concurrent, in mid air, segments. )
the tricky transformation may introduce kinks.
In many such “retraced” knots, the one line may go “over” and then “under” the other, and thus we have the formation of unnecessary twists, “kinks” - which, besides being ugly, they may also be detrimental regarding the strength of the knot. ![]()
As mentioned in Reply#22, we can either start from a double loop with communicating bights, or from a single end-of-line loop - but we should better start from TIB ones, in order to end with a TIB hitch. Starting from the ABoK#1021 loop ( which is nothing but two unlinked slipped overhand knots, joined by the pair of eyelegs of their common eye ), we end to a hitch with a nub a little simpler than we would, had we started from the Butterfly loop ( “simpler”, just because the two overhand knots are now not interlinked ).
However, although the nub is tight and stable, it is not deformed by the pulling if the ends against the pole, and it does not “walk” towards the tip of the main bight when the hitch is tensioned, it can not be untied very easily - in fact, it can be untied only with GREAT difficulty ! ![]() Therefore, I suggest one better ties it near the very end of the pole, so, if he/she pretensions it as hard as I did ( by STEPPING ON the hanged pole - hanged by the one and then by the other end, alternately ), he/she would be able to force the hitch to slide just a little bit, reach the end of the pole, and so be released.
Therefore, I suggest one better ties it near the very end of the pole, so, if he/she pretensions it as hard as I did ( by STEPPING ON the hanged pole - hanged by the one and then by the other end, alternately ), he/she would be able to force the hitch to slide just a little bit, reach the end of the pole, and so be released.
I know… It works better with some loops than with some others. I had mentioned it just as a way we can see how/why, starting from TIB loops, we end with TIB tackled hitches - but I do not believe that, as a tying method, it should be followed in all cases.
ABoK#1050 is interesting as a (TIB) Eskimo-like loop, but too lopsided for anything else. However, the nub of its Tackled version is OK, and it is not “walking” ( actually, because its asymmetry, it “walks” more while we pull the one end than while we pull the other, but after a while the whole nub reaches an equilibrium, and solidifies ). Trying to make it more visually appealing, I had sacrificed its TIB-ness ( just a little bit :)), and the result is shown in the attached pictures. Due to the fact that its nub is less convoluted, and less tight, the ends can be “pushed” through their “lock”, and so the this hitch can be untied more easily than the one based on ABoK#1021.
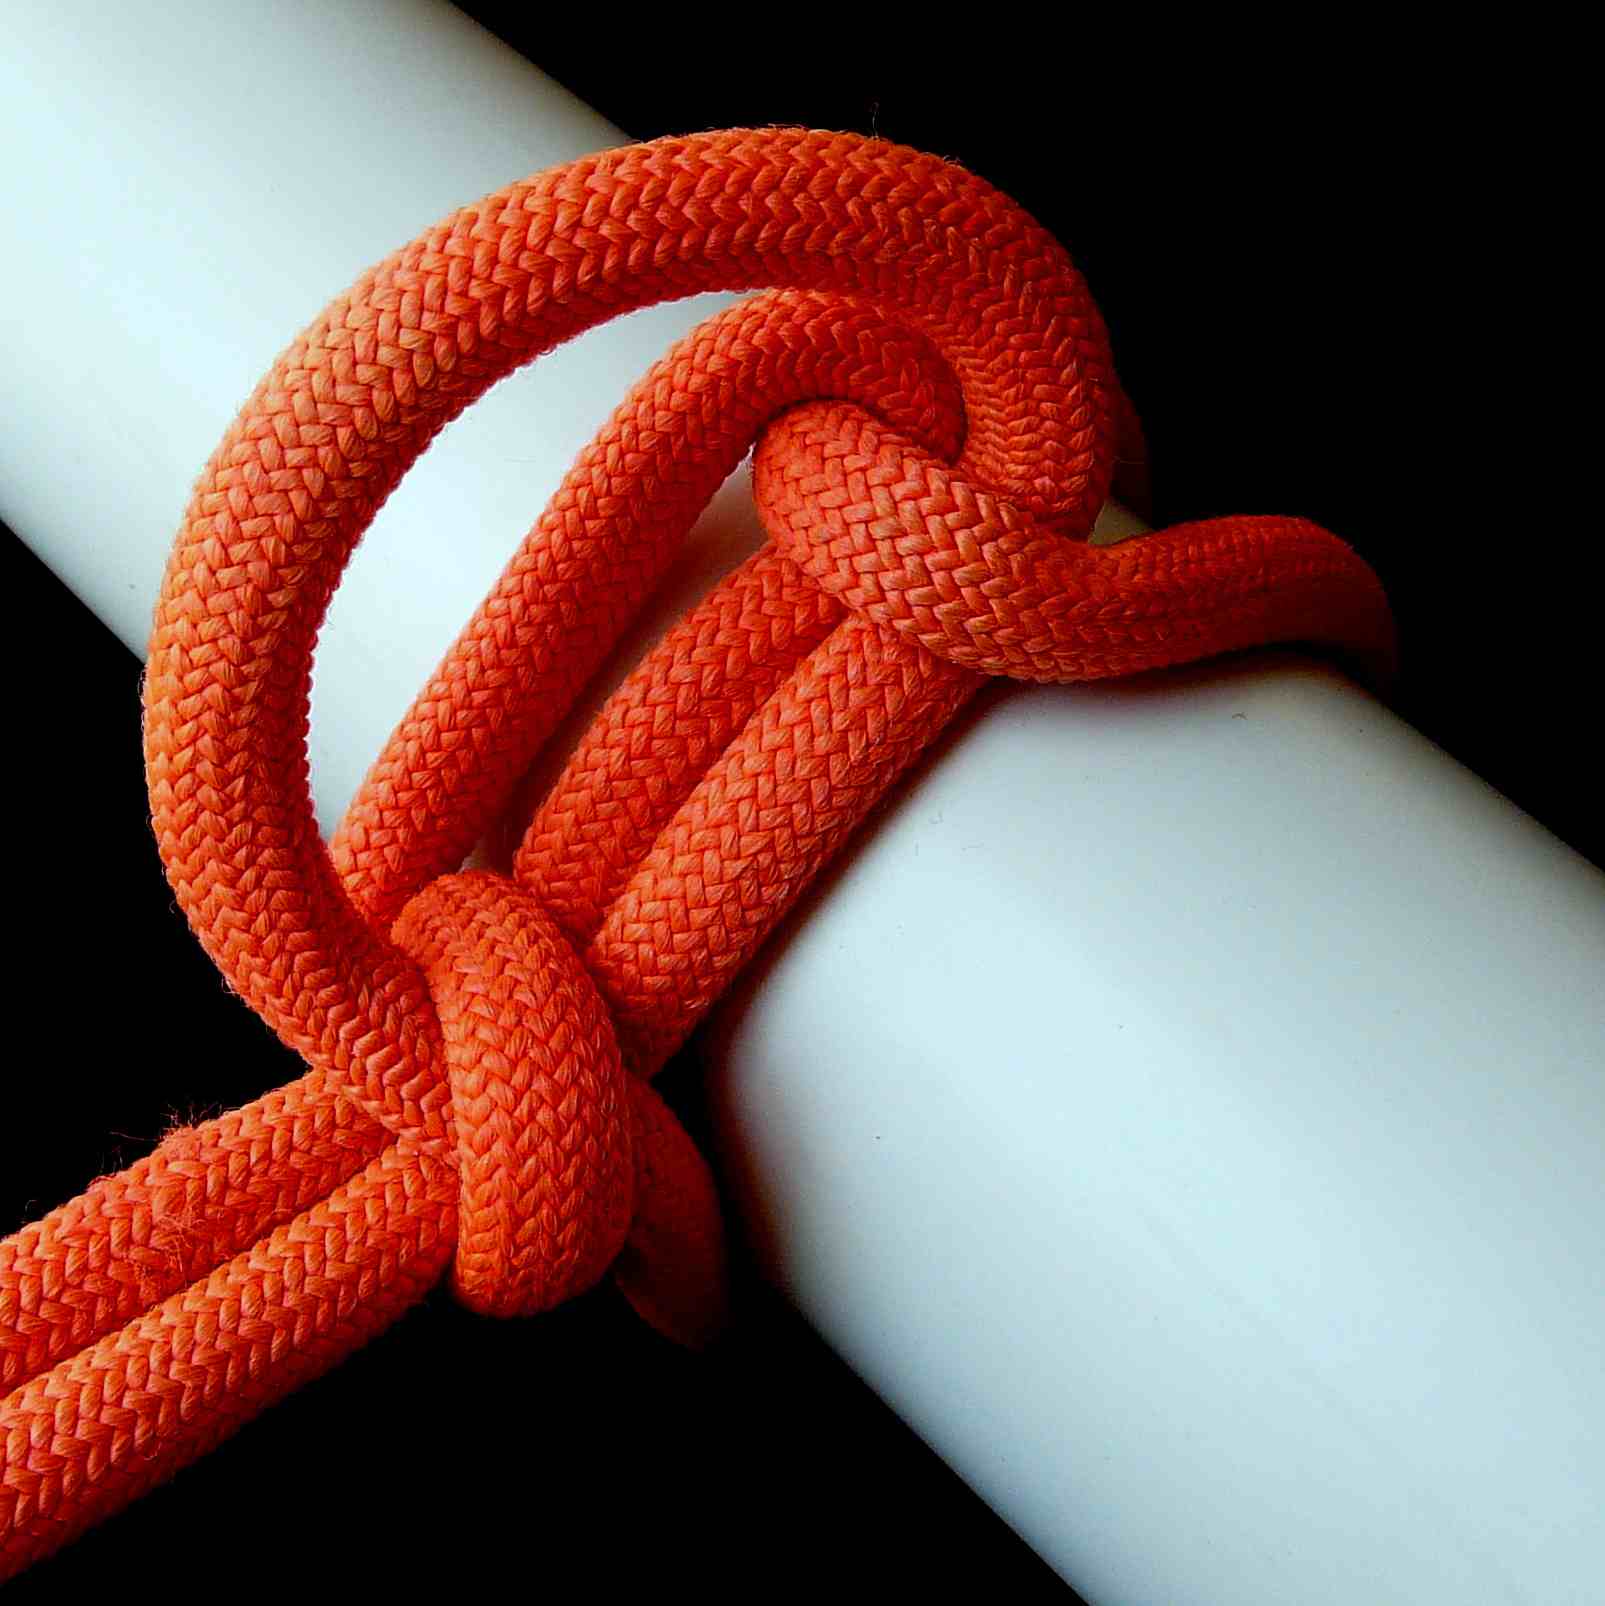
The simplest, conceptually, Tackled hitch ( tight hitch / binder ) is the one based on the simplest end-of-line loop : the Overhand loop. The good thing with the double-line overhand knot which makes the nub of this loop, is that, when the eye of the overhand loop is loaded, it does not “walk” towards it by itself - while, at the same time, it can be transported easily closer or further from it by us, if/when we want to re-adjust the size of the eye. The bad thing is that it “closes” tightly around itself and it becomes difficult to untie - but, for the purpose we want it, this is actually an advantage : in the case of the Tackled hitch based on it, we want it to be as tight as possible, and remain so during and after the pulling of the ends of the hitch which penetrate it, in order to be able to grip, nip and immobilize the ends which penetrate it as securely as possible.
There are different ways one can see a rope-made mechanism, and when it is simple, i.e., when it is as simple as a knot, there are even more ! ![]() Many knots are “similar” to many others, so there are many ways we can try to “reduce” our descriptions of their forms or explain how they work, starting from yet simpler, more “elementary” rope tangles.
Many knots are “similar” to many others, so there are many ways we can try to “reduce” our descriptions of their forms or explain how they work, starting from yet simpler, more “elementary” rope tangles.
How I “see” this Tackled hitch : As an overhand loop, where the ends :
- first, they are linked with the eye of the loop ( = they go through it, passing from its one side to its other ),
- and, then, they re-enter into the nub from the same side they exit from it in the first place, and exit from it from the opposite side.
In place of the Overhand loop, we may have any other end of line loop - only that it should be TIB, if we want our Tackled hitch to be TIB as well. For the time being, I think that the most appropriate loop for this is the simplified/slimmed Butterfly loop I had presented in previous posts.
As I had said many times, there are not only many ways to describe and explain a knot, but also to tie it ! To tie this Tackled hitch in-the-bight, I suggest one should better tie it first in-the-ends ( that is, on a short line, where he can have easy access to both ends ), and then make some “reverse engineering” to see how he could had tied it in-the-bight. The trick is to perform a simple experiment : On a loose hitch, removed from the hitched object, we can pull the ends all the way, so the two “secondary” loops get through the nub, from its one way to the other. After we do that, we will see that our knot has been transformed to something else - which I will not tell, because I do not want to spoil the joy of the knot tyer who will perform this transformation ! I only say that it is a well known TIB double loop, which can be tied-in-the bight also in many ways…( Stop ! I have almost spilled the beans already ! ). From this stage, the interested reader would see how to reverse the whole procedure, and go back to the Overhand knot Tackled hitch he had started.
We would had followed the same method for tying any Tackled hitch, based on any end-of-line loop, but : 1 : there may be easier and quicker ways to tie each of them, or 2 : by this method we may lose the control of the many parallel segments and twist some around others, and so end with a knot with kinks, which is not a good thing regarding its strength, as ruby noticed.
Even for the Butterfly Tackled hitch, which, for the moment, I find as the slimmest and more easily untiable of all I had tied and tried, I am not sure which is the easiest and quickest tying method… Also, I am a knot-tyer, I am not a knot-user : for the “average” knot-user, perhaps a bulkier, yet “simpler”, conceptually, Tackled hitch, like the Overhand knot Tackled hitch shown in this post, may be more attractive and “useful”.

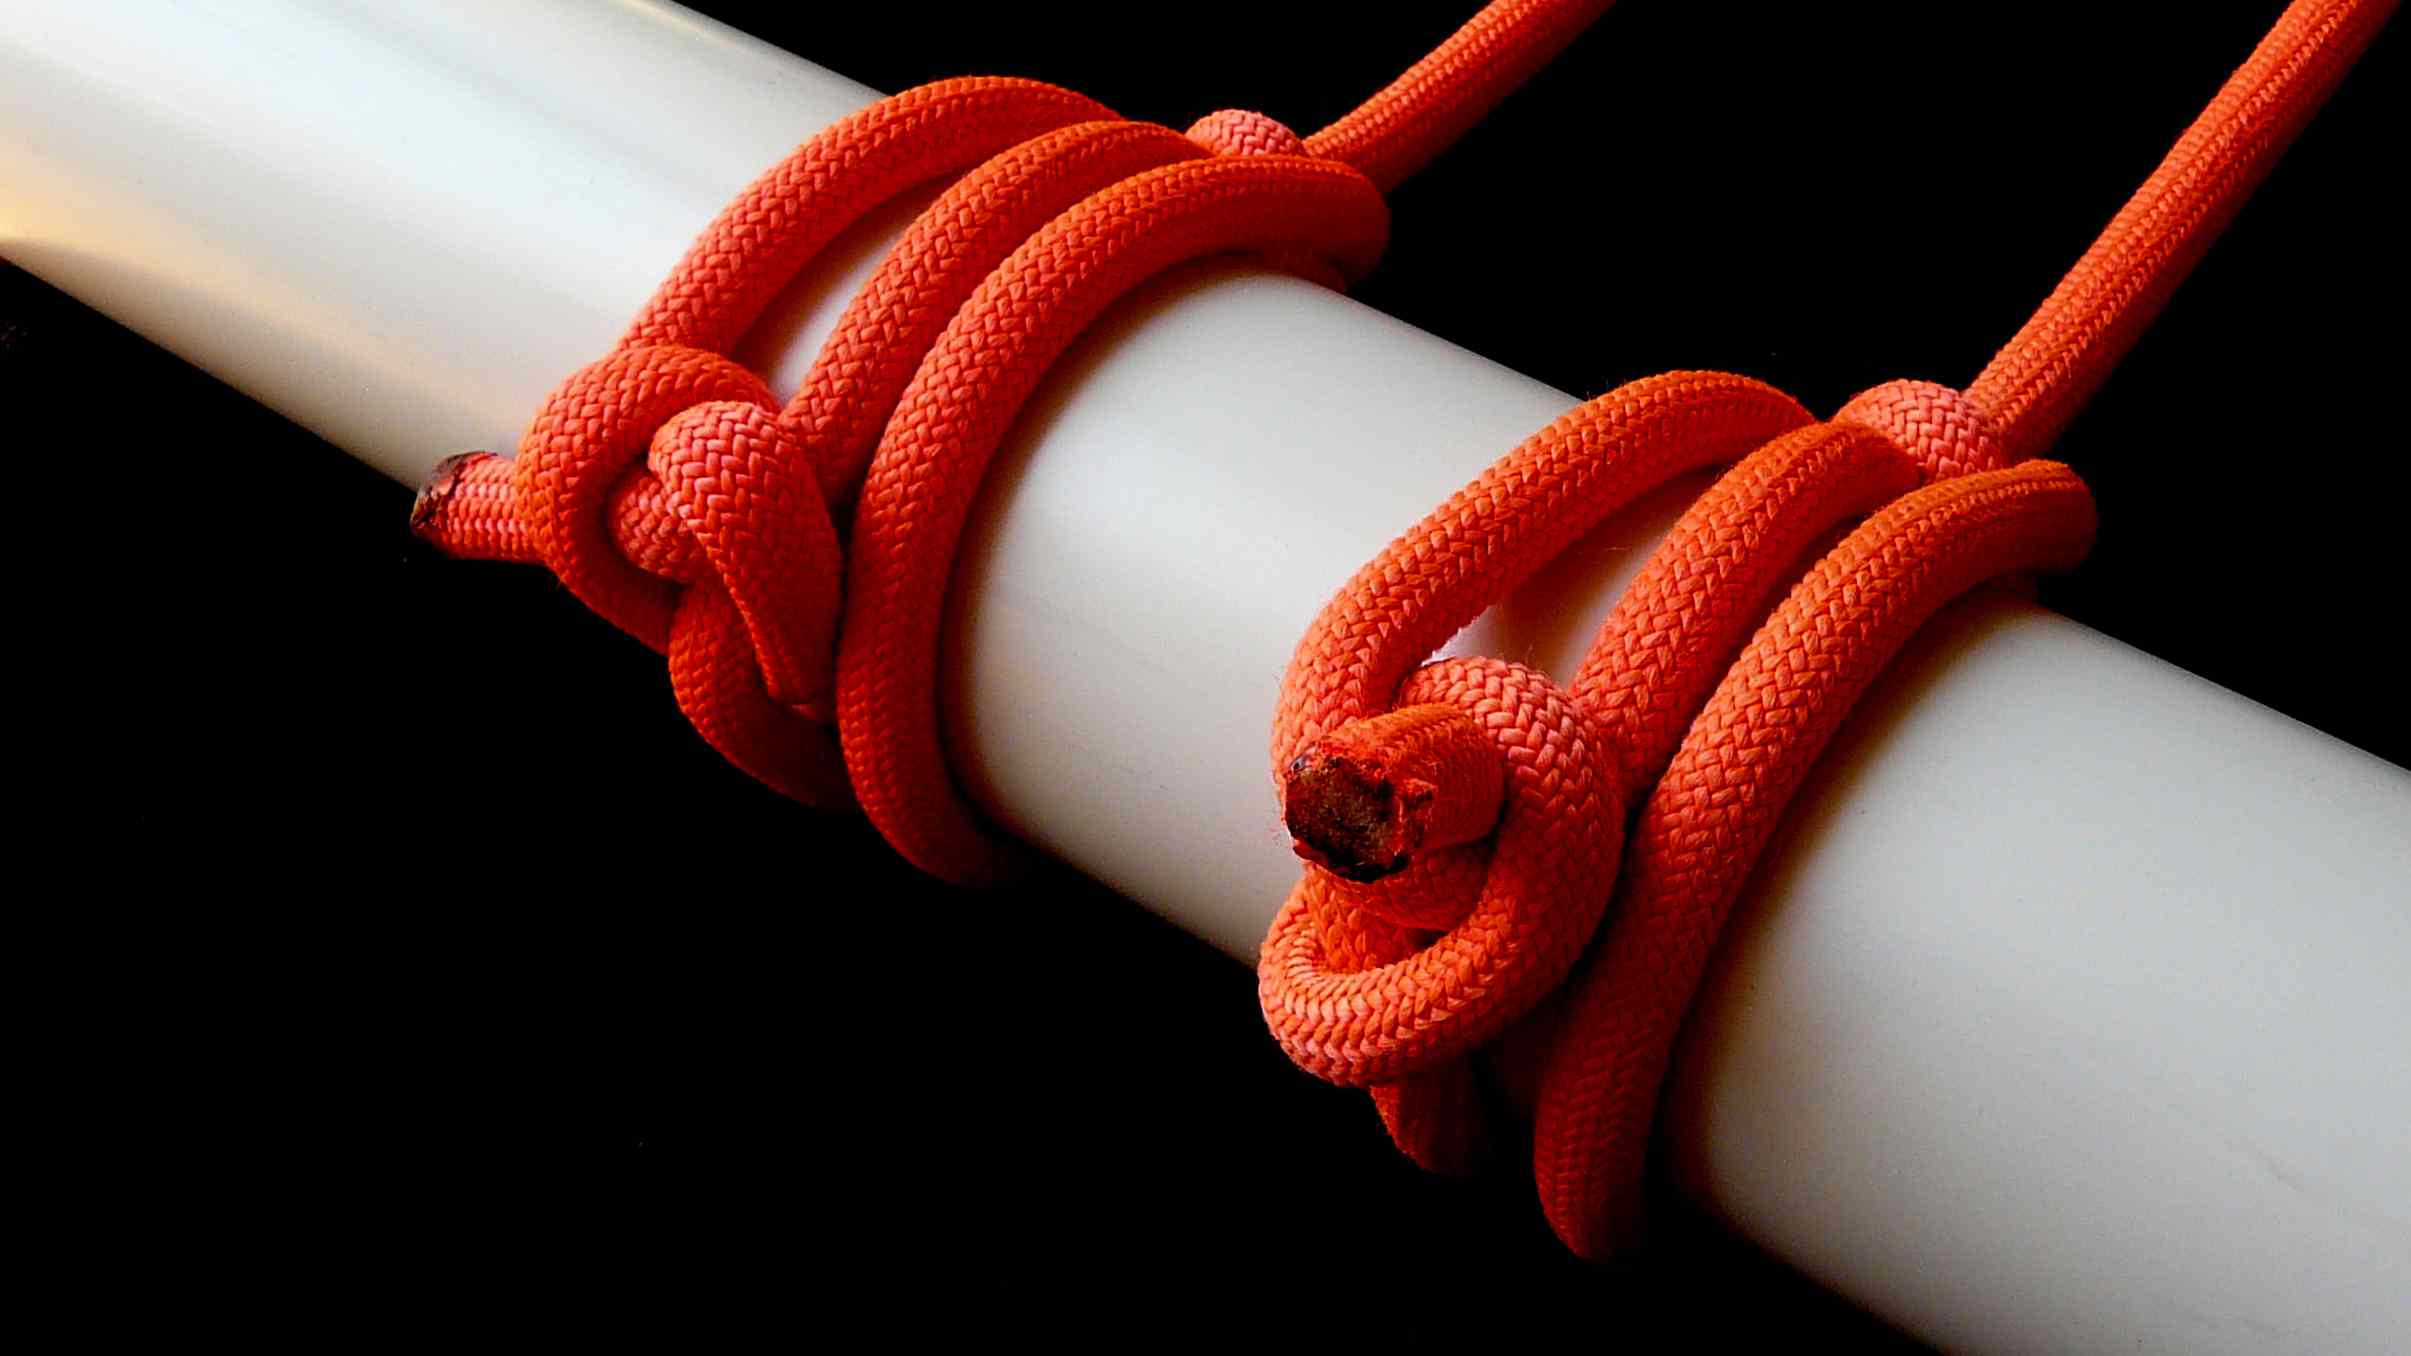
I had pre-tensioned this Butterfly Tackled hitch by jumping on the pole, with my full body weight, while it was hanged by each one of the two ends, alternately - so the nub was “closed” around itself very tightly. Yet I was able to release the “lock” and untie the knot rather easily, by pushing the rim of the first (“over”) nipping loop of the nub over the top of the second, (“under”) one, as shown in the last attached picture. It is interesting that, in this stage, the hitch is still holding ! It is only after we do the same thing to the rim of the second ( "under ) nipping loop, that the “lock” is finally released. This means that this nub works as a very secure “lock”, which, even if its first line of defence is broken through, its second will hold.
Needles to say, the grip of this hitch is phenomenal : one has to drive the ends back through the opposing bights of the main and the secondary loops ( i.e., to go from a 2: 1 to a 3 :1 mechanical advantage for each pair ) to tie a tighter hitch - but this is another story.
The simplest way we can transform a tight hitch into its “Tackled” version, is to twist the one half of each wrap 360 degrees relatively to the other ( so, duplicate the number of the wraps of the non-Tackled, parent hitch ). ( See this operation applied on the Tackled Simplest hitch, shown at the first posts of this thread ). This can be done instantly, it does not change the tying method of the parent hitch, and has unexpectedly satisfactory results, regarding the tightness of the wraps.
As I had tried to explain, the enhancement of the gripping power of the hitch ( per wrap ) which w achieve this way, is due to the alignment of the segments which go to, and leave from, the centre of the tackle : the common tip of the two interlinked Us - which alignment improves the angle between the pulling and the pulled segments, on which the efficiency of the mechanical advantage is depending. Now we can pre-tension each wrap of the hitch more, simply because we can exploit more what the mechanical advantage offers to us. The casual knot tyer may wonder why those two wraps, which have been born out of this tricky twisting of each initial one, do not revolve, so that their crossing points approach and finally “kiss” each other - since, geometrically, this can be done without any change of the lengths of the wrapped rope segments. The answer is simple : as it happens to tied knots which are not untied / unknotted, for exactly the same reason the screws are not unscrewed ! ![]() : Friction. To become able to revolve, while they are already starting to become tensioned, each wrap should overcome the friction forces coming from its contact with the surface of the hitched object, and those friction forces are always stronger than the forces which drag its crossing point towards the crossing point of its twin wrap. At first I had not realized that, and that is why I had not tried this configuration, although I had thought about it when I was tying the TackleClamp hitch. However, it seems that, even if we have some experience of “similar” rope mechanisms, we can not “think” about knots beyond a certain point, where things become too complex, and we have to actually tie and try them, and see what happens.
: Friction. To become able to revolve, while they are already starting to become tensioned, each wrap should overcome the friction forces coming from its contact with the surface of the hitched object, and those friction forces are always stronger than the forces which drag its crossing point towards the crossing point of its twin wrap. At first I had not realized that, and that is why I had not tried this configuration, although I had thought about it when I was tying the TackleClamp hitch. However, it seems that, even if we have some experience of “similar” rope mechanisms, we can not “think” about knots beyond a certain point, where things become too complex, and we have to actually tie and try them, and see what happens.
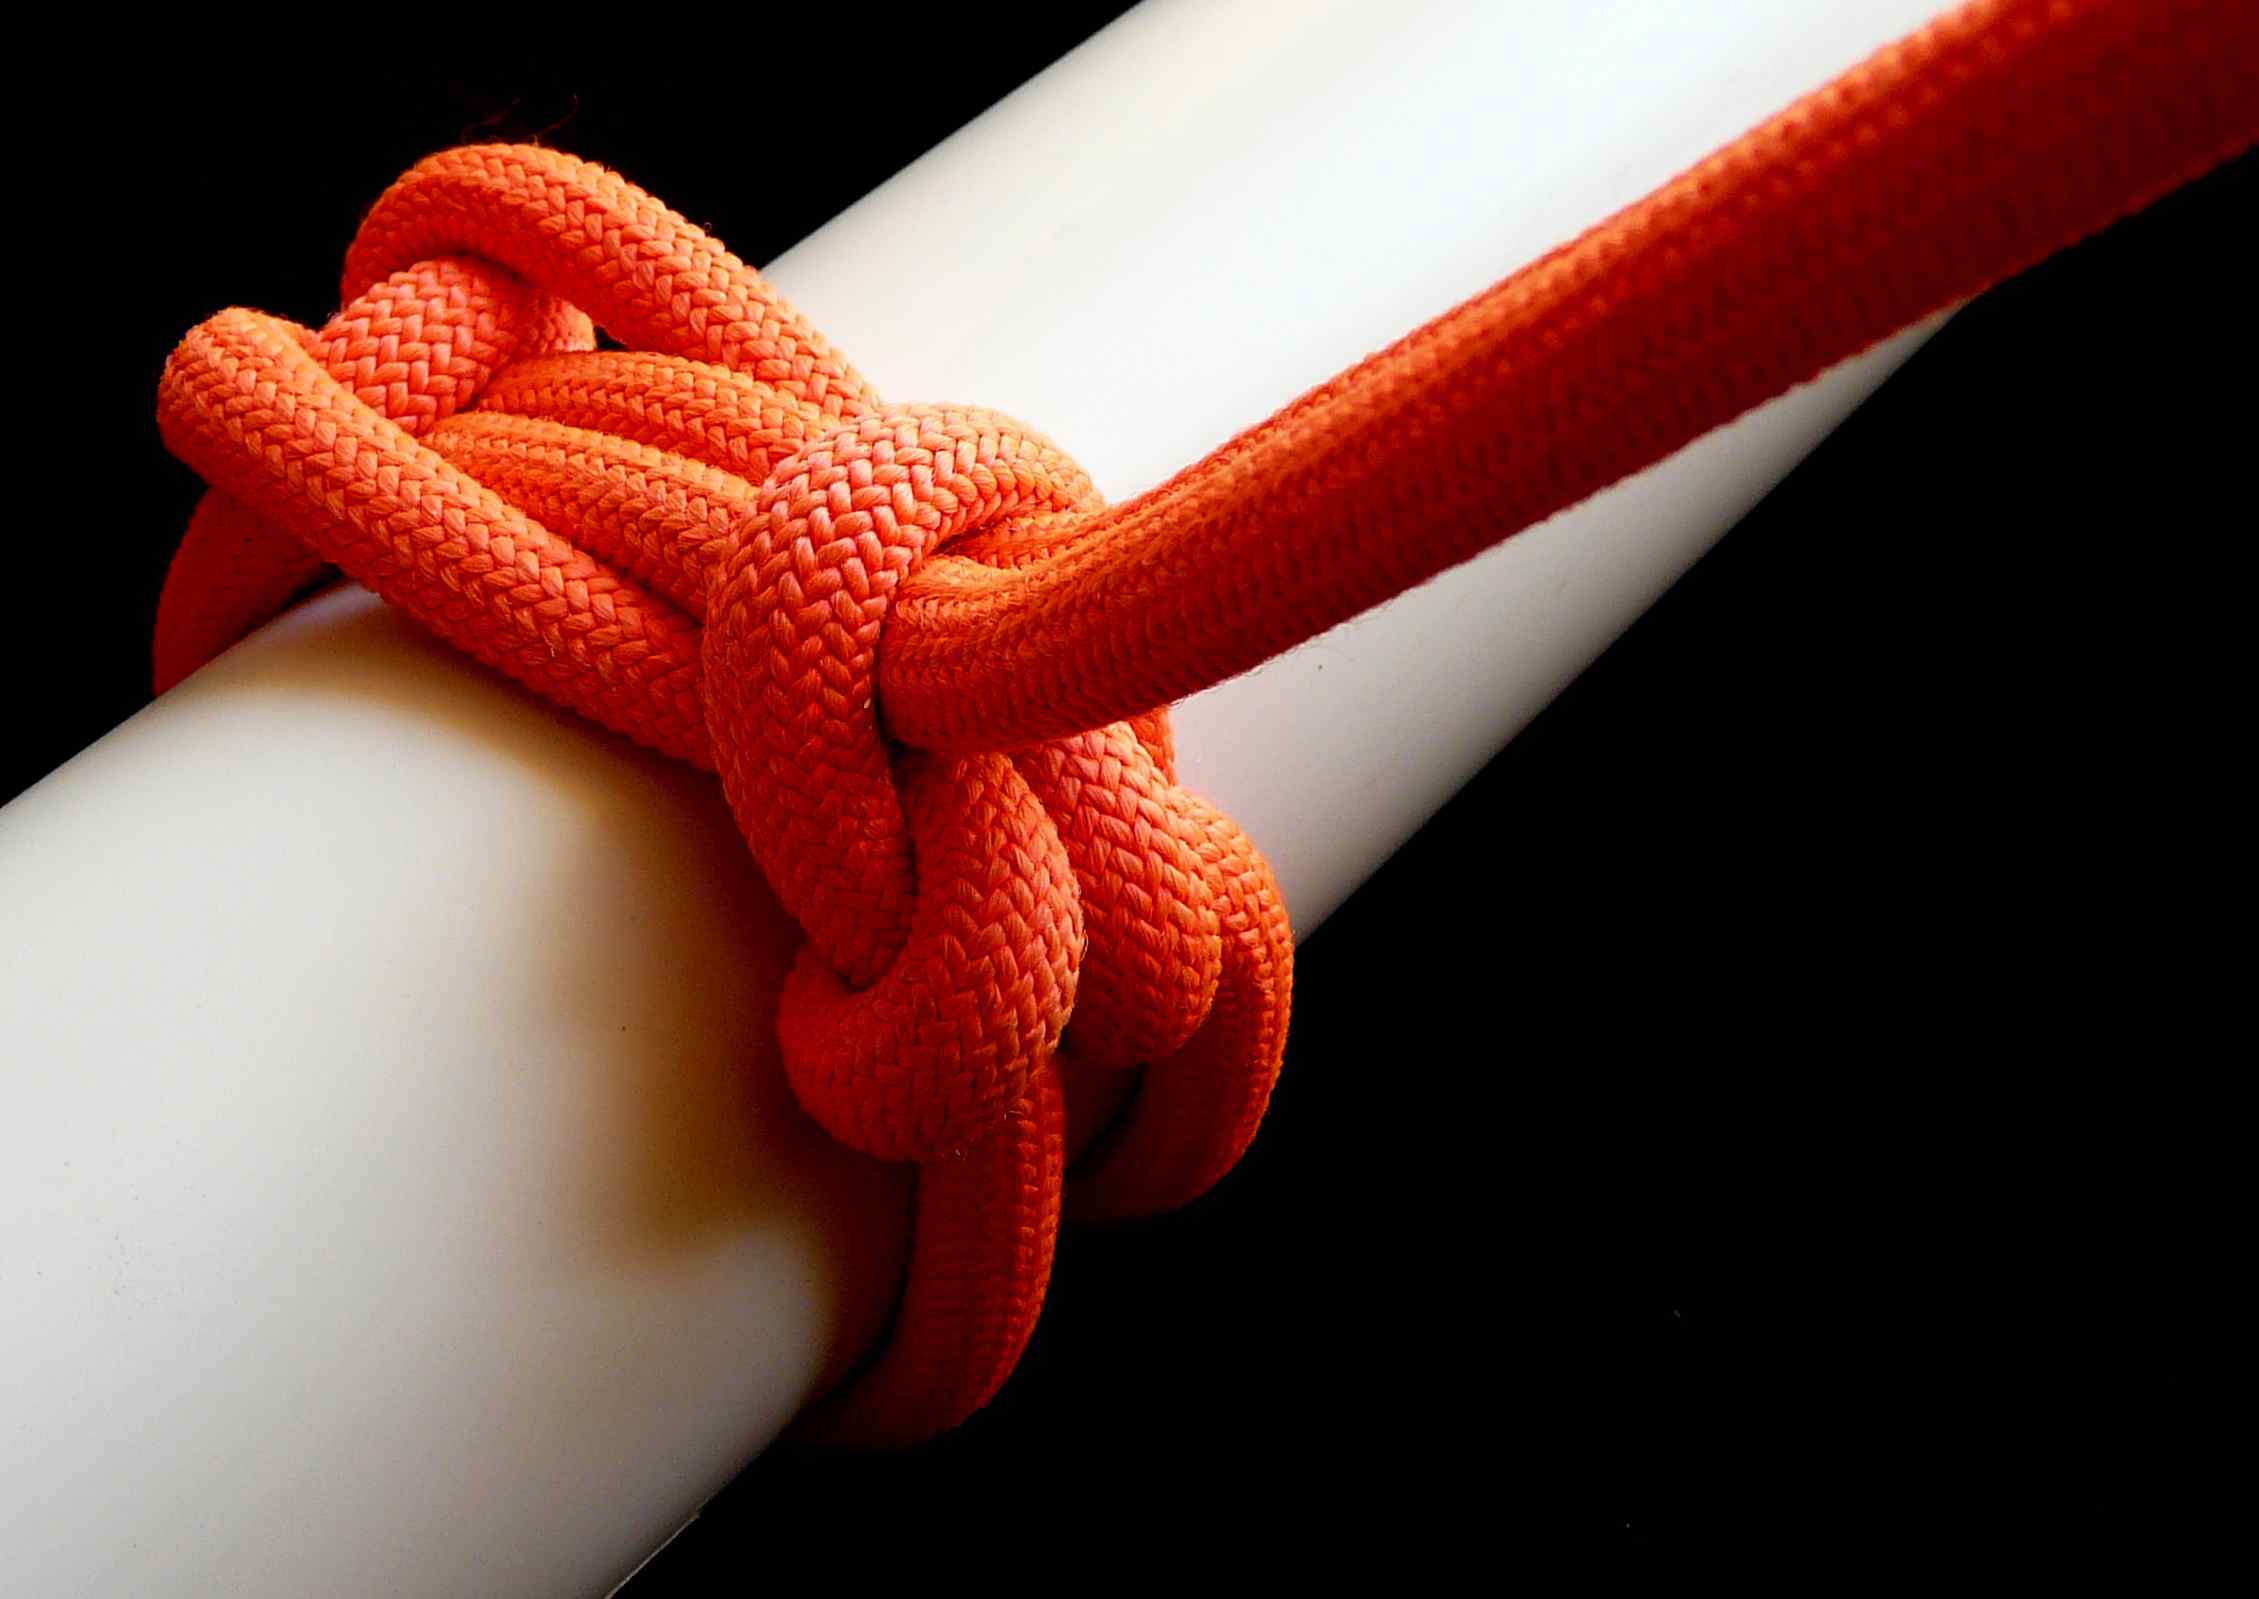
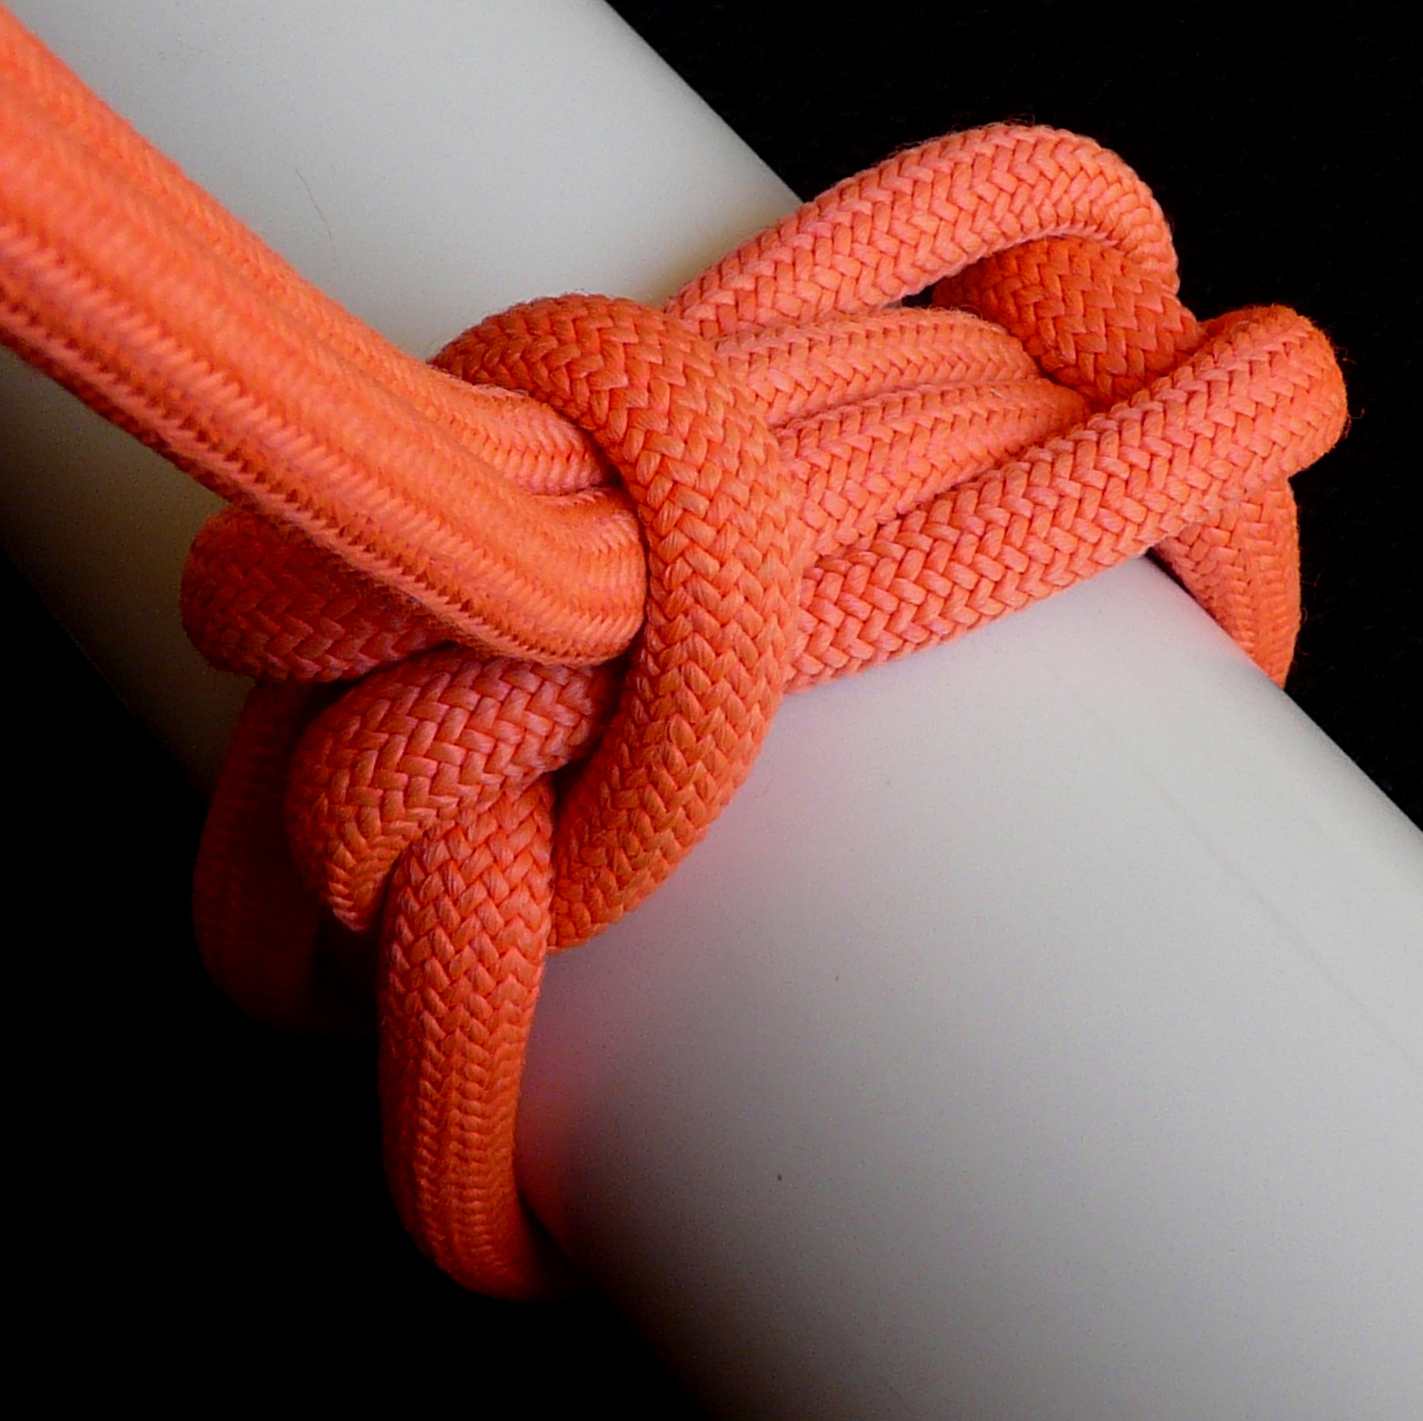
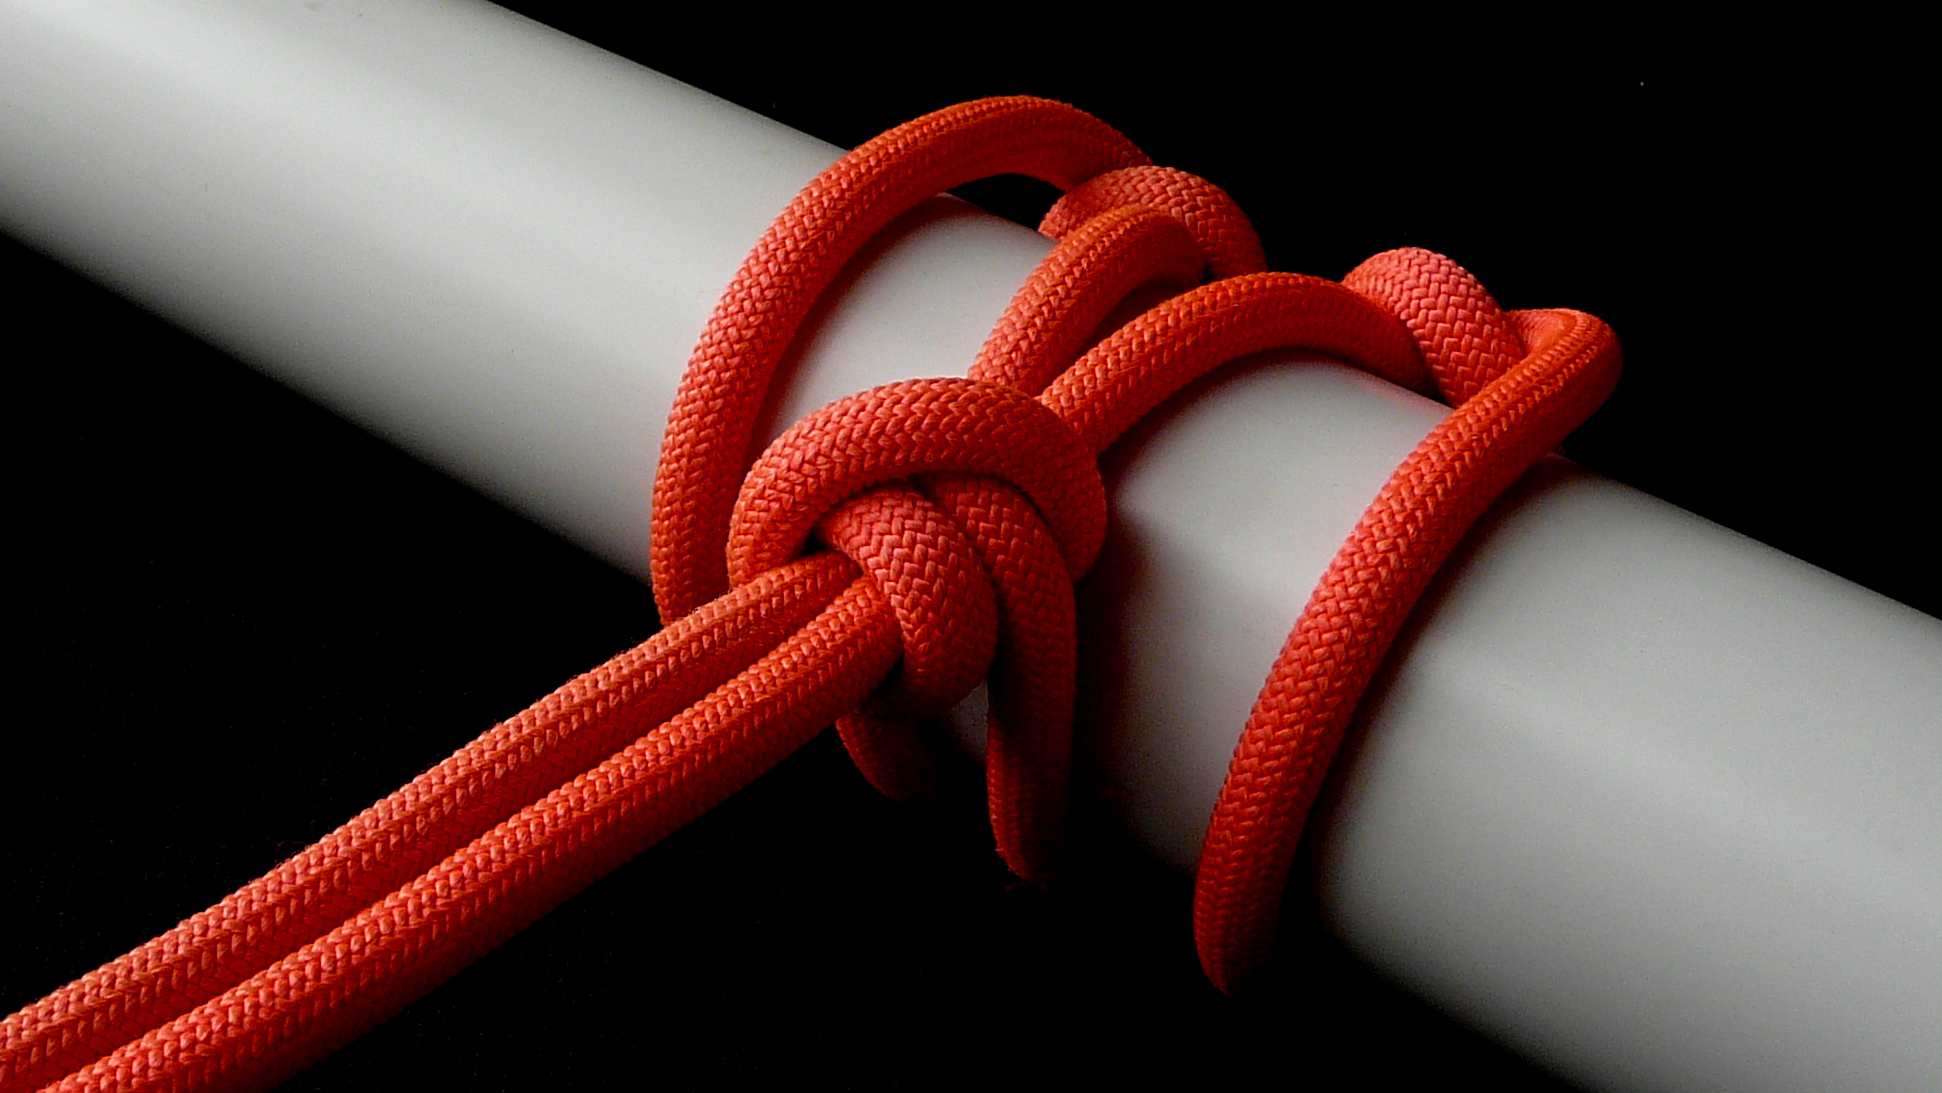
At the attached pictures, one can see the Tackled Bull Clove hitch. An already very good, very tight hitch, which becomes even better, because the tension / gripping power of each wrap is improved relatively to what it was in the parent hitch. I am not sure I would choose this four-wrap hitch and not a TackleClamp hitch, for example, or even the less tight, but also TIB ( and tiable almost instantly ) Locked Double Cow hitch - but I show some pictures of it, so the reader gets the “feeling” of how Tackled hitches themselves work, despite how we would had thought they would !
At the first two pictures one can see the stage where the wraps of the hitch start to become tensioned. We should leave ample space between the crossing points of the tackled wraps and the central nub, so the knot does not “closes” prematurely. This depends on the characteristics of the hitched object and of the rope, so there is no general rule we can follow to achieve this in each and every case. As a rule of thumb, I think that if the whole mechanism starts to become tensioned when the wraps cover the 3/4 ths of the circumference of the pole, the spacing would be enough - but with other objects, of different shapes, one should apply the best rule of all : try and error. ![]()
Two more pictures of the Tackled Bull Clove hitch - just to keep my blah-blah to show ratio small… ![]()
Thank you, Xarax, for all your “blah-blah”! ![]()
I’m trying to use the ABoK #1100 double loop, locking the tails into the two (tight) eyes, but it’s not TIB…
ABoK#1100 is a re-tucked Butterfly loop ( ABoK#1053 ), so it is TIB. I believe I had tied all the Butterfly-knot-related Tackled hitches, and I had not found anything better than the two I ve presented in this thread - but I may have missed something. With all those parallel segments, it is easy to make a mistake, and lose an interesting possibility. Keep tying and trying ! ![]() - and watch your back ! Tie, for example the Tackled Bull Pretzel hitch (1)(2)( which I have in front of me, but I have to wait the sun to take some decent photos of it…). It is very tight Tackled hitch, too. (3)
- and watch your back ! Tie, for example the Tackled Bull Pretzel hitch (1)(2)( which I have in front of me, but I have to wait the sun to take some decent photos of it…). It is very tight Tackled hitch, too. (3)
Let us return to the very first post, and have a look at the Simplest Tackled hitch shown there. Its Standing End is “locked” by the humble underhand knot, where this most simple, indeed, hitch is based - while, at a distance of only a few rope diameters, we have the centre of the tackle, the common tip of the two opposed interlinked Us. That does not seem right - a tight-hitch-knot-tyer who uses overhand and fig.8 knots, when he can use simpler tangles, is not worth his salt ! ![]() Why not utilize those opposing Us, and lock the Tail End there ( and not within the overhand knot ), by implementing the opposing bights locking mechanism ? ( which is much simpler, safer and more easily and instantaneously un-tiable than all the other “locks” we have ). And, as a bonus, we get one more zig-zag vertex, which means that we increase the mechanical advantage of the hitch.
Why not utilize those opposing Us, and lock the Tail End there ( and not within the overhand knot ), by implementing the opposing bights locking mechanism ? ( which is much simpler, safer and more easily and instantaneously un-tiable than all the other “locks” we have ). And, as a bonus, we get one more zig-zag vertex, which means that we increase the mechanical advantage of the hitch.
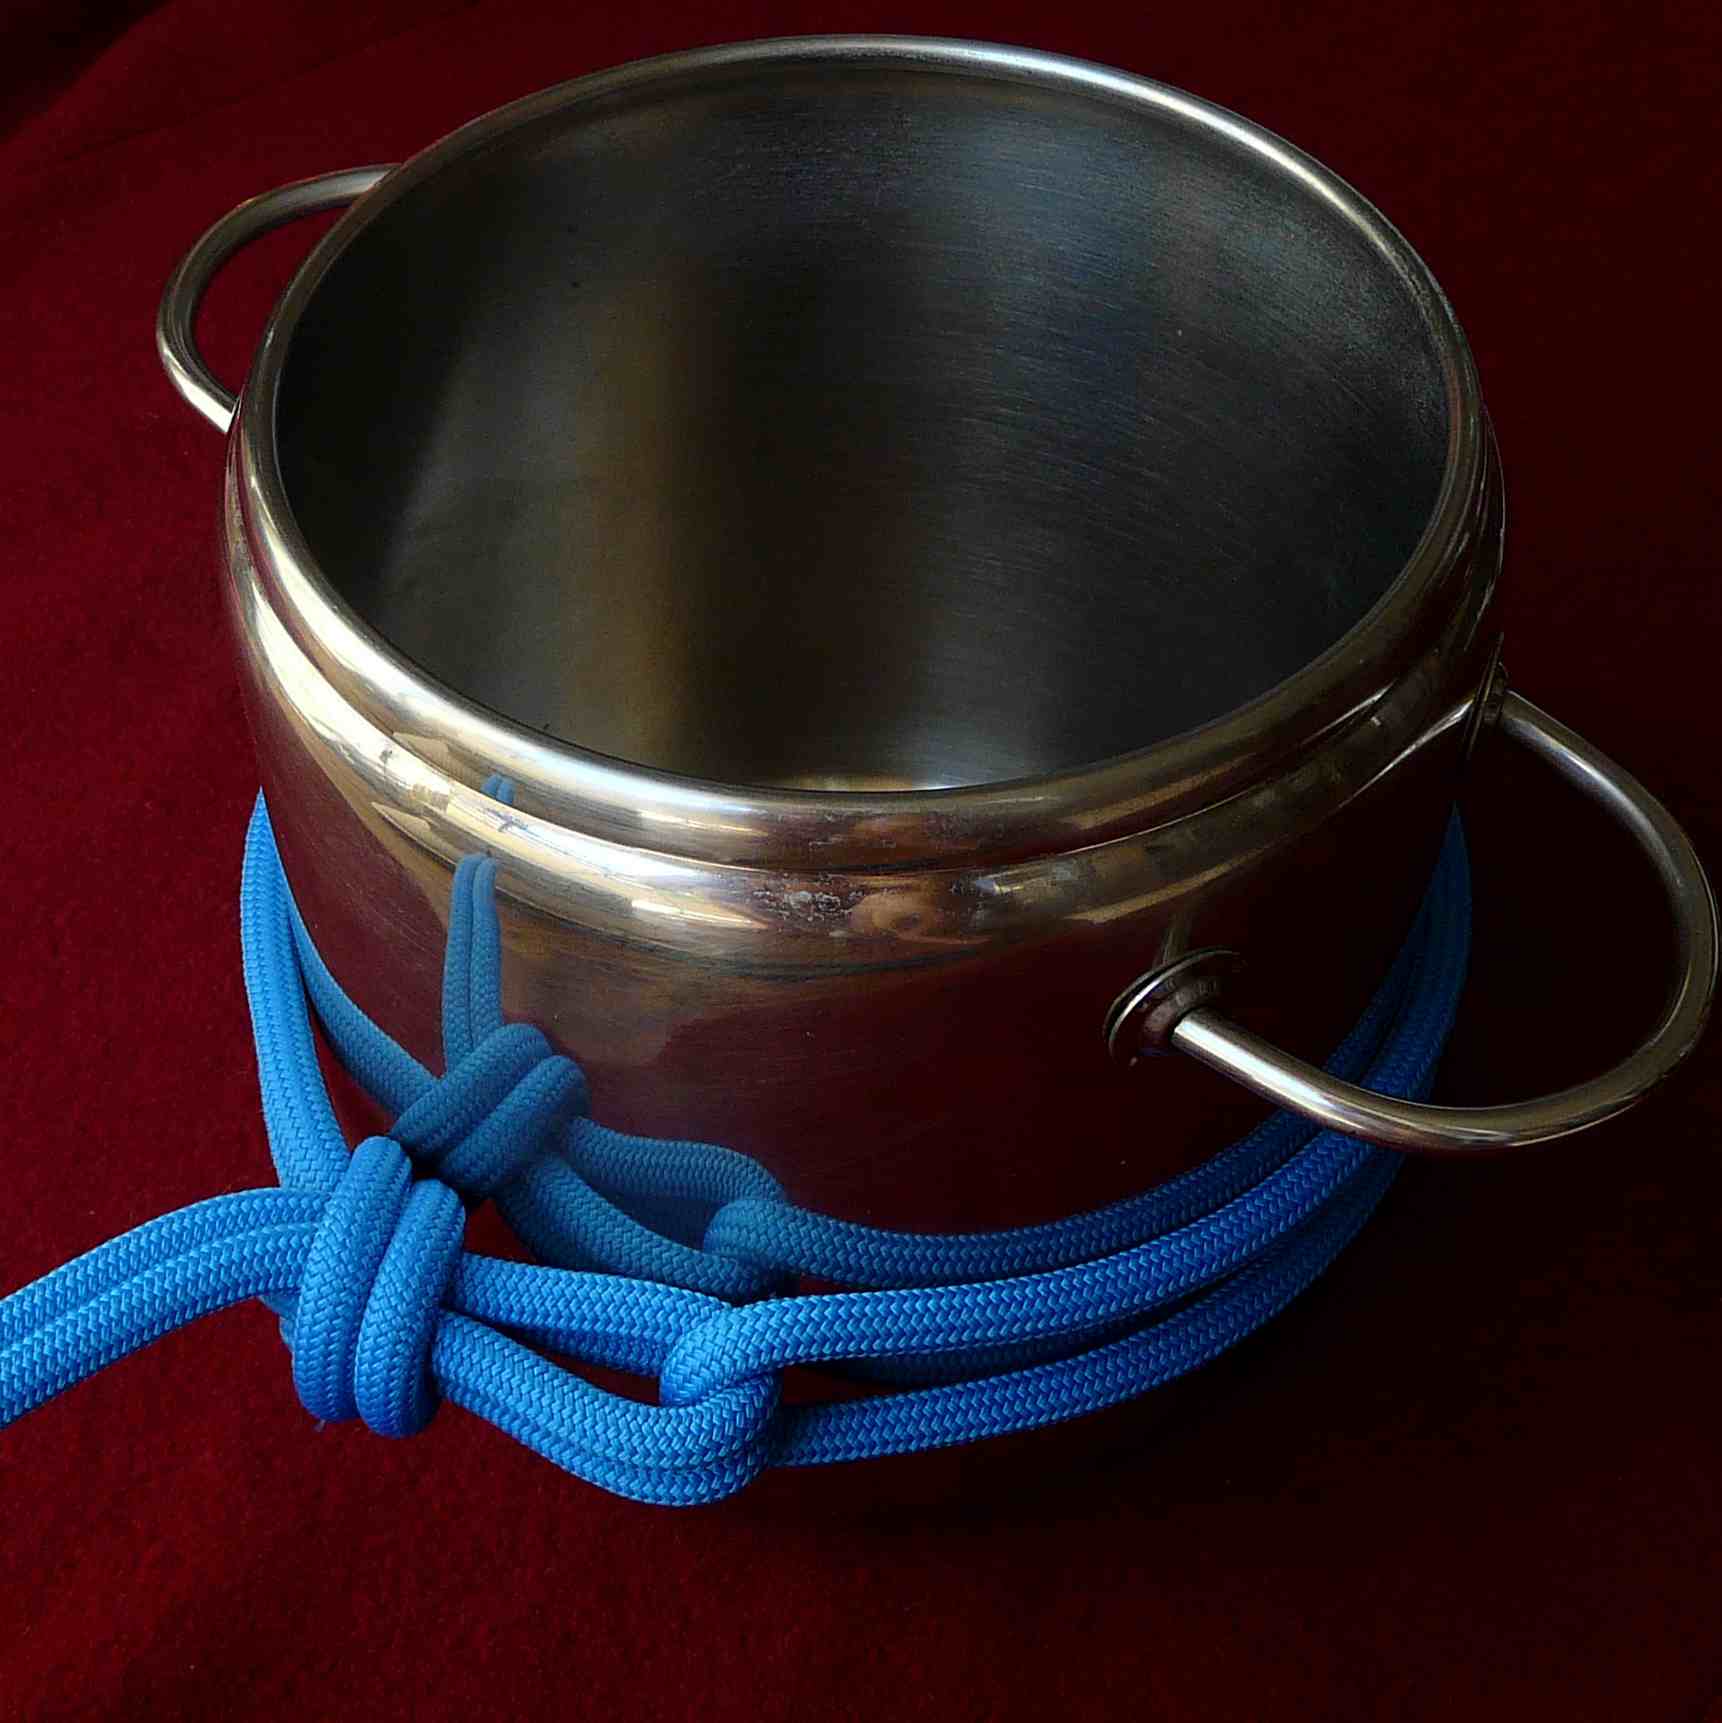
The loose form of that hitch, just before we start pulling the end against the pole, is shown at the attached pictures. For the moment, I call it Double Simplest Tackled hitch, or Doubly / Twice tackled Simplest hitch - and I have only to say that it is the tighter two-wrap tight hitch / binder I had ever tied ! Perhaps I should had anticipated its gripping power, since the mechanical advantage is increased relatively to its parent hitch, but, in any case, the feeling of a two-wrap hitch which can not even REVOLVE around a sleek pole, was really surprizing to me.
Reminder : the knot should be already “closed”, albeit not tightly, around itself and the pole at this stage - if it is still very loose, the two parts of the tackle will run the danger to slide on the surface of the pole all the way, and “kiss” each other before the hitch becomes very tight. On the other hand, and depending on how slippery are the rope and the pole, if one starts from this position, the hitch may “lock” prematurely before the two parts approach each other as much as we want ( we want a compact, tight knot where the pulling and pulled segments will be almost parallel, for reasons explained in previous posts ).
More pictures, of the tight hitch, shortly.
Note : As one may see, I had placed the parent overhand knot differently, because now the line which penetrates it makes a U-turn inside it. We have to secure an overhand knot at the tip of a bight, and, to do this in the most efficient and secure way, we should better arrange its segments so that its tail goes “under” the first curve of its Standing Part.
Here is how the knot ( shown in its loose, initial tightening phase in the previous post ) becomes after the pre-tensioning.
The two parallel umbilical cords between the two parts of the tackle are longer than required - they could well had half the length they have, and be even more straight and parallel. However, one can never be sure, in advance, where/when exactly the mechanism will “lock” : it depends on the characteristics of the rope and the pole, how loose or tight is the knot in the initial stage ( before the start of the pre-tensioning ), how hardly it will be pre-tensioned, if its Standing End remains perpendicular to the surface of the pole during all stages of the pre-tensioning… One has to tie the knot on the same rope and pole, and starting from the same initial set up, two-three times, to get an idea about how long will those segments be when the knot will be locked and become maximally pre-tensioned.
The third picture is the knot as it looks right after it has been removed from the pole through its one end, without been loosened. We see that it is a very small and simple knot, which consumes less material than other less tight and secure hitches, yet what it can accomplish, as a two, only, wraps tight hitch / binder, is quite remarkable IMO.
There are four ways to tie an ABoK#1821-like overhand knot inside the tip of the U. I have seen that, under heavy loading, the three of them are OK : in the fourth, the tail of the overhand knot does not remain as well encircled within its own rim and the rim of the U, so I guess that it may turn out to be secure than the other three. See, at the first two attached pictures, two of those three solutions, and, at the last two pictures, the solution which seems better to me. The overhand knot should be attached securely, yet it should not “close” around itself, in order to allow the unhindered passage of the line through it, when we pull it to pre-tension the hitch. ( I have not tried some other, more complex solutions (1) ).
I’ve been thinking of such things as “binder hitches” ?!
(And I guess that “friction”/“gripping” almost comes along
for the ride, so to speak, for if it’s much of a hitch and binds,
it will likely give frictional resistance against loading along
or near the axis of the hitched object.)
is the one based on the simplest end-of-line loop : the [i]Overhand loop[/i].Might it be best to orient the S.Part through the [i]overhand[/i] so that it splits the "spine" --and gets the hitch structure that you've elsewhere propagated as such a simple, good noose?
I found in the wild a case where weights for a net (tied-on
bricks or stones) apparently involved cutting and re-tying the
line to the netting, but where that very structure could have
been tied in the bight --and this one suggests such use, too.
With all such knots and esp. the more opposed-bights locking
ones, beware the specious performance on hard-slick objects,
sooooo unlike what will happen if trying to bind rope onto rope!