It’s coming up to Christmas and although I’ve been involved in knotting for 15+ years I’ve never made any globe knots as they looked a bit too complex and difficult for me. Inspired by a recent IGKT Half-yearly meeting at which @CRB taught Globe Knots, I recently got up the courage to find out how they are made and it turns out they’re simpler than you’d think!
Here I have made a few Globe Knot christmas tree baubles which I will share details of here. All are low-difficulty 30-facet Globe Knots made on the same home-made cardboard mandrel. Globe Knots are related to Turk’s Heads, and there are many good books on the subject, including some sold by IGKT.
For these Globe Knots I used the excellent free online chart/calculator by Allwine Designs below, which I heard about from this thread Knot Calculators and planners by @KnotMe - thanks!
https://www.freakinsweetapps.com/knots/knotgrid/advanced.html
Pictures
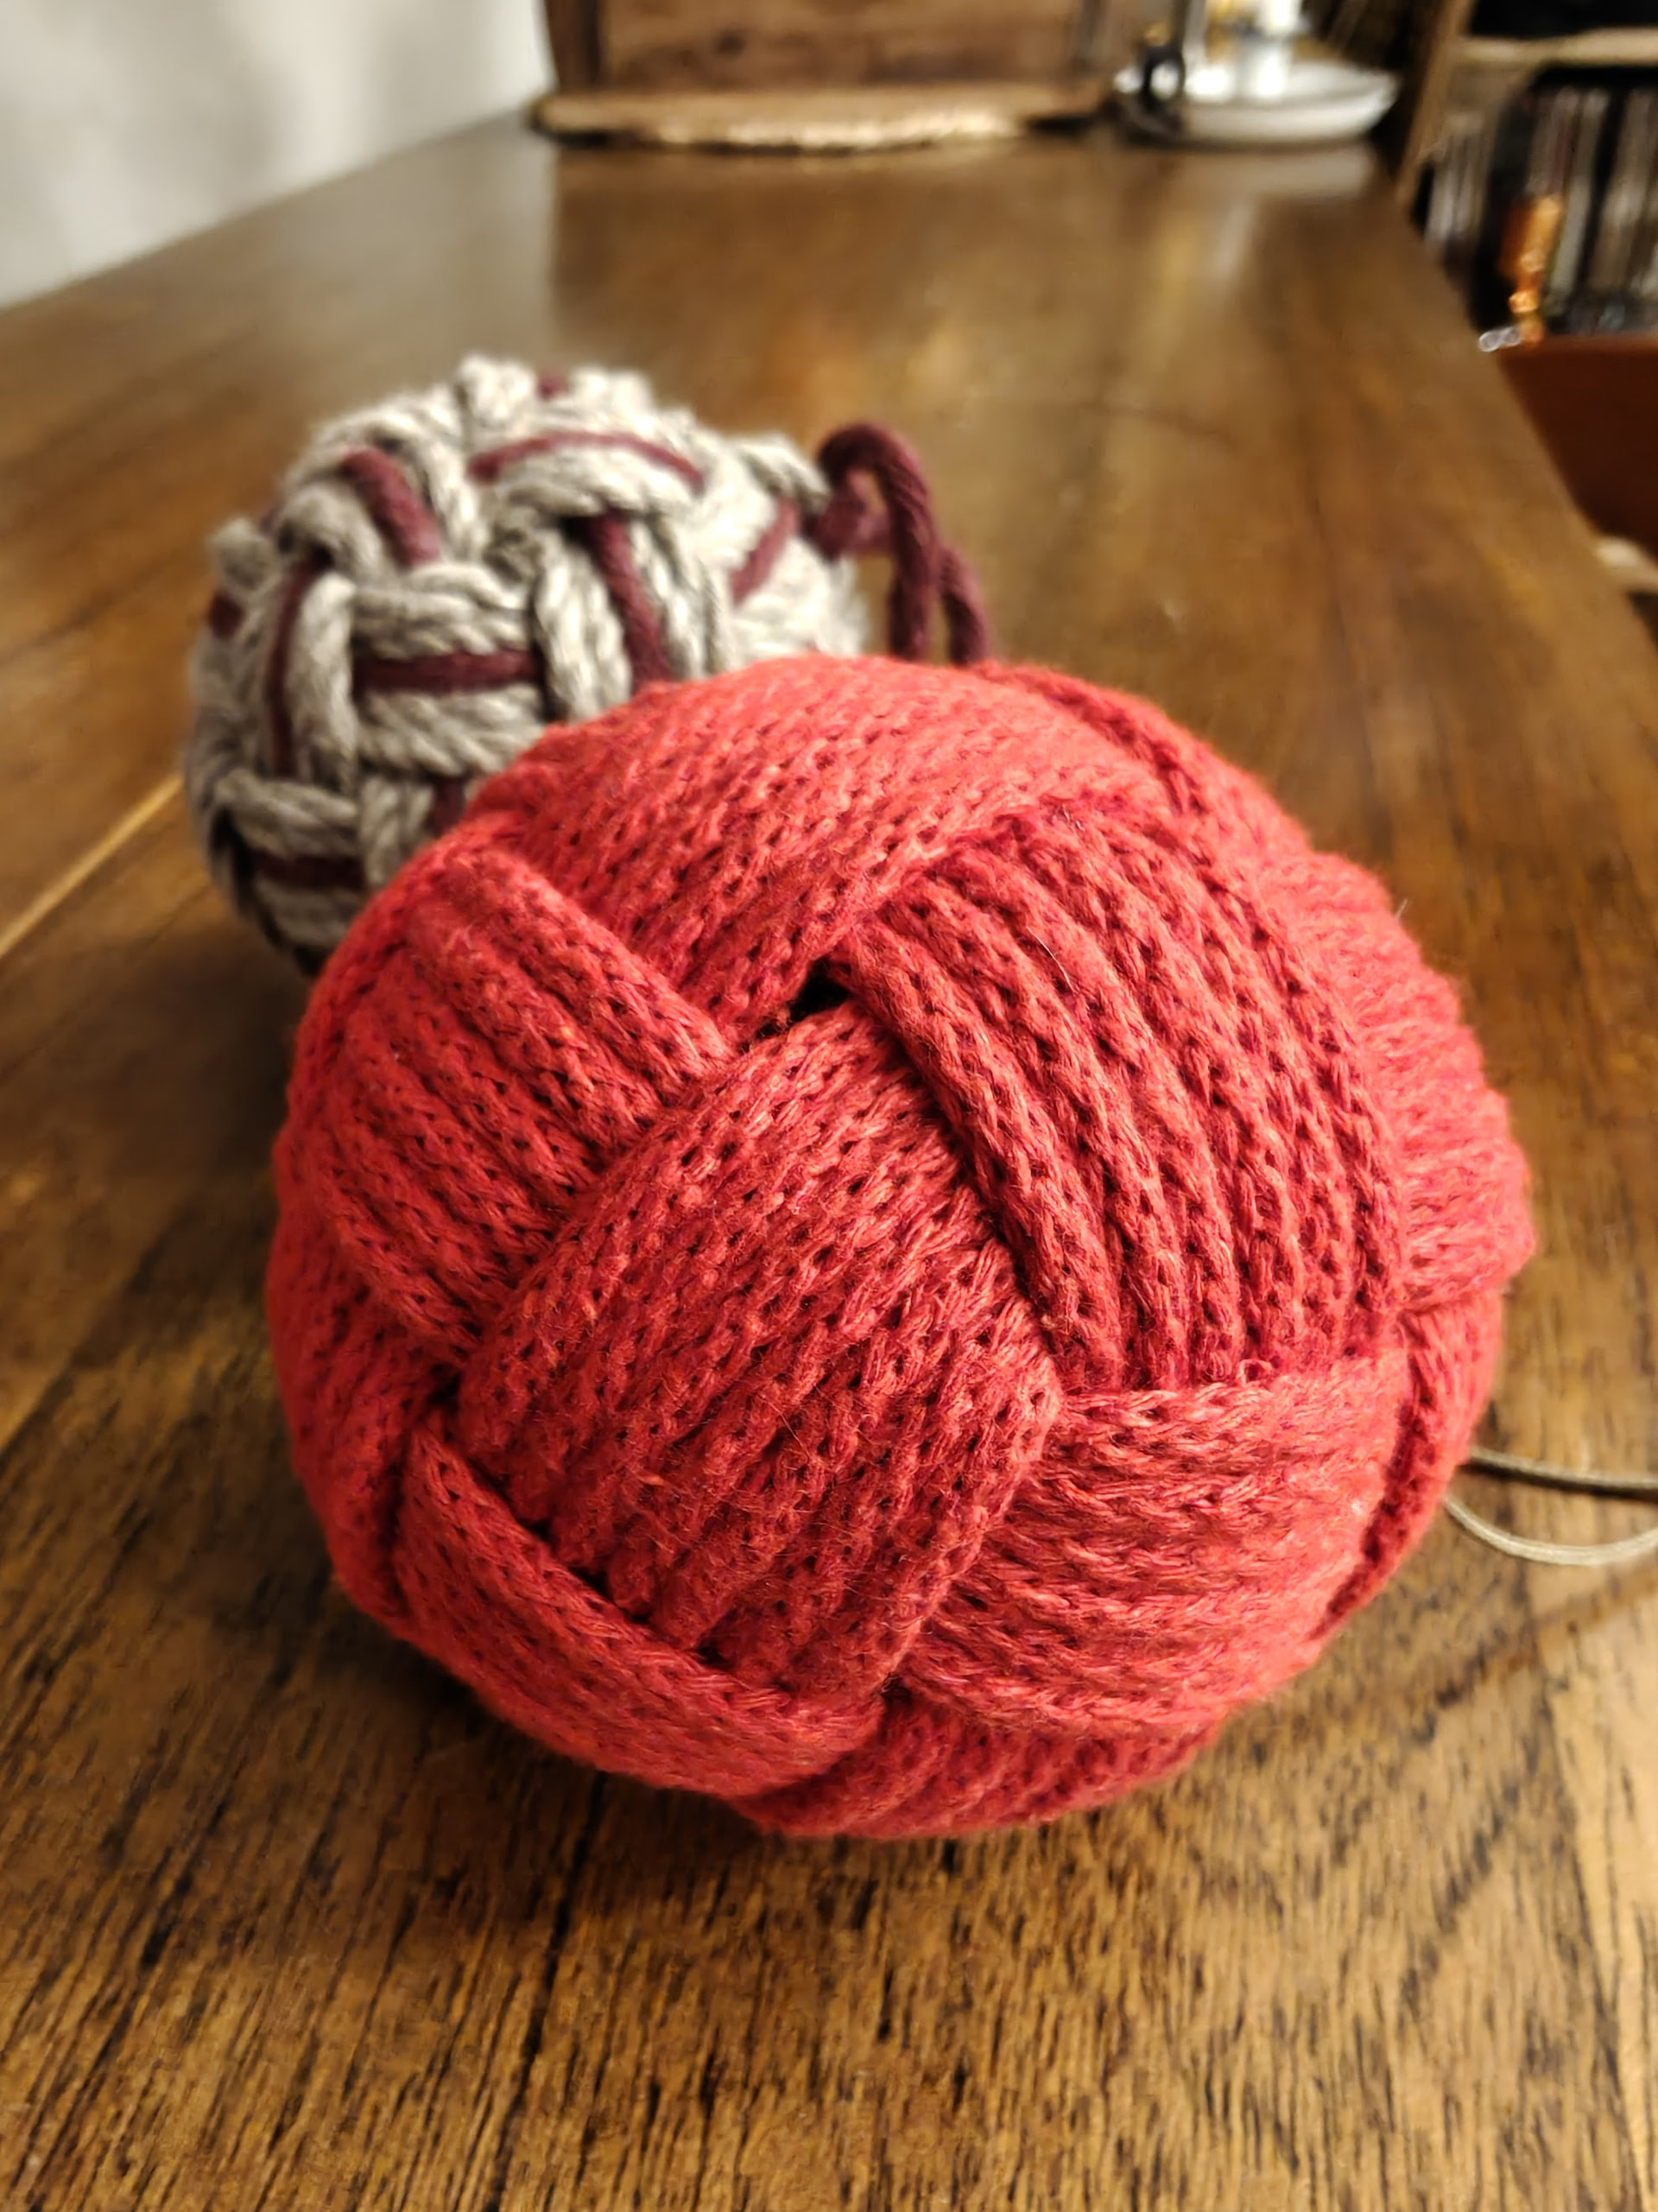
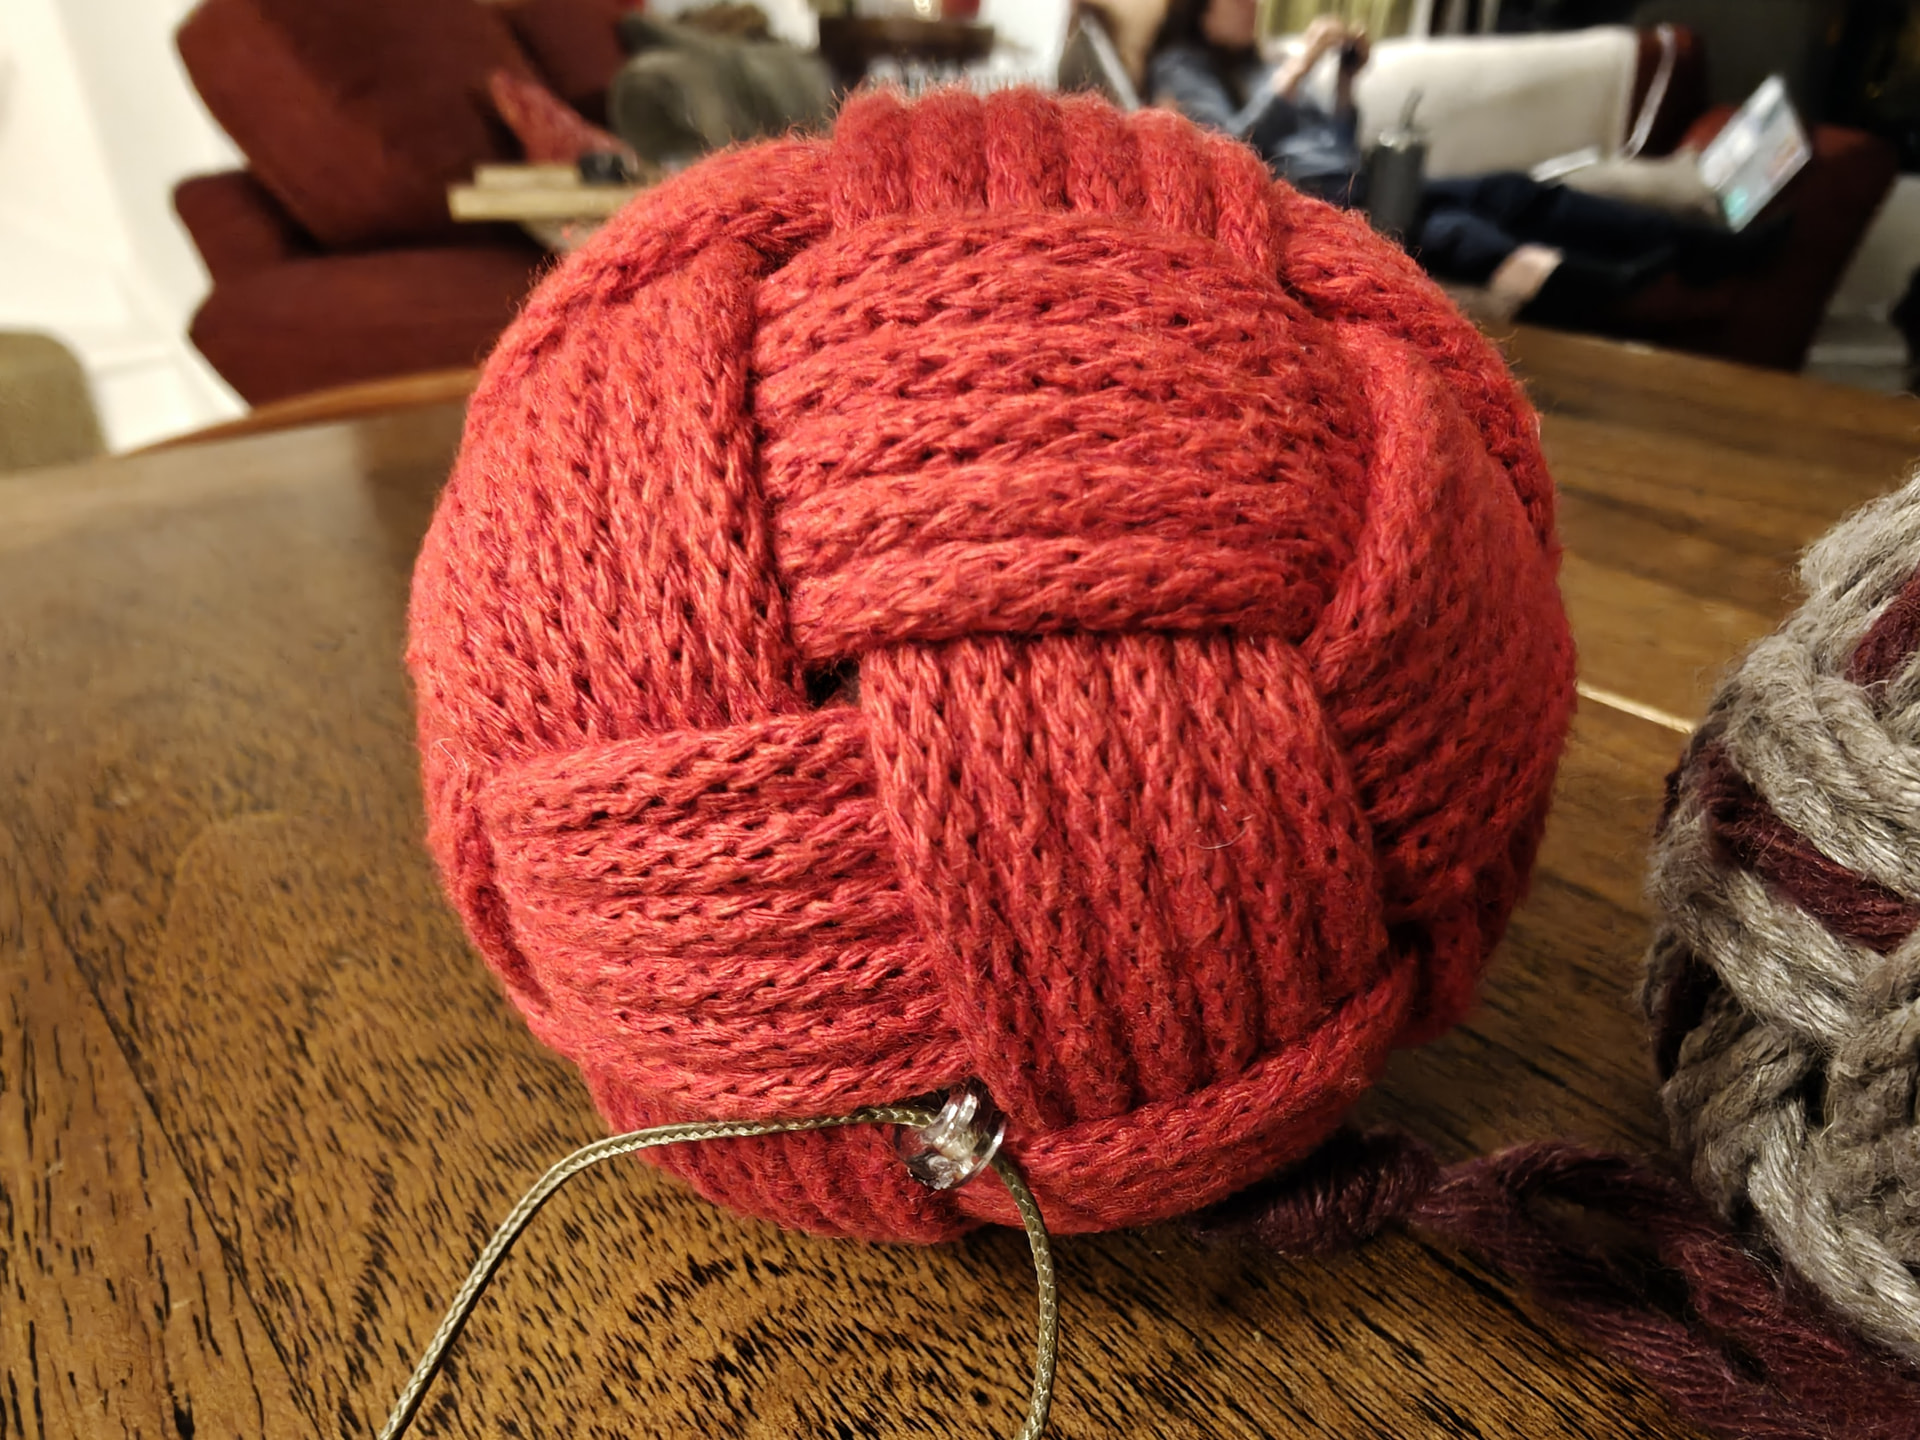
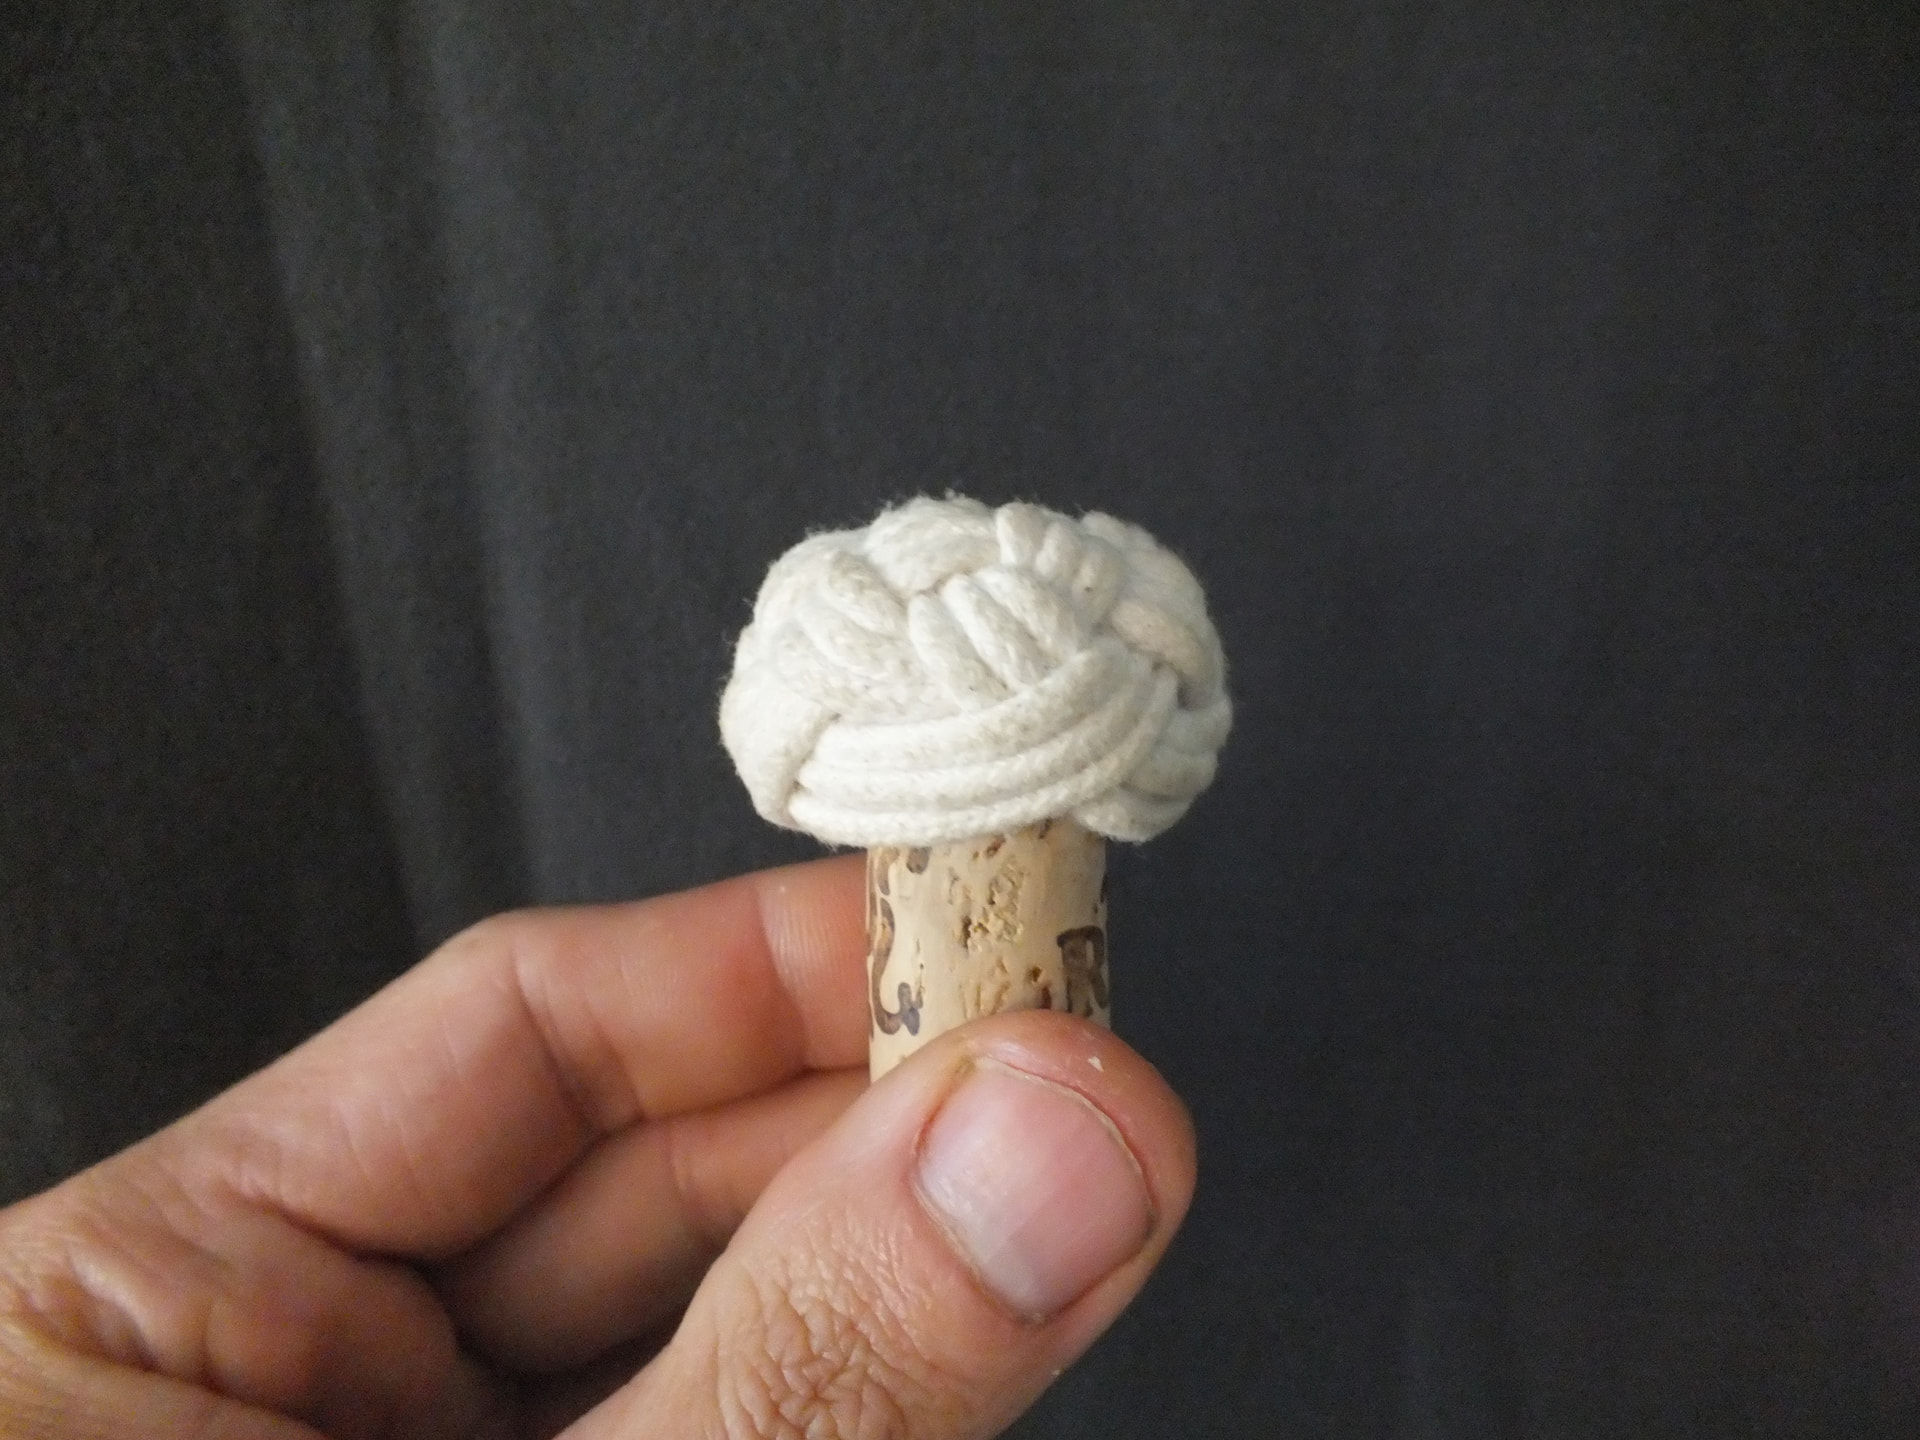
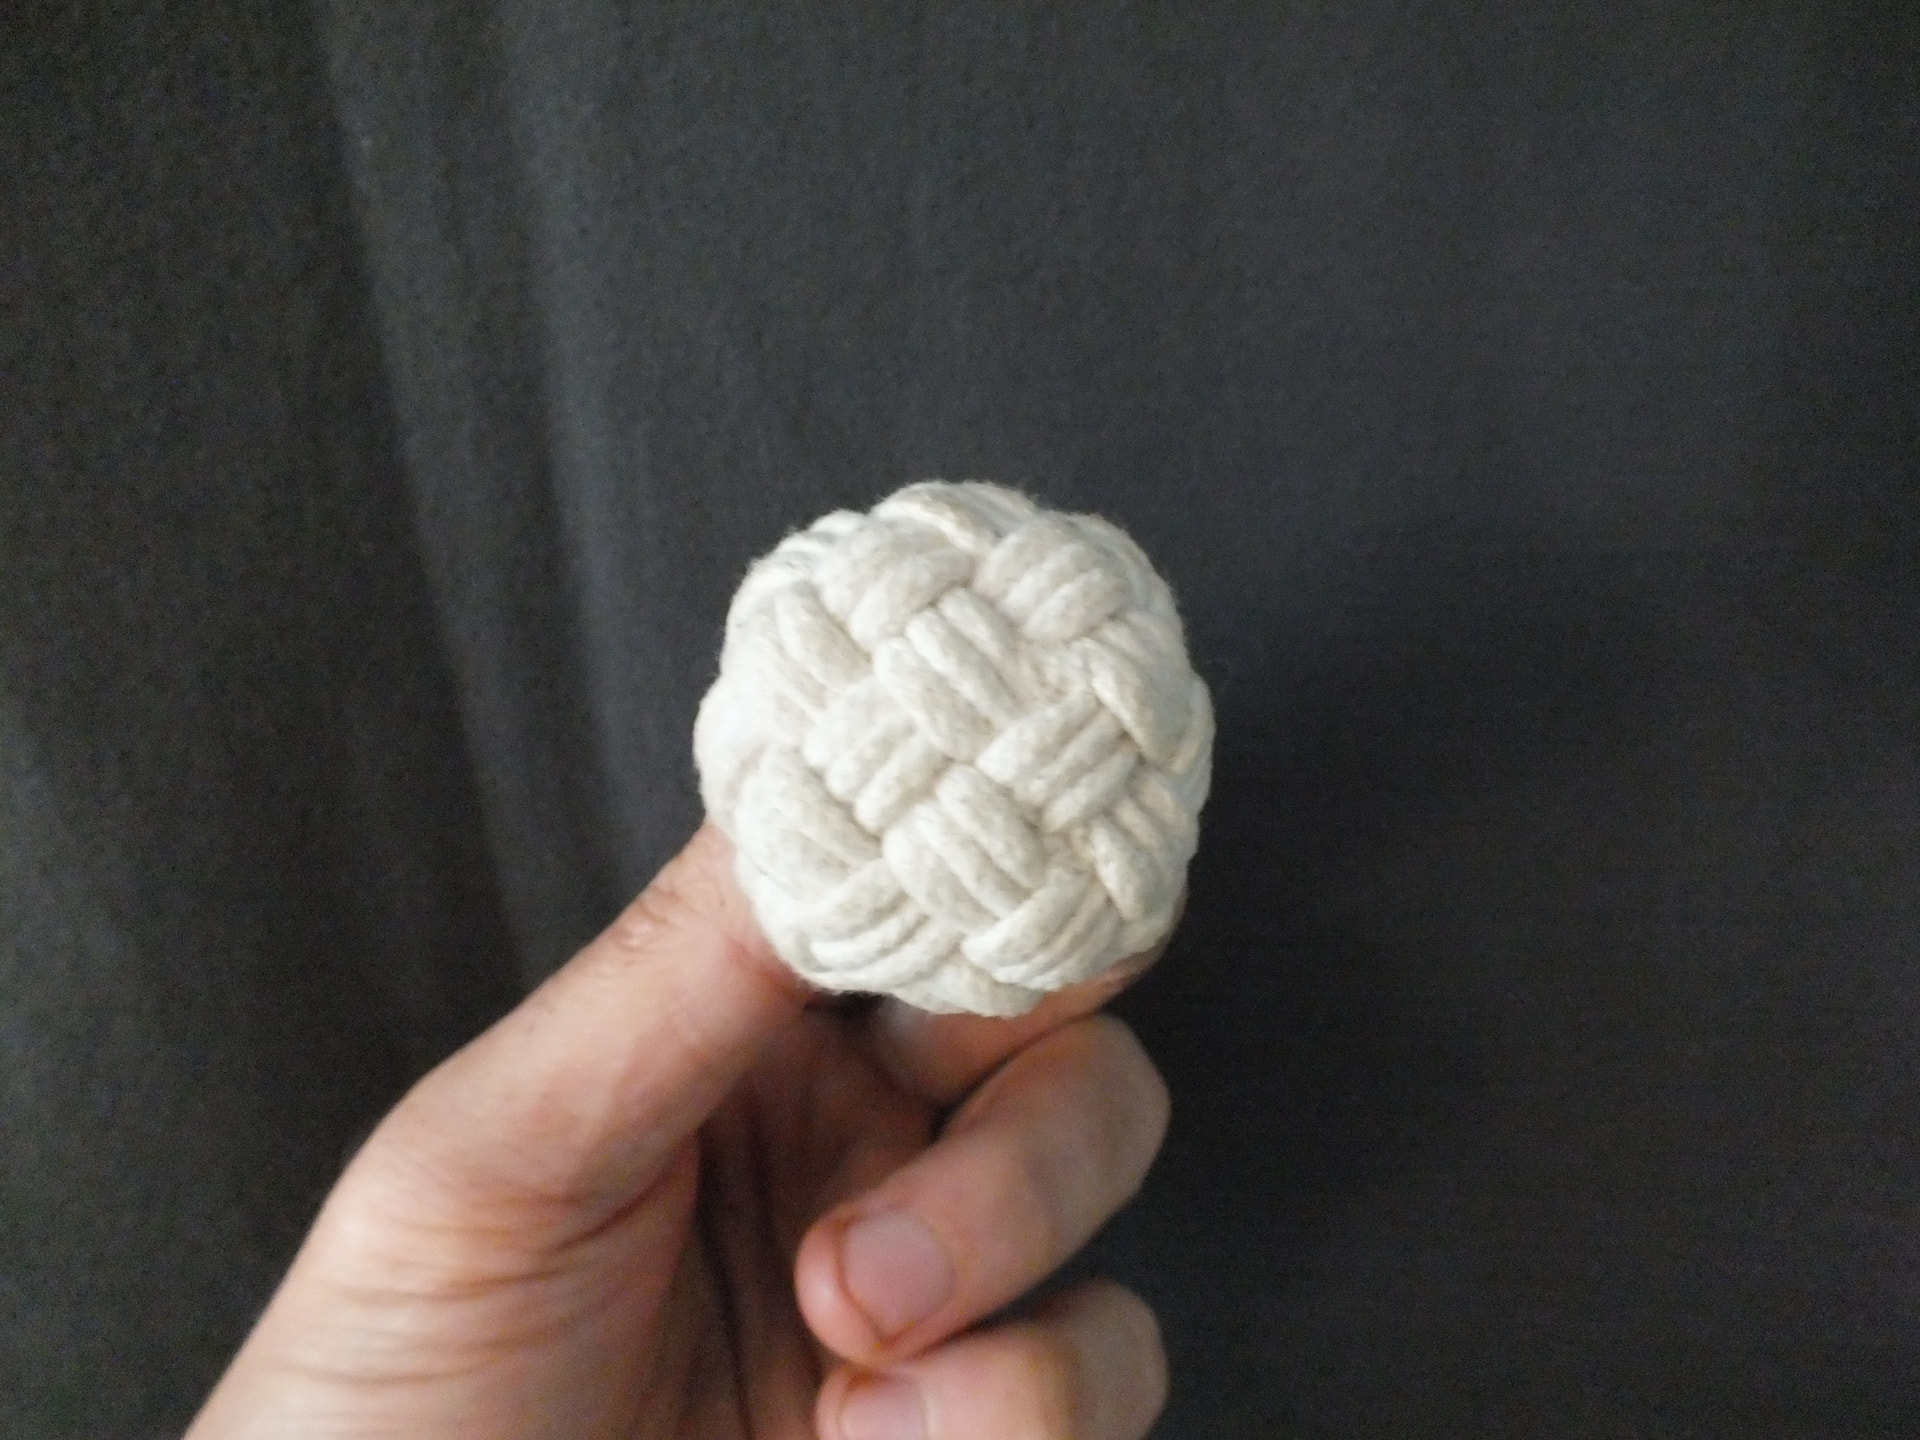
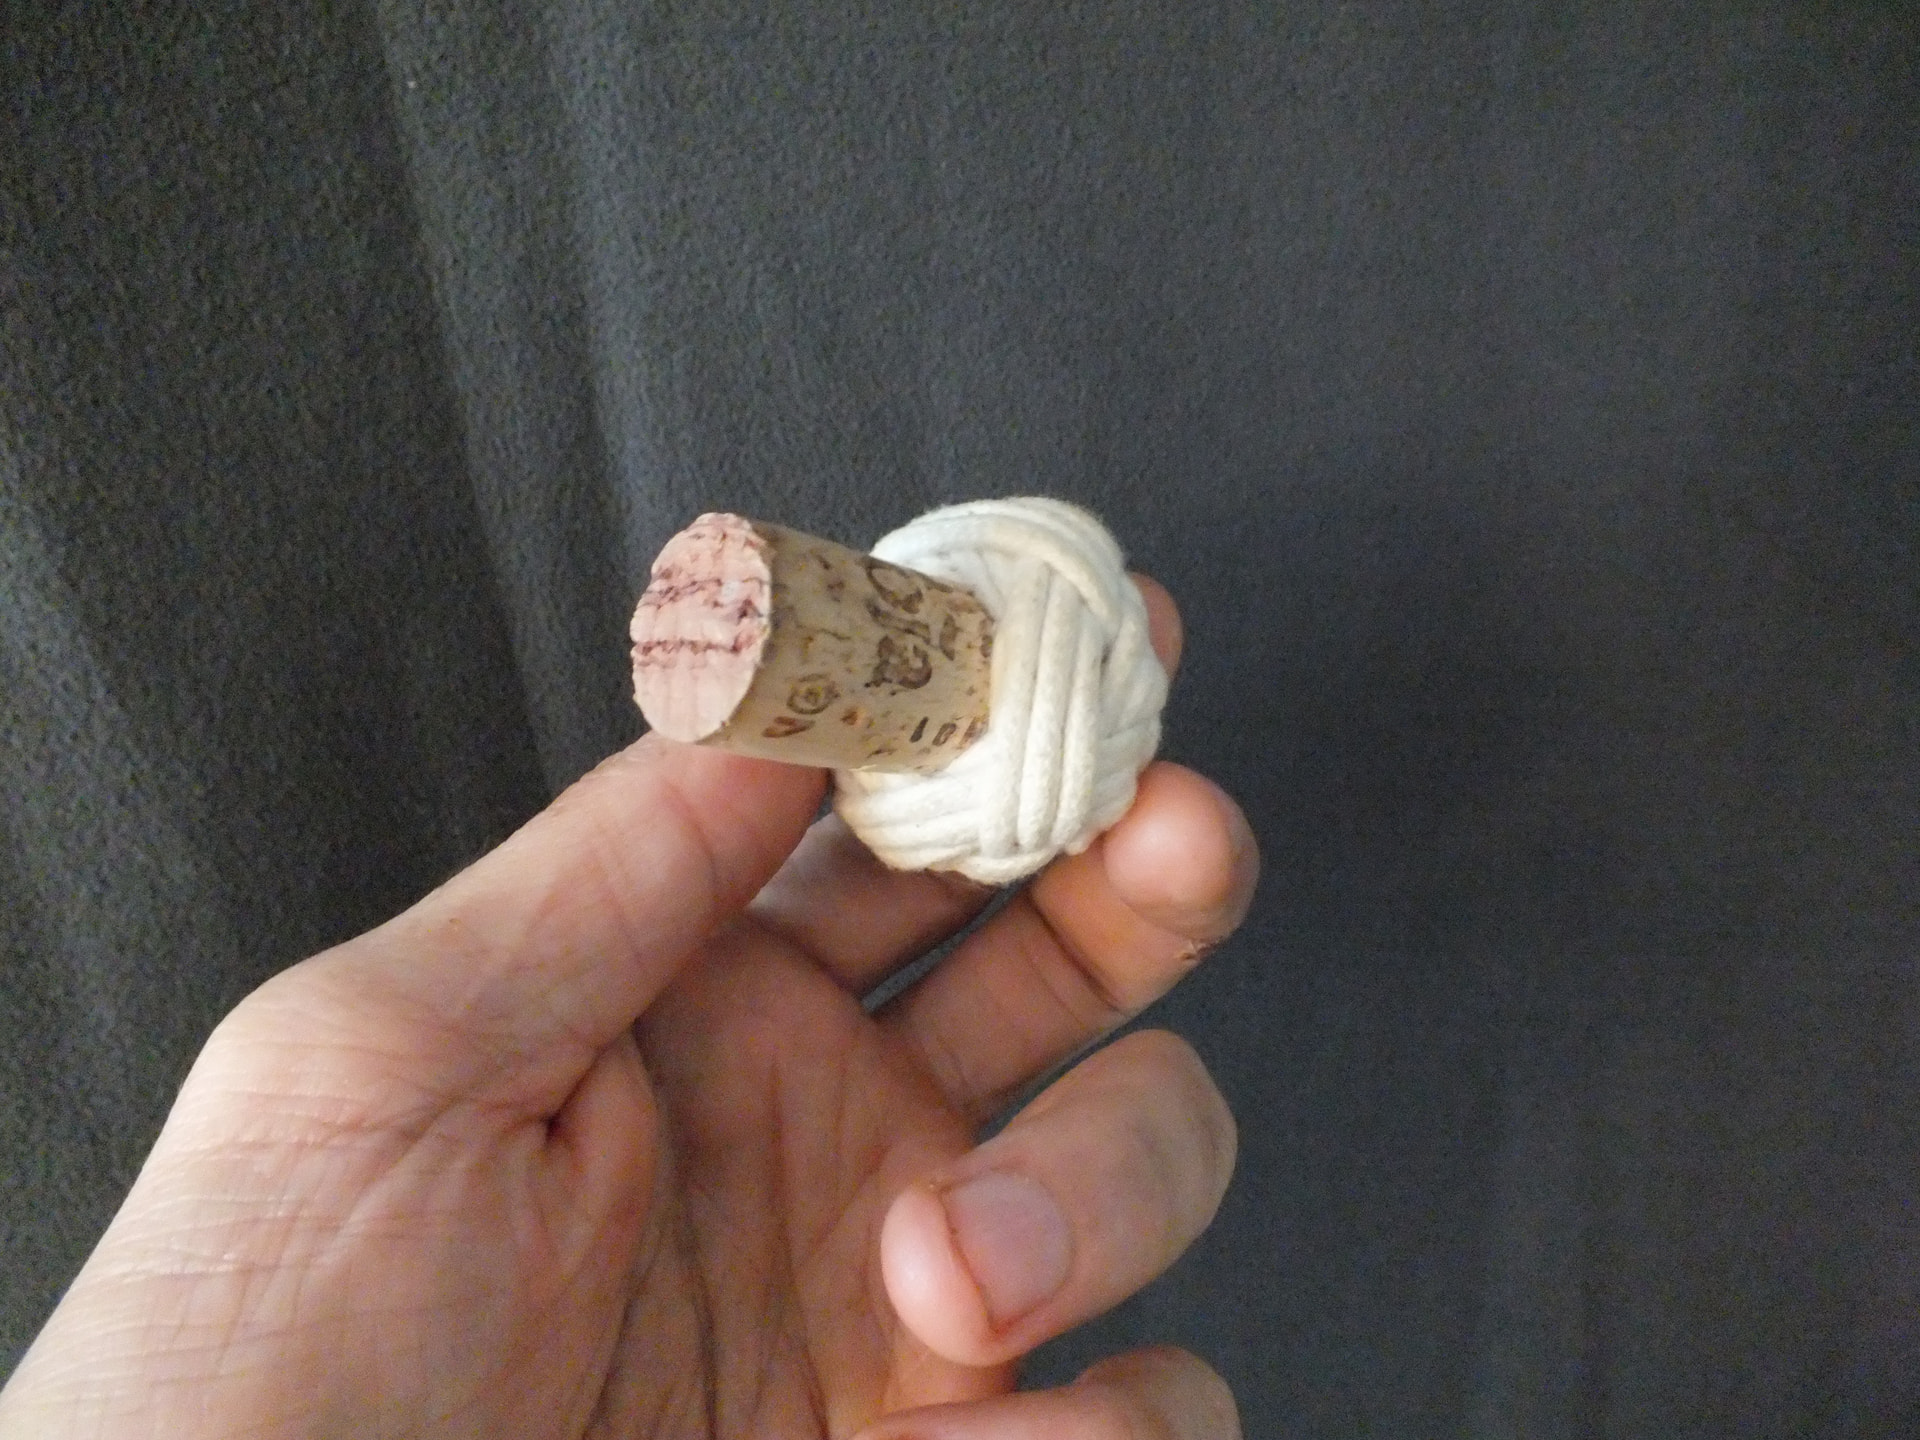
30-facet Globe Knot (6/7 passes) in red 5mm braided cord
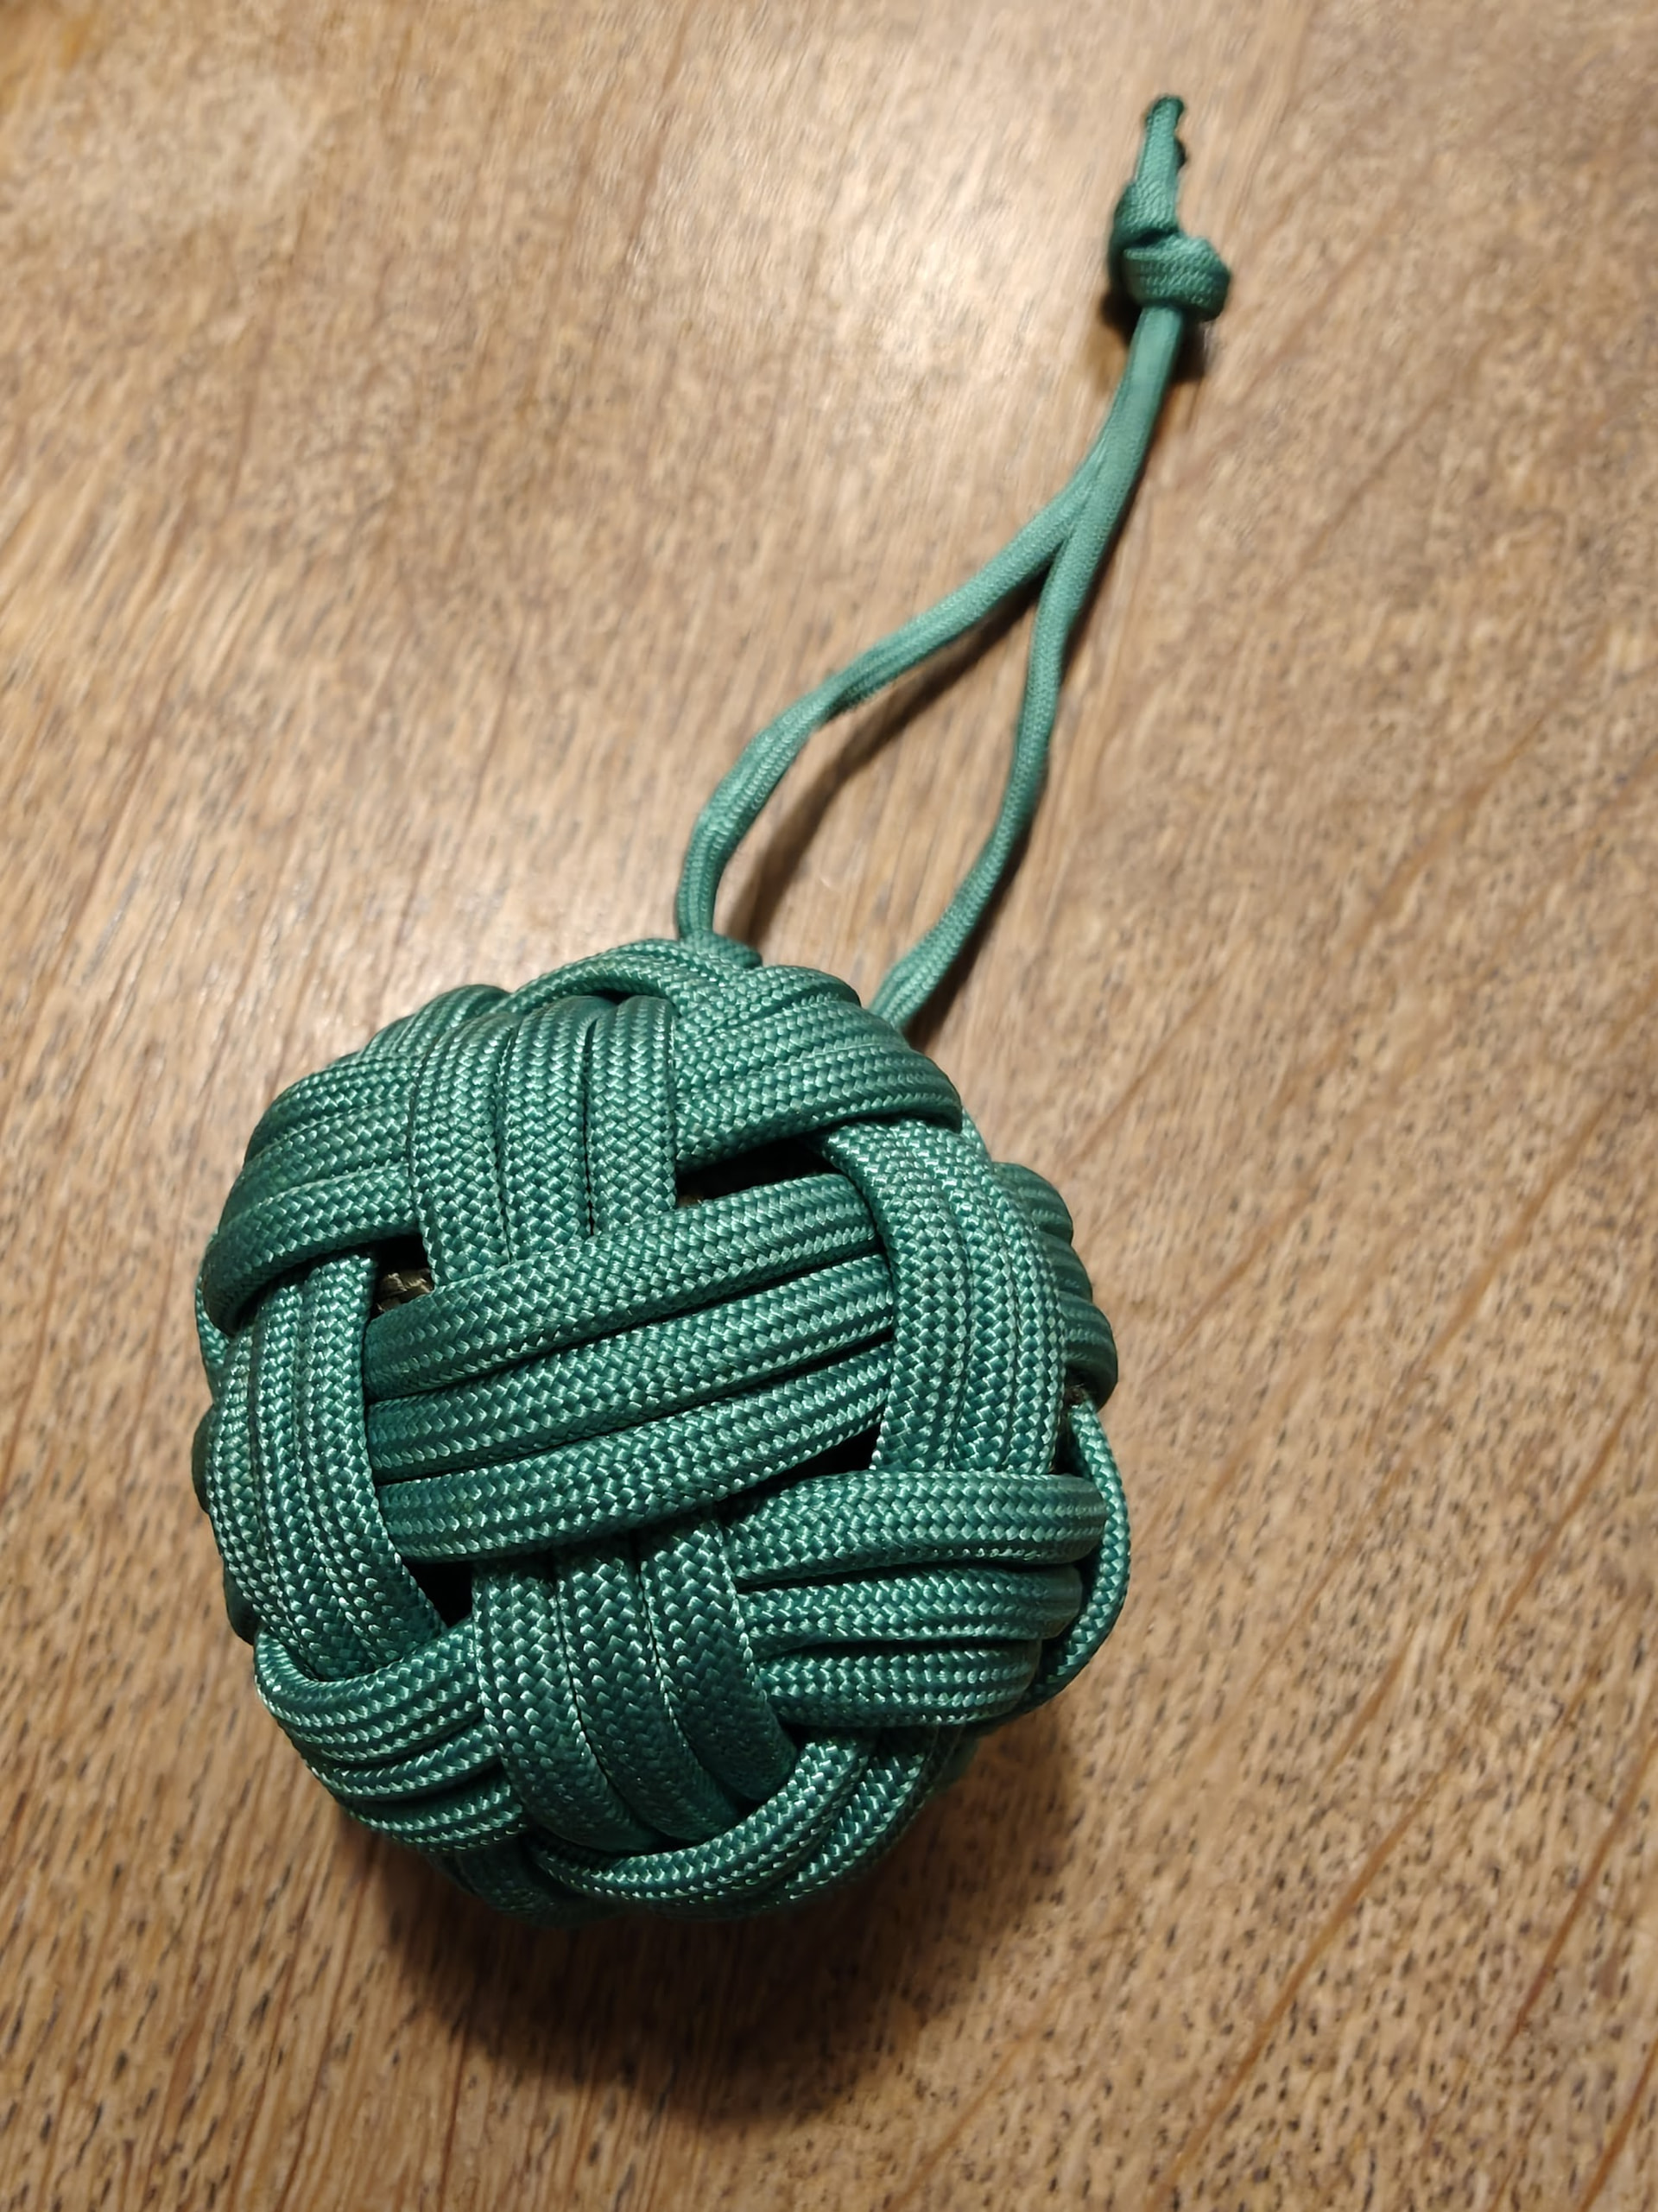
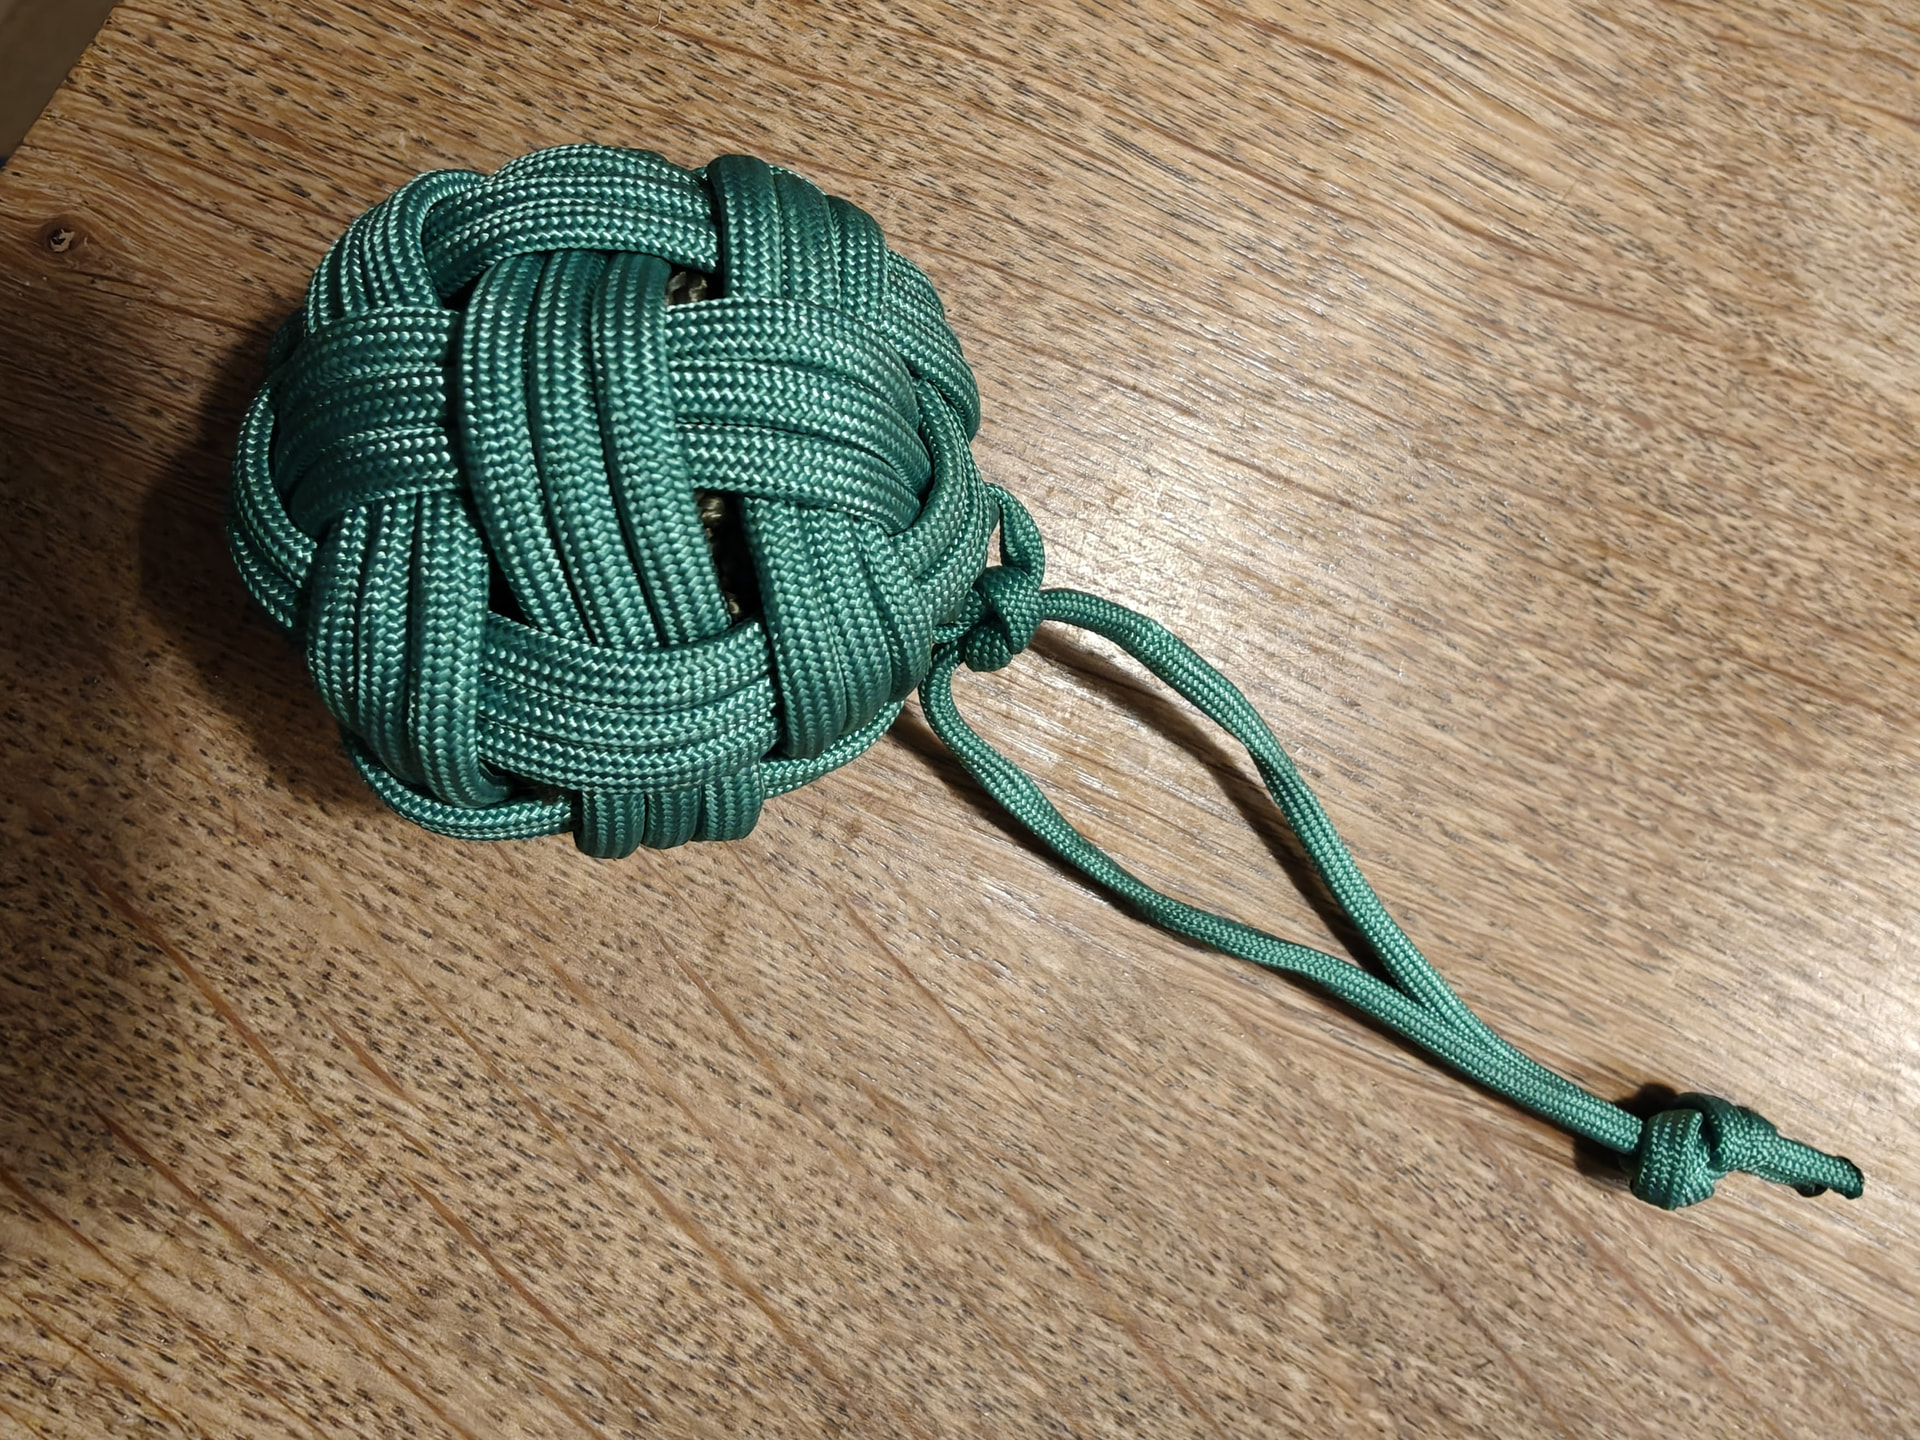
30-facet Globe Knot (3 messy passes) in green 4mm paracord
30-facet Globe Knot (5 passes) in 5mm linen 3-strand and cotton ‘inlay’

How They Were Made
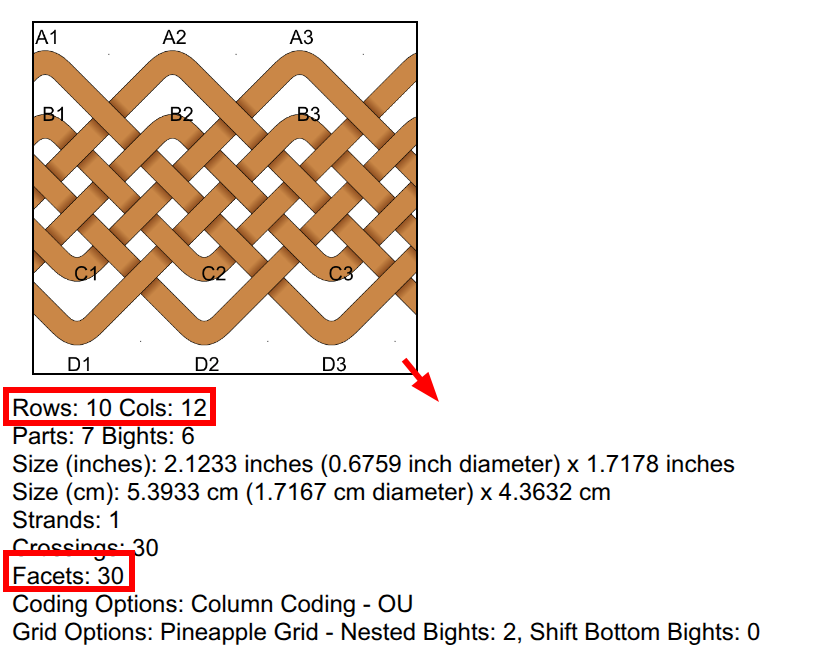
Pattern
I followed the detailed and excellent instructions in this Allwine Designs tutorial Globe Knots — Allwine Designs
In short, you use the ‘Pineapple Grid’ button with 2 Nested Bights, then drag to resize the grid until it is 10 rows and 12 columns. It will tell you below the number of crossings/facets - so you can create anything you want.
Under Strand Lengths the Allwine Designs calculator will even give you an estimate of the
Mandrel
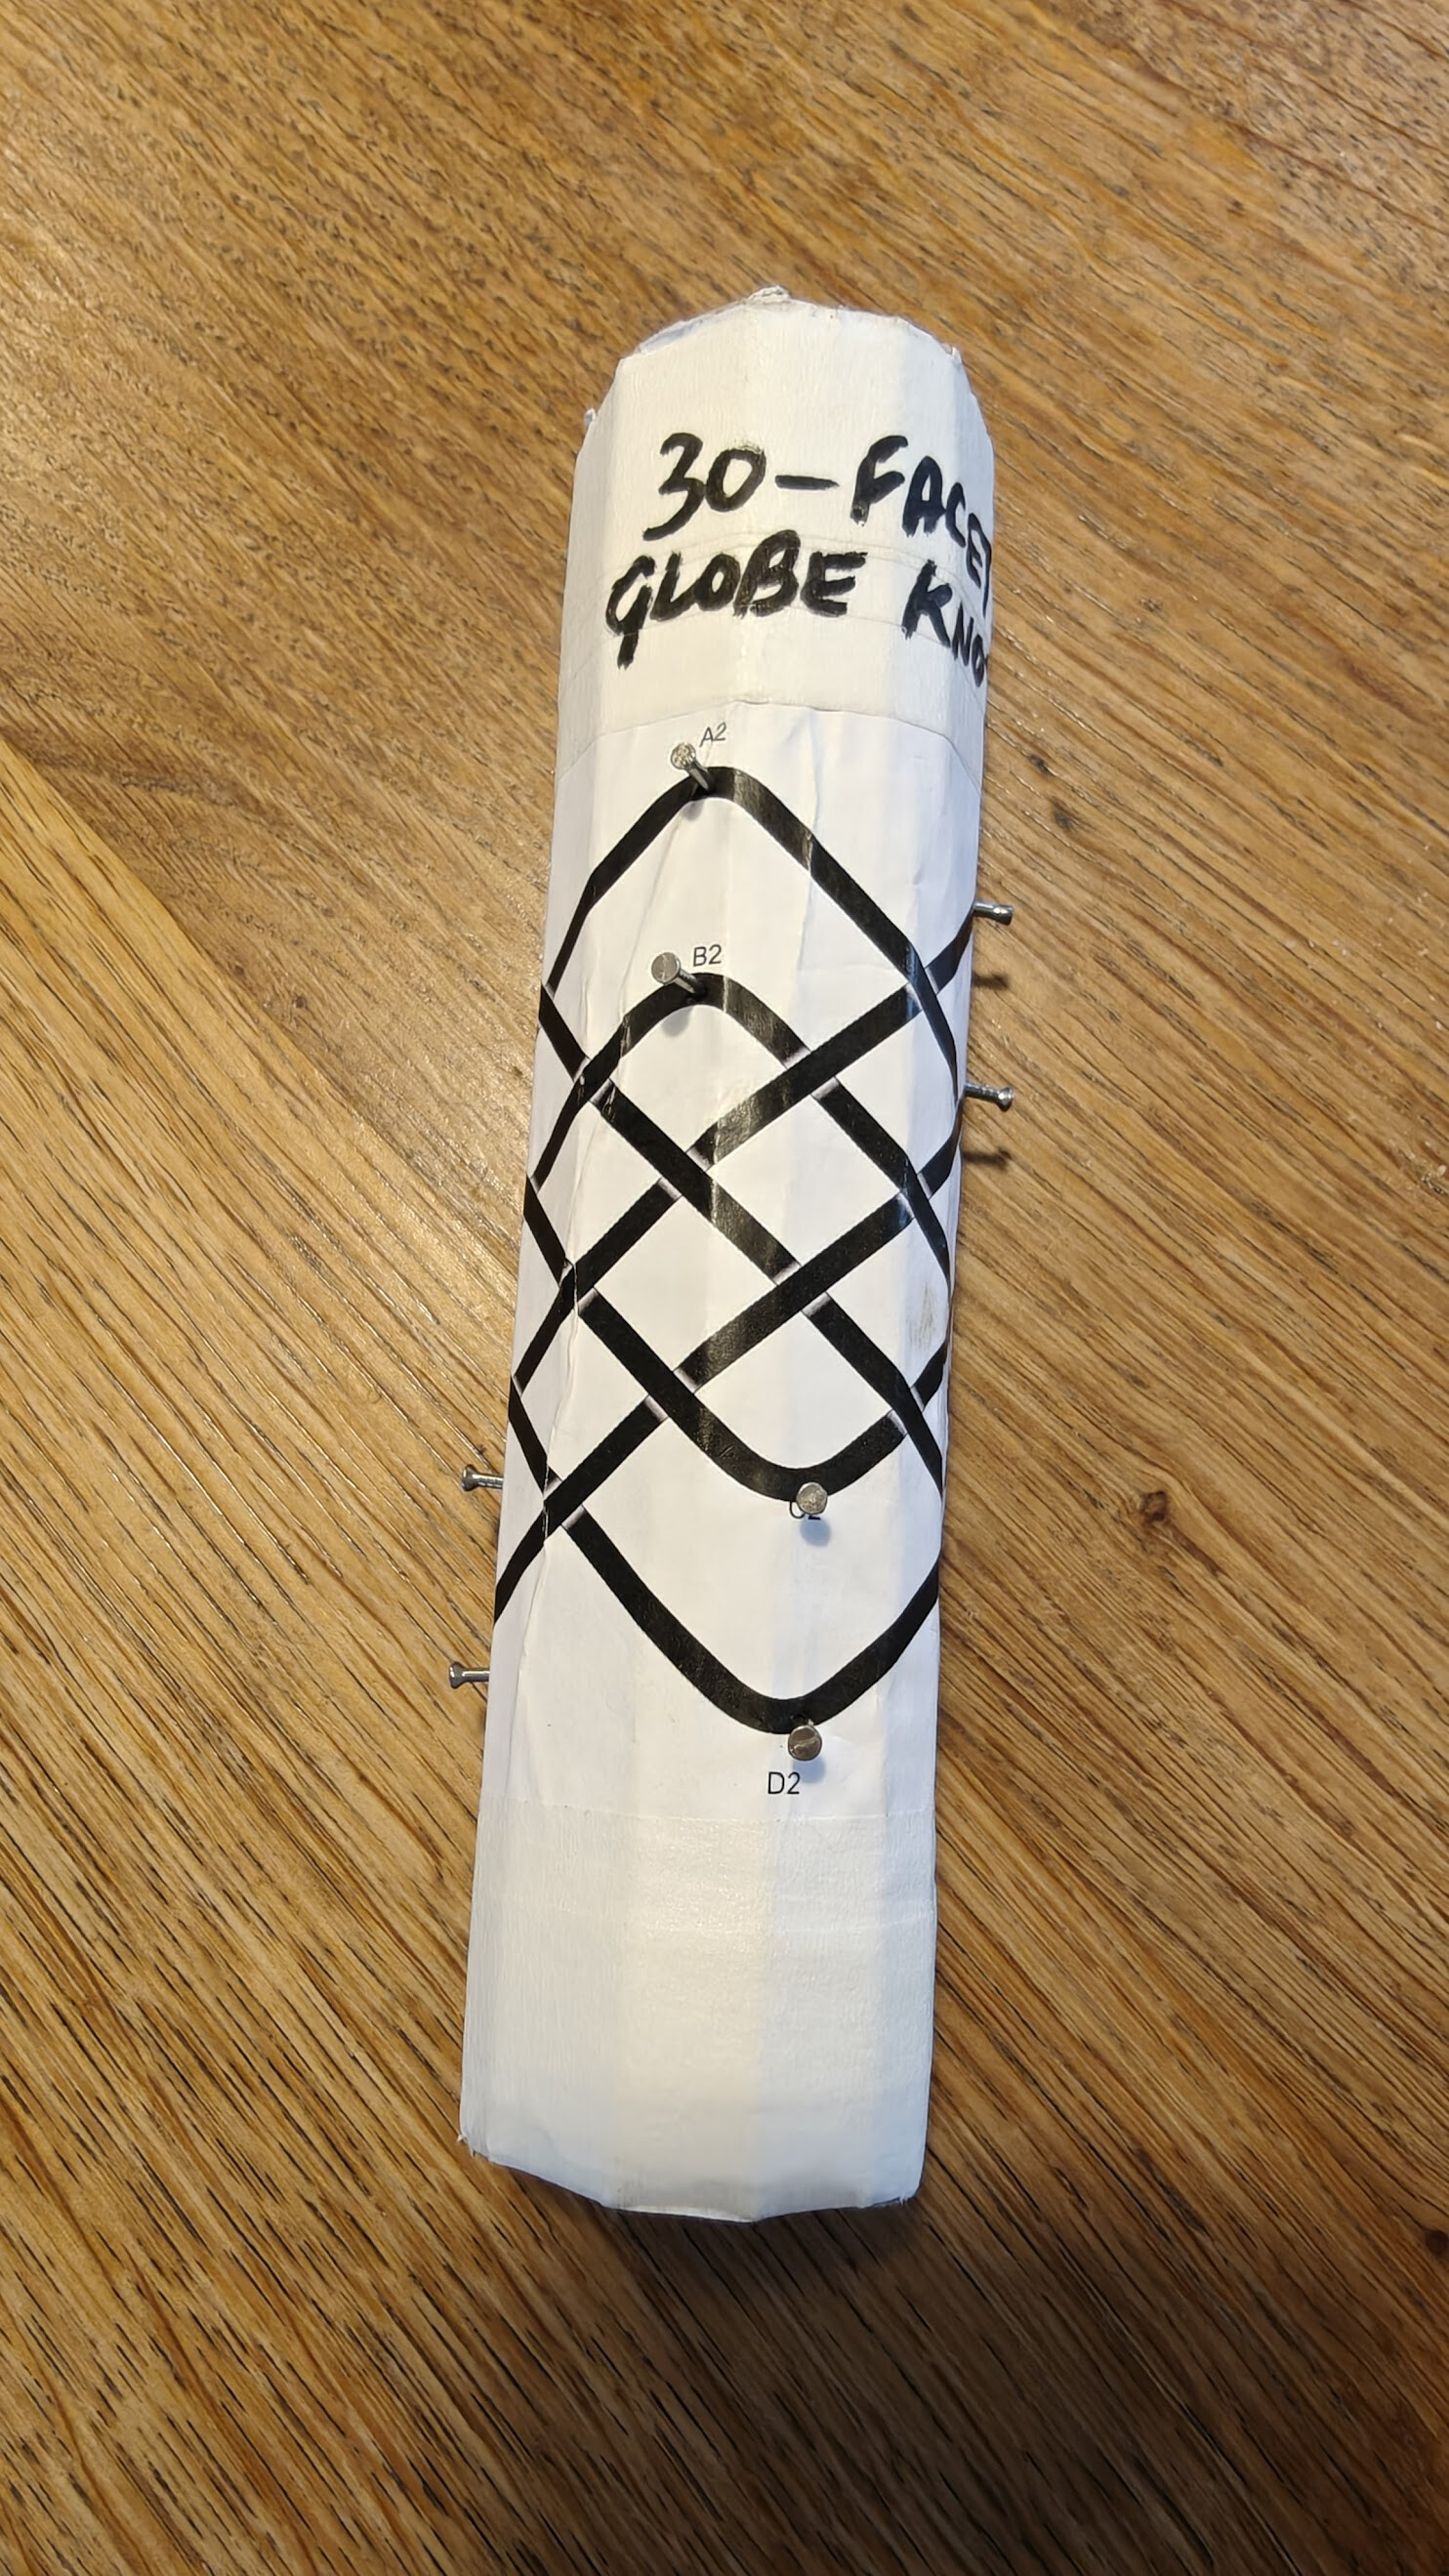
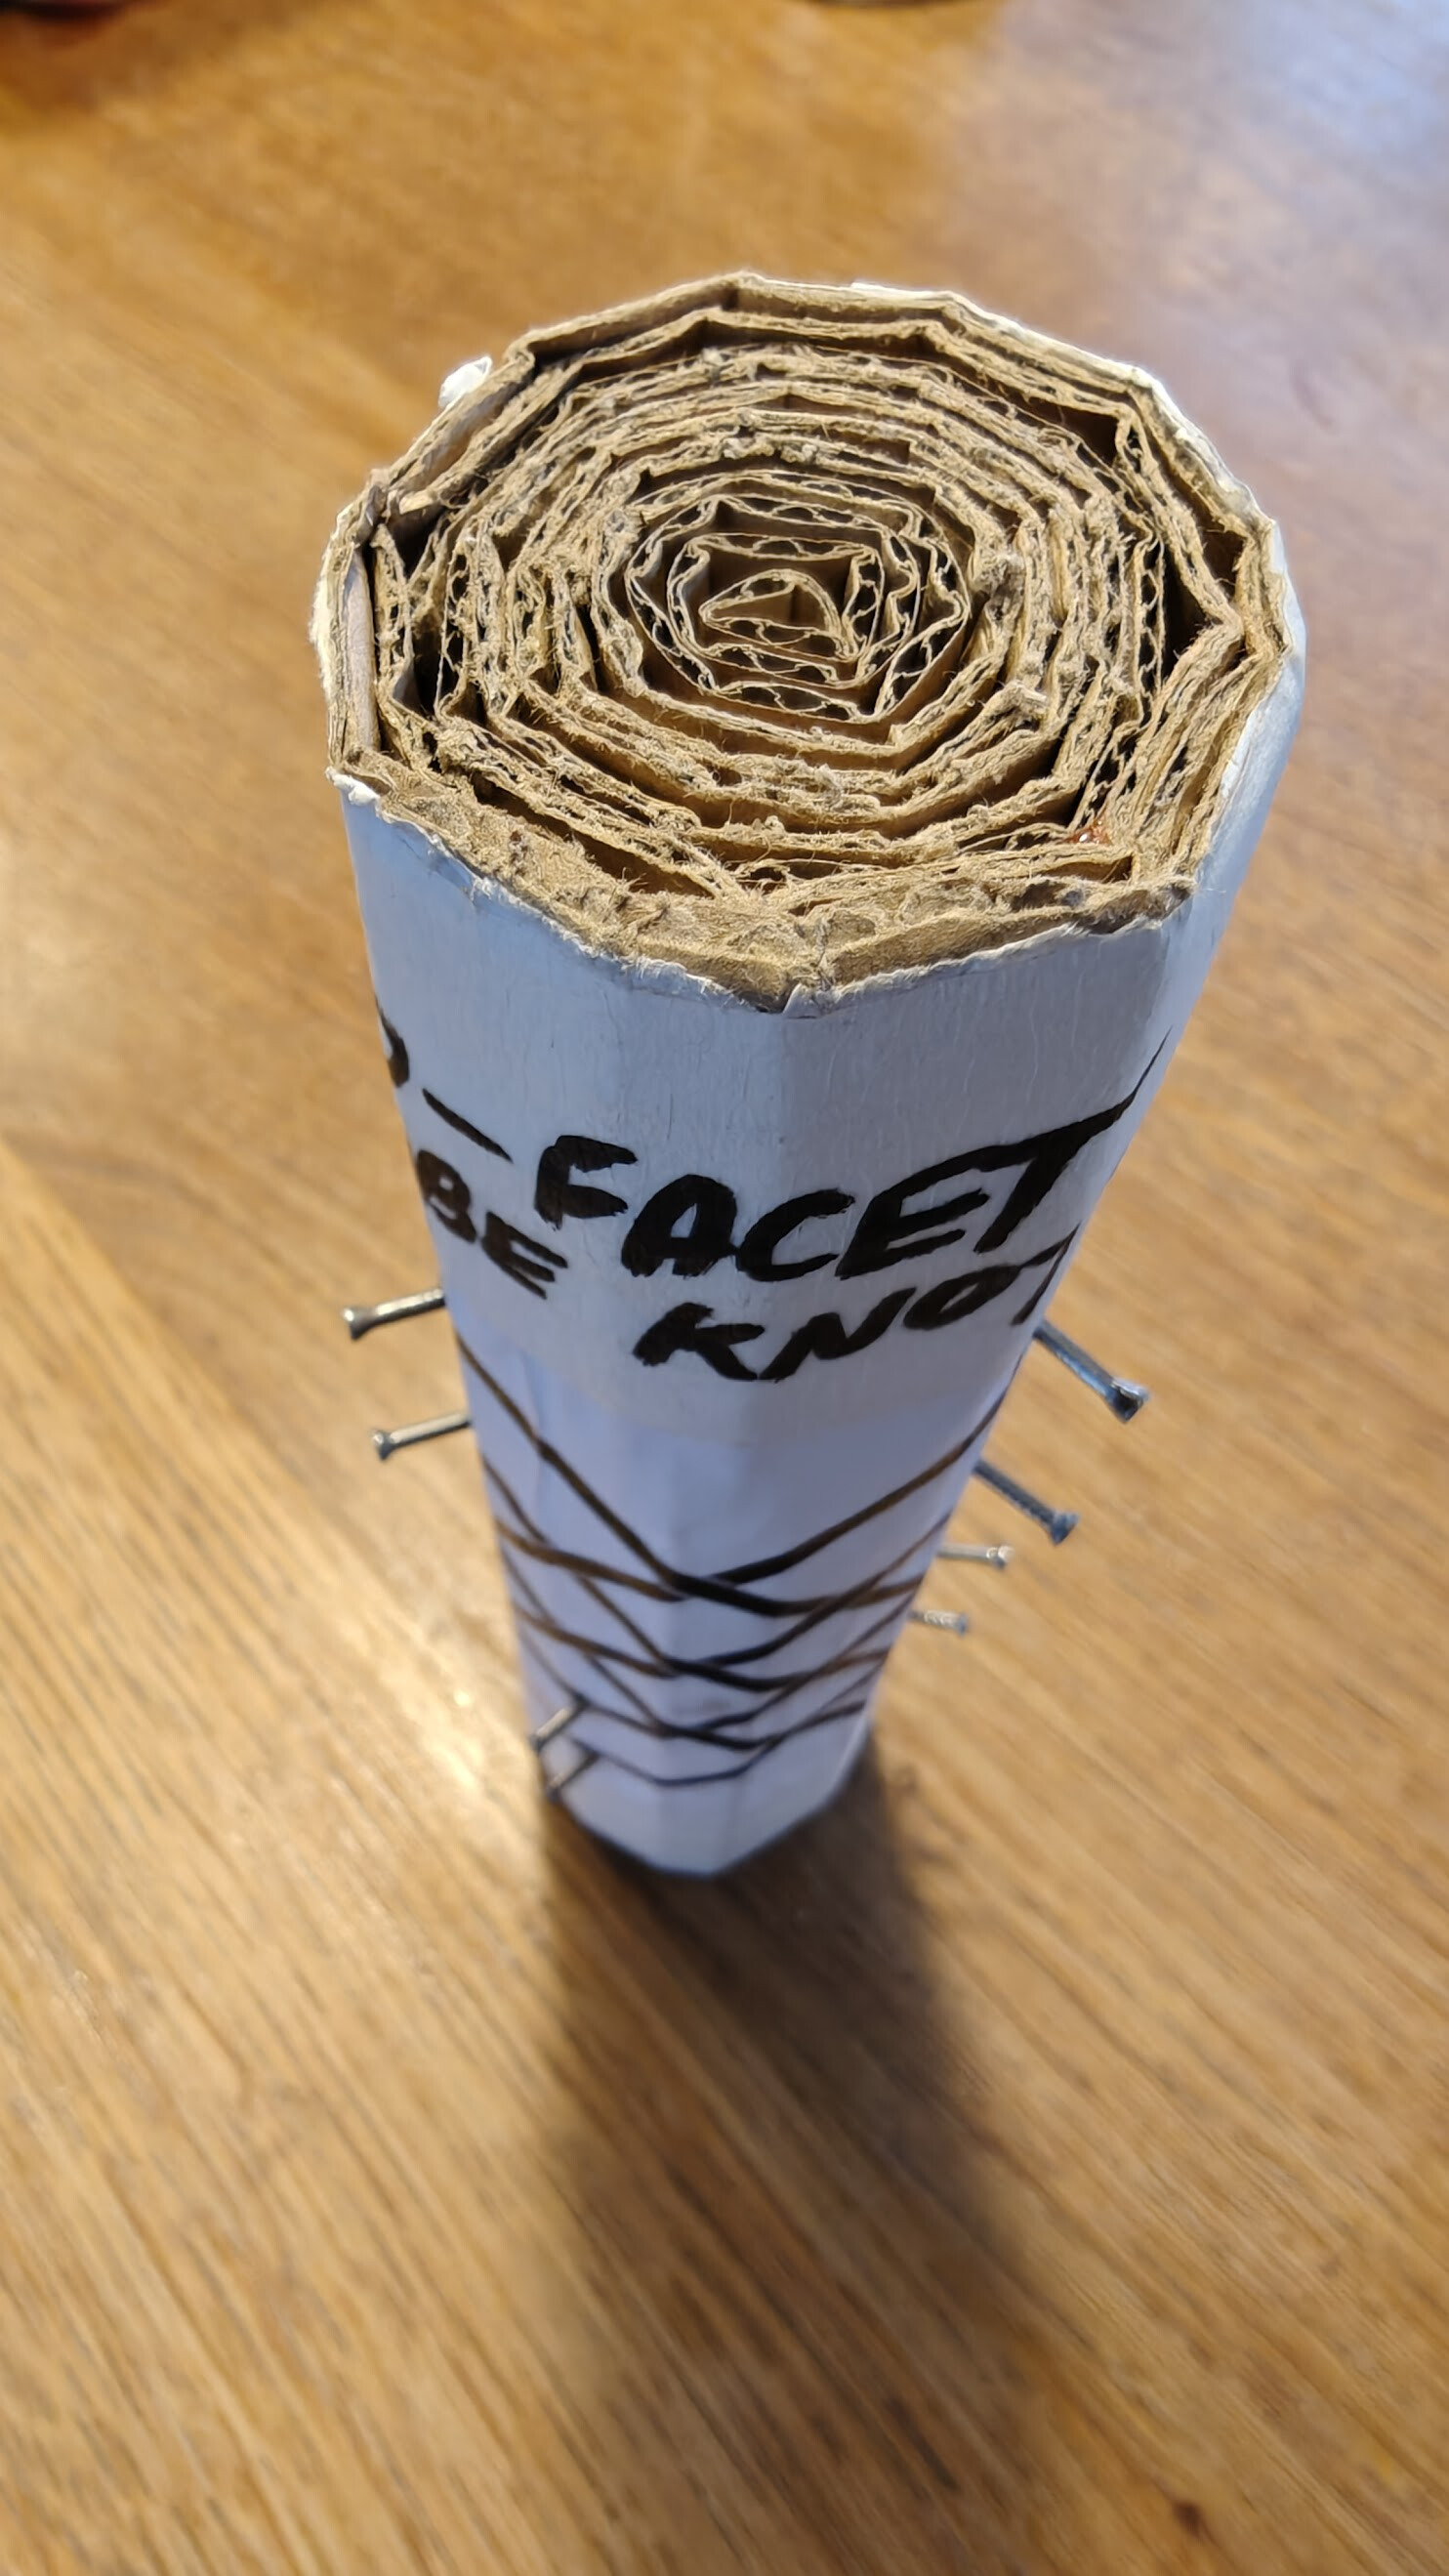
I used rolled-up cardboard which is readily available and easy to fashion into a range of mandrel diameters by simply rolling on a bit more cardboard. It’s held together with masking tape which has a nice matt surface that grips the cord slightly better than something shiny like duct tape.
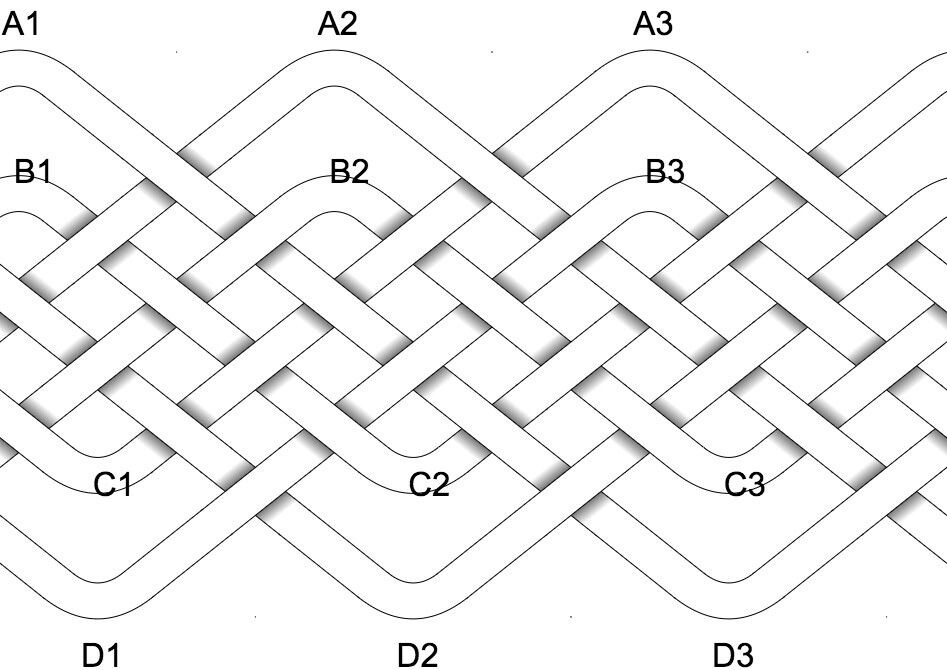
I measured the final diameter and used the Allwine Designs web calculator to print the pattern at exactly that size. The pattern is glued on to the mandrel and nails or pins inserted at the points where the cord needs to be hooked to create a bight.
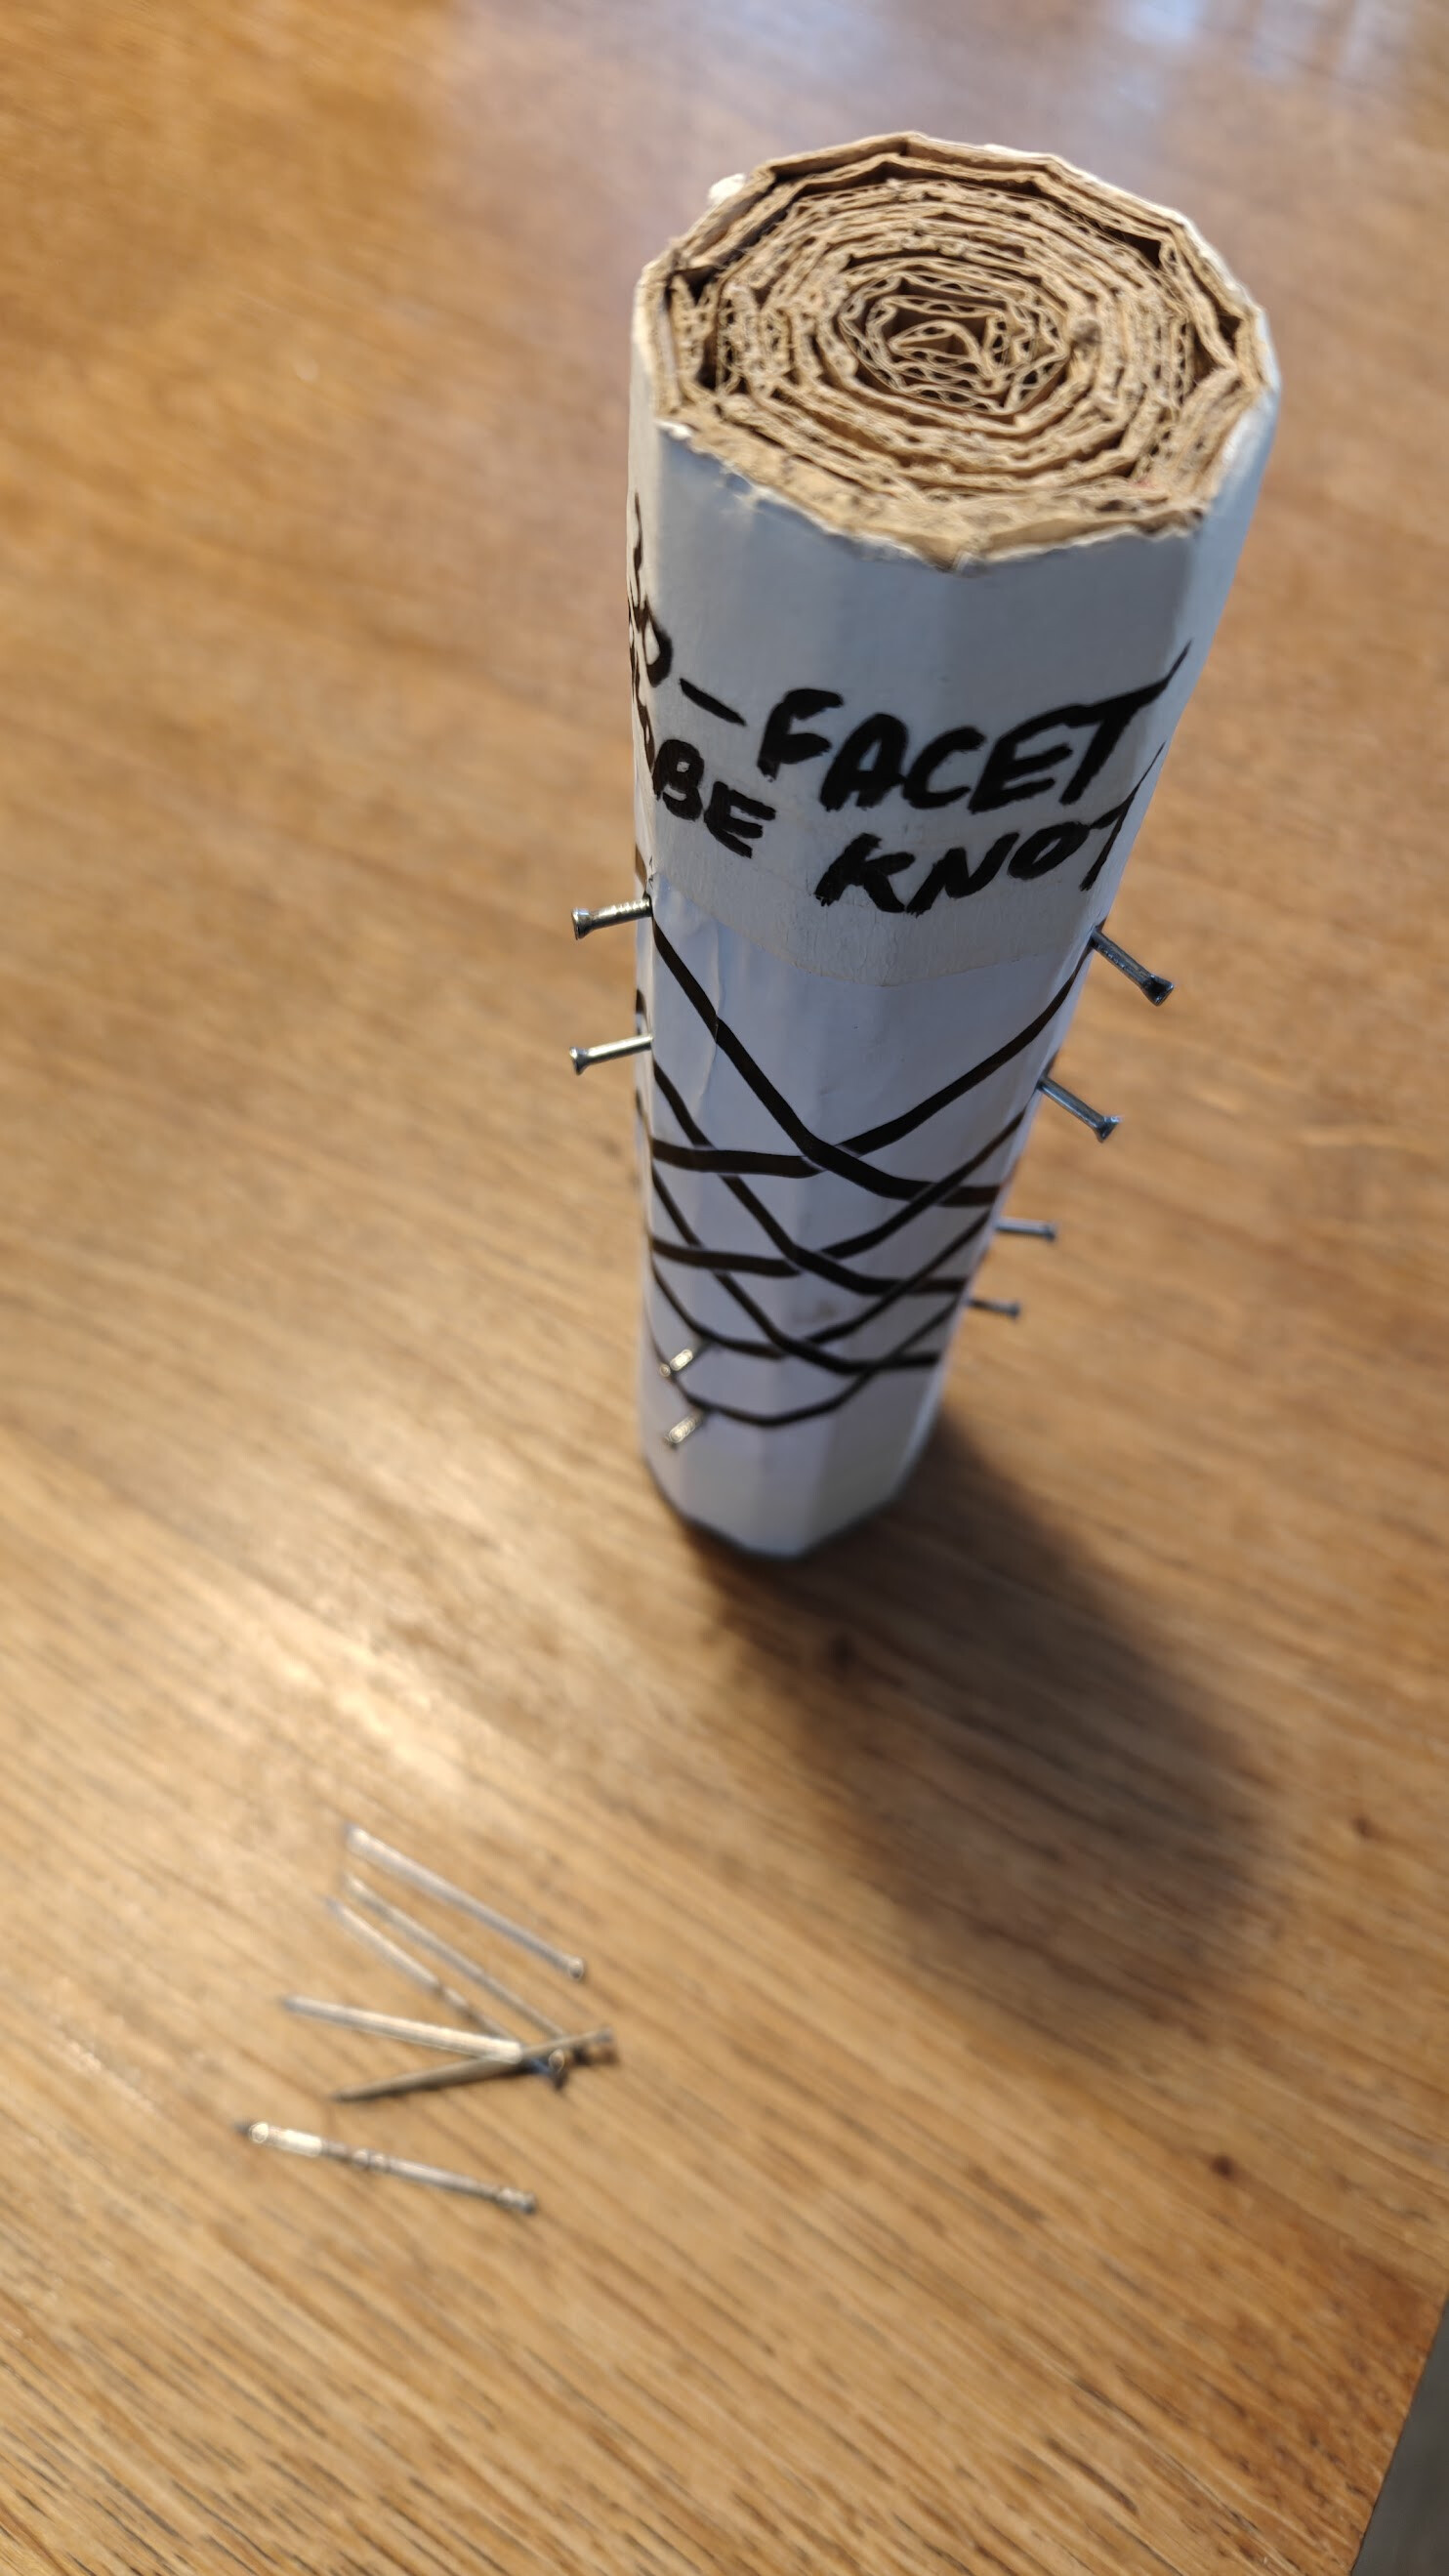
Centre / form
For the small green paracord bauble I made a ball using scrap bits of rope and string and used a few drops of CA glue (superglue) to hold it in place.
For the larger red bauble I bought some hollow clear plastic baubles to cover, these were better, although my mandrel was a little too small for the 70mm size. I am working on a bigger mandrel next!
Materials
I’ll link to some of the eBay UK sources here, but be aware that eBay listing URLs break pretty quickly, if the link is broken try searching eBay for the name of the item as below.
- 5 mm Natural Craft Macrame Cotton String Artisan Thread Twisted Cord
- Clear PLASTIC CRAFT Balls - 2-part Spheres Baubles Bubble Favours Wedding
- Eco Premium 5mm Braided Cotton Cord Macrame Hoody Laces MADE IN UK
Method
better photos of the tying stages will come soon - I will tie another one and take ‘in progress’ photos…
-
Estimate how much cord you will need for the first pass (from the Strand Length on the calculator + a bit extra for luck) and unwind this length from the cord bobbin - plus a bit more so you can put the bobbin on the floor. Importantly, leave the cord still attached to the bobbin as you will work the knot in the other direction along the cord later on.
-
Start anywhere on the mandrel (say C1 or B3… - it doesn’t matter really, but I would advise not the A or D bights), by placing part of the standing end of the cord on the mandrel about where you measured that you would need for the first pass, and working with the free/working end.
-
Follow the pattern round, going under and over the cord as marked on the pattern once you start to cross the cord over itself.
-
After one completed pass, once the cord is back to the start again, gently unhook the bights from the nails and remove from the mandrel.
-
Slide the bauble centre/form into the middle of the knot, and start tidying up the passes so they are roughly where they need to be (evenly spaced around the centre)
-
By looking at how much cord you have left after one pass, you now have a better idea of how much more cord you will need to cover your centre/form - it’s just a case of guesstimating how many passes it will take to fill in, and multiply rope used so far x number of remaining passes. You can now cut this length off the bobbin.
-
Finish off any spare cord you had of the first pass working towards the original free end to use all that cord up.
-
Then start working the other way, doubling, tripling the knot as you would for any Turk’s Head, until you have the required number of passes.
-
You can finish at any point, even with incomplete passes. Ideally for neatness you’d have an exact number of passes, but as you can see with my red cord bauble, it has 6 passes in some places and 7 in other because I ran out of cord going for that extra 7th pass! I think it looks fine for my Christmas tree
-
Bury the ends under the wraps using a bodkin, haemostats, or fine pliers/tweezers to pull it under the existing passes.
-
Add some form of hanging loop, which you can do with any small scrap of twine, cord, thread, etc.
Post your photos!
If you found this mini tutorial helpful please let me know. If there’s something not clear or needs better explaining, please let me know too! And if you make some baubles yourself, then please do post photos of your creations below.