If a semi-rigid material is introduced into the center of the cord, as a soft iron wire or a copper wire, it can be bent to just about any shape and stay that way while taking a photo. Depending on how much time you dedicate to it, you may make it very convincingly floating in mid-air, and the end can be pointed any direction you fancy. It may even be bent in such a way that the rope surfaces will not touch in the crossings.
It is very difficult to make the soft wire penetrate a long segment of α rope lengthwise…I know it because I had tried it for another reason: It had occurred to me that, if I could do this, and take a CT of the knot, ( I have a friend working as α radiologist at a hospital ), I would have a very accurate description of the path of the rope in 3D. After this, it would not be difficult to convert the pixel image of the curve onto a vector image, and then proceed to re-draw the knot with a computer graphics software program. That way we can have a virtual reality image of the knot, and be able to rotate it, and view it from any angle…I was nor successful to make the wire pass through the axis of the rope, if the segment was not very short. Maybe you can try it and succeed.
That’s an interesting solution xarax. I guess we’ll have to provide a new classification for these inverted knots. ;D
alpineer
It’s like everything in this world; maybe extremely difficult the first time you try it, but once you’ve got the hang of it, it is rather easy. For inserting a metal wire, it helps if the tip of it is round; the easiest way to accomplish it is to double it like a hairpin in the end. If you then wish to remove it, you continue in the same direction, taking it out at a convenient point. It is easiest with double braid rope. In laid rope, the wire can be laid into the centre.
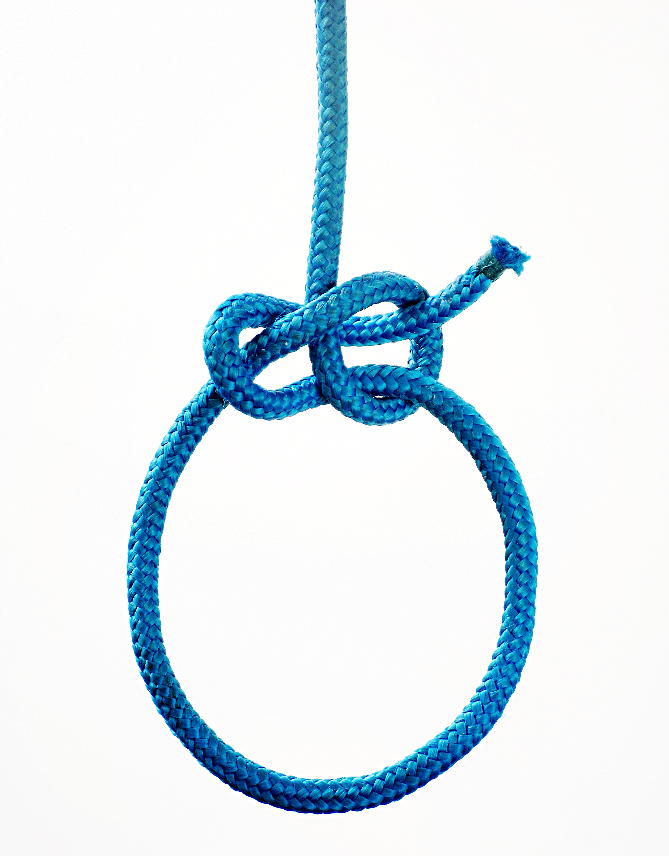
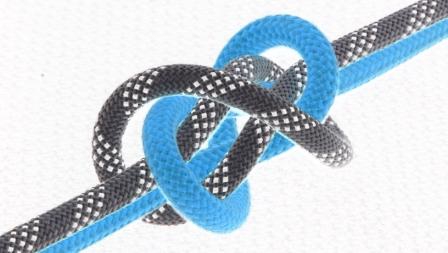
To take this picture, I suspended the knot from the back of a chair and took it against a cupboard door in my kitchen, backlighted from the window and with the shaving mirror illuminating it from the front. Both these pictures are taken with a compact camera, Canon PowerShot G7. Any camera that can be set to compensate for a light background can do this. I used compensation +2 and white balanced for the cupboard door.
Then of course we have the Indian rope trick if all else fails… (The quena is my main instrument http://www.youtube.com/watch?v=R2qdbiierJI )
I think that a major consideration when taking a picture of a knot is to make the knot itself as legible as possible. For simple knots like the bowline, it might suffice with one face of the knot to get the three-dimensional idea of its topology, provided the image shows the flow of the line into the knot, which is related to the flow of force in use. In a bowlinesque knot as the Eskimo Bowline, an image as the one in http://igkt.net/sm/index.php?topic=3233.45 is a bit confusing to interpret, as it hides the nature of the TurNip, even if the image is perfectly clear. The more common flattened form of the TurNip in my opinion is a better presentation, as it to me is a more true image of one of the states while tying the knot.
So the problem that has to be coped with when photographing a knot is twofold: How will the knot be best represented, in order to easily be correctly interpreted, and how should it be shot so that the image as clearly as possible shows its topology?
Yes, but how beautiful is this perfectly clear image ! See the almost sexy shape of the shadow of the nipping loop on the eye leg of the bight and the tail !
I always show a “front” and a “beck” ( or a “top” and a “bottom”) view of any knot, except when those views are identical. Sometimes, I show a side view as well, with the knot diagonally placed into the frame of the picture. It might well be a carefully chosen angle for a knot, from where everything is unambiguous, but it s a hard thing to search for it in each and every knot. I can not do this for all the knots I tie and post pictures of, pictures that I consider to be just a helpful, easy to make documentation of the knots I happen to meet. But I would love to see a good photographer, like you, to take some sophisticated pictures of some of those knots. When I will get rid of most of them, by the strength test during the “knot wars” I plan , then I will take out my film 6X6 heavy gun, the high resolution scanner, and all the sophisticated lighting appliances of a studio, to compete with you guys ! ![]() The pictures I have posted could well have been replaced by sketches, but I wanted to present the knots in an easy way that anyone in the Forum could also do, with a minimum of time spend ! With the technique of the digital camera without any other flash than its own, the large diameter / two colours ropes, the positioning of them on the floor, I wanted to establish a tradition that everybody could follow, ( so we reduce all this annoying endless blah blah and misunderstandings about things that could be clarified in a second ). So, I want a simple, easy to follow technique that does not make people reluctant to follow it, because they might fear they are not able to achieve good results with it. A technique that is as a simple as writing, and run a lesser danger to drive us to misunderstanding and “knot-tiers wars”( as the silly one we fought a few months ago… :))
The pictures I have posted could well have been replaced by sketches, but I wanted to present the knots in an easy way that anyone in the Forum could also do, with a minimum of time spend ! With the technique of the digital camera without any other flash than its own, the large diameter / two colours ropes, the positioning of them on the floor, I wanted to establish a tradition that everybody could follow, ( so we reduce all this annoying endless blah blah and misunderstandings about things that could be clarified in a second ). So, I want a simple, easy to follow technique that does not make people reluctant to follow it, because they might fear they are not able to achieve good results with it. A technique that is as a simple as writing, and run a lesser danger to drive us to misunderstanding and “knot-tiers wars”( as the silly one we fought a few months ago… :))
I am afraid that your proposed wire skeleton ropes, that allows us to suspend any rope tangle, tightened or not, in mid air and use light, mirrors and a shallow focus to have a clear background, however ingenious, is too complex and difficult for the average person in this Forum. Of course, I would love to see your pictures taken that way ( and presented one by one at different posts, so you can use the maximum allowed KB limit for each of them ) !
Another easy way to have a white background, is to shoot the pictures on a blue or green one first, and then remove the colour, using one of the many commercially available software programs. This technique is nowadays cheap, quick and effective. It enables us to place the (tightened or even loose) knot on the floor (so we do not have to suspend the knot s nub and the free ends in mid-air), and use the camera s flash, because, with the dark background, we avoid any annoying reflections.
I have used the free, demo version of FXhome PhotoKey 4, available at :
http://fxhome.com/photokey-4
For more information about this technique, see
http://en.wikipedia.org/wiki/Chroma_key
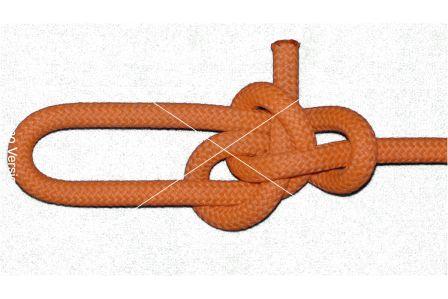
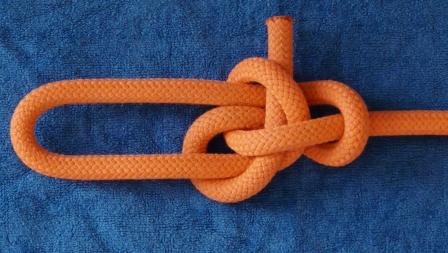
One has just to insert a picture by the command “import” on the foreground frame menu, and then choose the command “export”, and save the transformed picture on his computer. As simple as that, a matter of a few seconds ! The blue or green dark background disappears, and in its place we have a very soft white/grey tone. See the attached pictures, for the application of this simple, easy and quick technique on images of a knot that was placed on a blue towel on the floor.
I am afraid things are not so simple, Korgan… ![]()
We can not USE a white background when we shoot the pictures, because of the flash reflections on it. We want to HAVE a white background in the final product, for printer s sake…, but shoot the pictures on a dark background, that absorbs reflections.
No. Infanview changes the RGB combination configuration to any other R, G, B combination, it changes the order of the sequence of the three (R, G, B) primary colours. It does not turn the RGB configuration into a RGW one ! ( W= white) Also, we do not want to turn the colour of the background into a white, everywhere in the picture ! We want to erase only the solid dark colour that is confined into the background area, not this colour everywhere of the frame. You need a Chroma key program to do this, like the one I have mentioned. If you discover a free Chroma key program, please send it to me… ![]()
And what happens when we already have pictures with a black background ? If we turn black into white, we lose all the shadows, and replace them with Gothic-style strange illuminations…No, believe me, you can not do a summation of those two pages in a single line ! ![]()
Agent_smith, I just realized you’re the one posting the pics with the white backgrounds.
http://igkt.net/sm/index.php?topic=3233.0
Those pics are about the best I’ve seen. If you include some of those pics in your original post, you’d be an instant authority. A picture says a thousand words. New people have to do a search.
Xarax’s pics are good too, but he often shows the knots tightened up. It’s often like a mini puzzle to figure out the knot.
Can you replace the blue, of the background, and the background only ( otherwise, you change the colours of the whole frame, i.e, of the ropes as well…) with white ? ( as I have done in (1)). ( I The pictures there are taken using a blue towel, and the knots are placed on it horizontally, on the floor. If so, please, tell me exactly how you do it. because I have not been able to discover that trick. Could you show me a picture of a knot where you have achieved his with one or more transformations with the Irfanview ?
Not always very much tightened, but tightened nevetheless. I want the reader to have an idea of the final knot, because I am not analyzing the knot s structure, I just want to present the knot. But I always include a "fron"t and “back” picture ( or “top” and “bottom”), so there are no ambiguities in the structure.
True, so I have said hundreds of thousands of words, as I have posted hundreds of pictures. ![]() Reading even only the 1 out of the 30 of those words, should be sufficient to you to realize that I am not generating “noise”. But it was not ! ( “I think can live with this…” :))
Reading even only the 1 out of the 30 of those words, should be sufficient to you to realize that I am not generating “noise”. But it was not ! ( “I think can live with this…” :))
True, but is not an interesting, pleasant puzzle ? ![]() I have thought about this, and I have decided that only people that “bother” to solve those little mini puzzles, are really interested to learn about the knot. And, as I have said, you have to solve this puzzle about a dozen times, to get a “feel” of it. In a forum with knot tiers, you expect to have an audience of knot tiers, I suppose. I have learned many new things about a particular knot, and about knots in general, when I did had difficulties, or made mistakes, with the deciphering of a knot, shown in a picture. Deciphering the picture of a tightened knot is a fine educational method. With two views, this is never a too difficult thing for a knot tier, and for the simple, practical knots we are talking in this Forum.
I have thought about this, and I have decided that only people that “bother” to solve those little mini puzzles, are really interested to learn about the knot. And, as I have said, you have to solve this puzzle about a dozen times, to get a “feel” of it. In a forum with knot tiers, you expect to have an audience of knot tiers, I suppose. I have learned many new things about a particular knot, and about knots in general, when I did had difficulties, or made mistakes, with the deciphering of a knot, shown in a picture. Deciphering the picture of a tightened knot is a fine educational method. With two views, this is never a too difficult thing for a knot tier, and for the simple, practical knots we are talking in this Forum.
Maybe the discussion is more one of chit-chat or theoretical type, and photography is a topic per se that is not very simple, but there are a couple of issues with images of knots that often need attention.
There are various aspects of a knot when you tie it, and more often than not, the method of tying and the intermediate stages are just as important as the final aspect of the knot and its topology when in use. This is particularly easy to see when you tie the bowline with any of the methods where you collapse a slipknot to draw out the collar, and some knots rely heavily on transformation in their final steps, most notably the Carrick Bend.
So sometimes more important than showing more than one face, which might as well be perpendicular faces, rather than only back and front, the different stages in transformation may be worthwhile.
Also, if you cannot find a suitable way to get rid of the background, it might be easier to just shoot it as it is and lay a semi-transparent paper upon it a print of the photo and trace the knot with a pencil, shading it where appropriate and then scan the sketch. When you do it by tracing on top of a photo, there is very little risk of making a mistake, forming an impossible figure, and the final image often is a lot more intelligible.
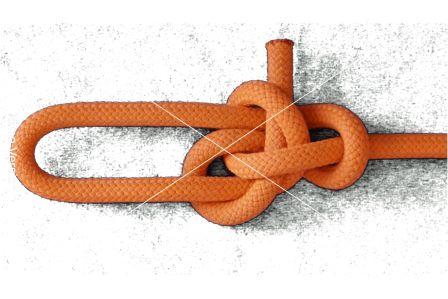
When you have a solid white background, it is rather easy to transform the image into a transparent gif instead of a jpeg, so that it may be overlaid on any background. It might be easier to insert other graphic objects if you intend to make a pdf document, as you need not insert graphics into the image, but can overlay the image upon the graphics. The attached image is such a gif image. When it is laid into a webpage for example, the background shines through.
(Fourth paragraph post-edited for clarity.)
This can also be done with photographic means. There are many photo software programs where the contour of areas, where there is a change of the main colours hue, is automatically traced - so we can re-trace this line on the computer screen with a Bezier or NURB curved line, and have a very accurate sketch ( provided we use different colours for the different ropes and the background ). However, such sketches suffer from their in-between style : they are, most of the times, neither good artistic representations, nor good photo-realistic representations…Not very attractive for the younger generation, nurtured with the spectacular computer graphic images of the contemporary video games. My intention was to create virtual reality representations of real knots, that were first scanned by a 3 D scanner, or by a CT instrument…I hope that some younger knot tier will succeed to put all the various photographic and computer techniques together, and present to us virtual reality knots, that can be rotated and examined, in all their aspects, as real 3 D knots.
Another way to have a white background, is to turn a dark one into a white…This can be done easily with the contemporary software programs ,provided the dark background is almost monochrome.
I have posted many pictures of knots in this forum, with a black background. However, agent smith pointed out to me that a black background is a trouble for the printers, so I had to figure out an easy, simple way one can use to convert any of those pictures to pictures easy to be printed with a printer, with a white background.
The following is the easiest solution I have found until now, based upon the freely distributed photo program GIMP ( http://www.gimp.org/) : One has only to use three out of the hundreds functions of this program…and the “open” and “save as” commands.
0. Insert the image with the dark-monochrome-background you wish to convert to a white- background one, by the command “Open” of the file menu ( first column).
- Choose the command “Select by colour”, of the select menu ( third column).
Now, put the cursor on a point of the dark-monochrome background of the image, and click. The “select by colour” command will outline this background, and separate it from the foreground of the picture. - Choose the command “bucket fill” of the toolbox ( second row, second thumbnail image), also accessible through the tools menu, eighth column.
Now, put again the cursor on a point of the dark-monochrome background of the image, and click again.
3. Choose the command “Cut:” of the edit menu ( second column).
Now, the previously selected dark area would turn into a white area, because any colour inside it would have been removed.
This is it ! Now you just have to save the image, by the “save as” command of the file menu ( first column).
(One can use a little higher number than the default #15 “threshold background” of the “select by colour” command - double click on the “select by colour” thumbnail on the toolbox, to make this number be available to adjustments). A number higher than 15 and lower than 40 gives good results. But that is only a minor detail of the method.)
See the attached pictures for a black background image of a knot converted by the simple, easy and free way described above, into decent white background images. Finally, I post the “negative” of this picture, that can also be generated by a function of this program : just choose “Invert” of the colours menu, seventh column.

Egadz, why ruin a Good Thing?
(I MUCH prefer the 1st (dark-background) image of yours to the
bleached-background others. The light is coming from the cordage,
in the former, and not soooo strongly from everywherElse but !)
![]()
I know…That happens because black has not colours, whle white has them all…But what can I do ? I was obliged to shoot the pictures with a dark, black or blue background, and then transform them (with the use of a Chroma keying program) and post them with a white background ! Because agent smith s argument about printers was compelling and convincing…He simply wants to be able to print the pictures, without paying a fortune to Hewlett Packard ! I chose the White beast and not the Black beauty…
If you remove the background altogether (transparent), you will get the benefit of the lower cost of printout, AND the more pleasant background of the forum. Just a thought.
I guess you have to use gif. I have tried transparent with jpg, and the background gets saved as white. Anyway, I’d prefer to dictate the background color, rather than making it transparent. What happens if the forum decides to change the forum’s background color to black or something like that? You’re screwed. Go directly to jail. Do not pass Go. Do not collect $200.
My preference is png. Transparency is not a part of the jpeg file spec.
Anyway, I’d prefer to dictate the background color, rather than making it transparent. What happens if the forum decides to change the forum’s background color to black or something like that? You’re screwed. Go directly to jail. Do not pass Go. Do not collect $200.That is why I usually add a dropshadow to my illustrations.