My first post here - awesome site by the way I’m sat at home on earned voyage leave and am royaly bored, so I’ve decided to make a knot board. I’ve managed to source all the raw materials to make one … apart from labels for the individual bends, hitches etc.
Unfortunatley I can’t afford to get brass ones made so I’m looking for decent looking (cheaper) alternatives. I’ve spent the last 2 hours gooooooogling with no luck, so if anyone has any ideas I’d be eternaly grateful - my handwriting’s terrible so that one’s out the window LOL.
Perhaps the use of appealing and complimentary card stock (colored?textured?) and printing with attractive font, then cut the labels out with decorative shape/edging, seal and apply.
Do you know anything about making printed circuit boards? Etching is a possibility. It’s a bit of a process, but the end result could turn out awesome.
Basically, make a printout of the desired design/text on a plastic foil, actually two, and place them on top of each other. The reason is to make it stop light from passing through. I have to add, if using a laser printer, make da … certain that the foil is suited for laser printers. Else it could melt and render your printer useless. I have heard of using yellow as a printout colour, since that blocks UV. Others have had success with paper printouts and wet it with oil, sunflower/olive oil to make the paper somewhat transparent …
Get a laminate for PCB, precoated with photoresist. This enables you to get copper on fibre glass. There are resist to be had on spraycans, and so get the emulsion on solid pieces of copper or brass. I have even etched steel. But it IS a bit messy, and has to be done without too much light. The instructions say that it should be dried in an oven at 80C. It’s not strictly necessary but recommended. In some cases though, an angry Mrs could be worse …
The ultraviolet source could be a lot of stuff. Daylight works as do fluorescent light. There are special lamps for the job, but it is mainly a matter of test your way to success. That the lighting is even, is important here.
Expose the emulsion to the UV-light for a certain amount of time. Finding the appropriate time is the trick i the previous list item. Do make sure the film is pressed tightly to the emulsion. Do that with a pane of glass.
You develop the whole thing in NaOH, sodiom hydroxide. The solution is very weak, about one percent. It’s not recommended to stick your fingers in it, but you won’t die immediately. the fingers will however feel a bit slick. rinse off for a long time as soon as possible.
When the pattern reach a good contrast, chances are that it is done. Make sure there isn’t some faint coat of resist left. It will come back and bite your behind in a while.
Etching in Ammonium peroxide sulphate. It is available specifically for this job. Possibly, there are other trade names for the stuff. Check your local electronics supplier. It should be warm, and in motion all the time. There are other chemicals like iron chloride, but my experience with that is not good, and I don’t even know it is available anywhere.
Wash off the protective resist with acetone, or for a brushed appearance with a metal brush.
There is a possibility for me to assist (do it), but I’m afraid I will have to charge some. My lab is permanently set up. But once you get the hang of it, it’s really not that difficult.
A few caveats though. PCB laminates will, like metal, bend a little if cut with metal shears. Some resist will break along the line. Sawing is more boring, but gives a better result.
Upshots: fibre glass may not be the prettiest of text or background, but it is great for backlighting.
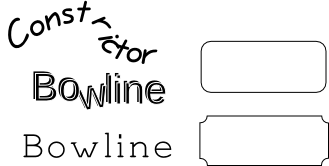
This is what I have for now. I hope the details are not too lost from the postprocessing. These are of course not signs. Somewhere on this forum there were talk about “rope fonts”.
On my knot training table, I printed the labels on regular copy paper, covered them in clear tape, and glued them to the painted wood. They have held up to many curious fingers touching them, and still look like the day I glued them on. With a regular printer, you can vary the font, size, even the color if you have color capabilities.
You can laser print or photocopy a mirror image printout of your lettering, and use a hot iron to transfer the toner (not ink) directly to wood. Experiment on scrap wood first, of course.
I have to admit I’m still a bit stuck on what to do, though I’m seriously thinking about printing off onto card (it’ll be the cheapest option), though I’m far away from getting to that point in the build so I’m still open to options.
The PCB etching sounds really intruiging, but I’m not very good with chemicals - I got a lifetime ban from the chemestry lab at school :-X so I’d best leave that one well alone.
I’m going to be using an Admiralty chart of the south coast as a background so the card option seems to be the best bet at the moment - I’m able to buy paper glue (just), though I’m only allowed to use blunt nosed scissors LOL.
This’ll be my first board, so I’m interested to see how it turns out.
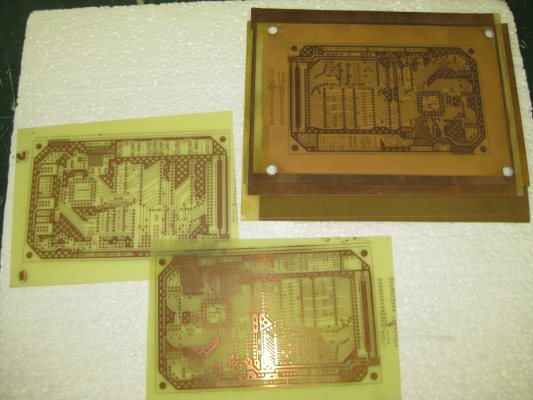
I couldn’t resist … (pun accidental). This is the test run I did in steel. The resist broke up. Mostly due to poor cleaning, uneven coating (the tiniest pieces of dust pull the resist into clots) and careless handling. The major damage was the time spent in acid. The low temperature made the acid very slow, and I forgot about the project for a TV show or two. A permanent marker pen can amend some damage if it is discovered in time. But the picture ought to show the general idea, be it in steel, brass or copper.
The etching looks good - I still can’t be trusted with acid though and the glue tip is top notch thanks and I’ll definatley take photos to share with you all, just waiting for the postman to deliver all the bits ‘n’ pieces so I can get started.