In the Non slipping bend in Dyneema thread, the question arose as to why make a bend at all, given how easy single-braid Dyneema is to splice. One answer given was that sometimes you need a small loop - one that isn’t large enough to permit the buried length necessary for a strong splice.
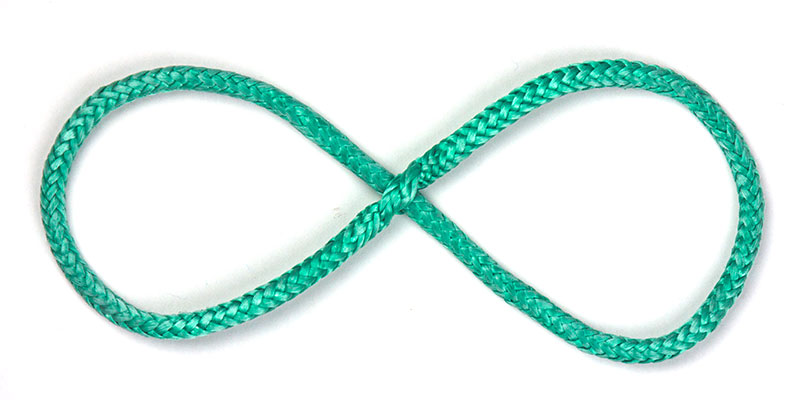
Well, my preference in such circumstances is something I call an “Infinity Splice” (shown below). I don’t believe that it’s possible to make a fully lock-brummeled simple loop, even by inversion methods like the Mobius eye splice. It is possible, however, to make a fully lock-brummeled loop in the shape of a figure-8 or (if viewed horizontally) the infinity symbol. I’ve been using these for several years now as replacements for wire pigtails - or anywhere I want a clean, simple rope loop (even if I don’t need the tensile strength of Dyneema).
Note that the crossing of the splice is not fixed. That is, you can adjust the relative sizes of the two loops at any time. I find that convenient when I want to eye-hitch the loop on one end. For example, I have a boat with a floating boom (the gooseneck is not fixed in place on the mast). I use an infinity splice with one end eye-hitched to the mainsail tack grommet and drawn up so that the other end forms a loop large enough for the boom gooseneck to pass through. That way, the boom rides up and down with the tack of the sail.
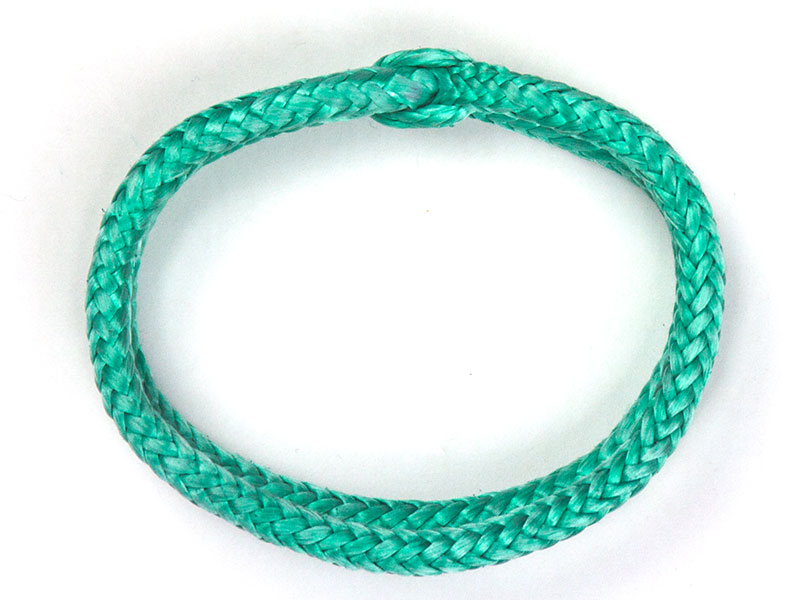
If I want a smaller diameter loop, I simply fold the ends over to form a doubled ring. The example shown below is made of 1/8" (3mm) Amsteel Blue. The crossover has fully locking brummels and both tails are buried about 10" (250mm). When folded, it yields a double-loop approximately 3" (75mm) in diameter. The strength of the splice is reduced somewhat by the deformation of the brummels, but it should still be much closer to the rated line strength than any knot. When I use a doubled loop, I generally drop down a step in line diameter (That is, if I want the strength of 1/8" line, I’ll make the splice out of 7/64" and fold it into a double loop).
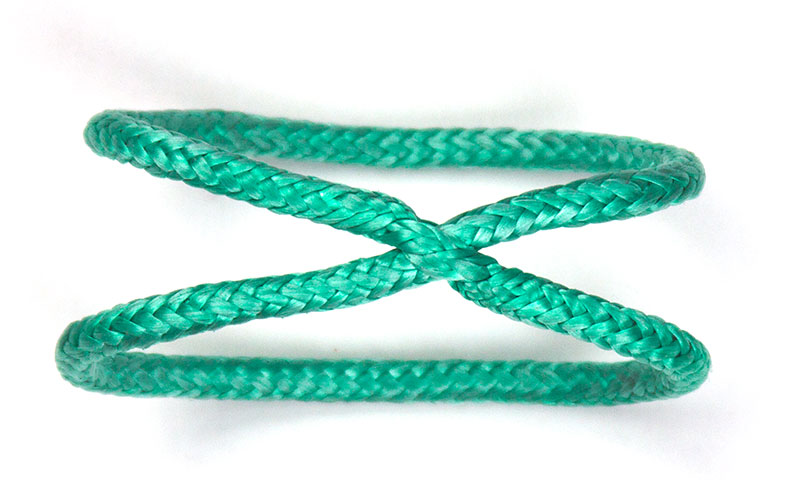
Step 1: Arrange a length of single-braid line in a “Z” shape.
Step 2: Pass each bight through the braid of the adjacent working end.
Step 3: Pull the bights apart to form a locked Brummel around the center part.
Step 4: Bury and taper the tails (not shown). If the loop is large enough, then the tails won’t meet. I generally prefer to make the tails sufficiently long that they overlap, and taper them opposite each other. That way, the splice has a constant finished diameter all the way around.
I hope that was interesting, and that you find the splice useful.
Inverting one of the loops actually undoes the locked Brummel. You wind up with a simple bury on one end, and a distorted (inverted eye) single Brummel and bury on the other. You can verify this by pulling the buried ends out. The splice will then fall apart.
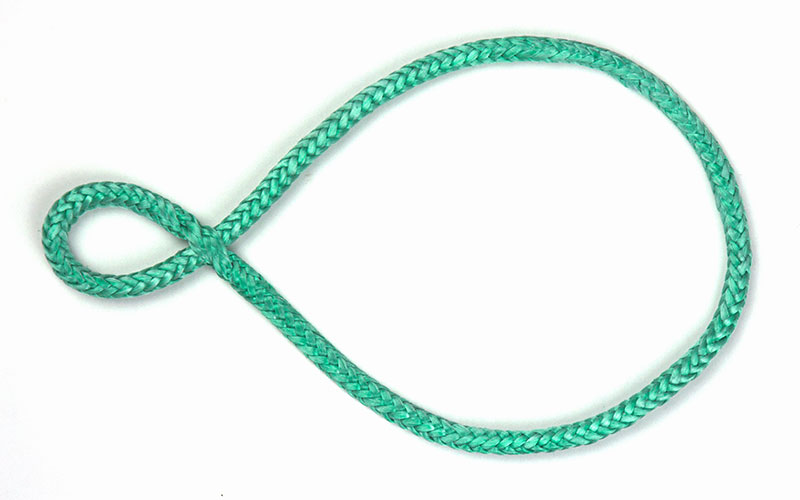
I tied this figure 8 slippery loop with maximally long burryed ends. I pulled one loop tightly around a small carabiner and pulled the long loop taught. I tied an overhand knot in the long loop with a small loop emerging out if the knot. I tucked the small loop through the emerging loop and snugged the overhand knot. This forms a soft shackle with a double strand locking loop.