Yet another midline eyeknot

If you mean that the slightest modification in knot’s geometry, brings about a completely different knot, maybe i would agree with your claim.

However, if you think that there isn’t any topological correlation between the two knots, with just a slight fiddling of the nipping loop with less effort, as i described it previously, then i have to disagree, because i have established this correlation more than fifty times, which makes me 100% sure.

Let me put it another way. If i follow the steps of the tying method at reply#78, is it feasible to create one of your configurations at reply#76, let’s just say the one in your first image, yes or no?

Hi Kost_Greg

Re. #78 and 79, I just point out that your inline eyeknot is not my Moth Midline Loop Knot because you use the name Moth Inline Eyeknot. Thus confused me that the TIB tying method is Moth Midline Loop Knot. I have admitted it is different from mine.

Yes, the configurations of the tying steps at reply#78 can be turned to the configurations at reply#76.

Most Midline Loop Knots have their nub being strangulated by their SParts. Moth MLK has not, its’ SParts grab the lower part of the main collar, so the knot can be easily untied by retreating the SParts and free the loop from the collar.

Your Moth IEK also can be easily untied by flipping the collar over and free the eye/loop. But its’ SParts grab/strangulate.

Happy Knotting
yChan

Hi Ychan

I think we have an understanding here, for your consideration, i didn’t launch the knot at reply#78, as my own creation, it was just simply originated from your configuration, as a different dressing, and that was the reason me using your selected moniker, it was not my intention to hijack it.

Let’s just say, it is just a variation of the moth with just a slight core modification.

Of course, it goes without saying, that if you have developed a TIB tying method, that leads directly to your structure, by all means, do upload it.

Thanks.

Hybrid butterfly forms

I am bringing to mind that this type of structures employ interlocking, figure eight and overhand components.

Some or most of us, when tying the 1053 butterfly, we usually arrive at the conventional first image figure, just before the final reeving of the central bight down through both interlocking loops.

Instead of doing that, a crossing knot is formed at the left, S loop continuation, while the central bight is driven only through the crossing knot and down through the right Z loop, according to the second figure, which leads to the cinched and well dressed structures of the next two images.

It is certainly an interesting scheme with sufficient stability towards all loading directions, and in my view, a more manageable, figure eight component, at heavy strain.

Of course, the overhand is still there, ready to rock, but for fussy knotters (like me :)), the good thing is that it might be able to leave room for a couple of modifications, that neutralize its jamming function.


I was quite surprised to find out that the previous inline knot at reply#83, appears to maintain the symmetrical properties of the butterfly knot despite the distinction of the two components that make up the core structure (figure eight/ overhand, overhand/overhand for 1053).

In others words, it actually becomes feasible to transition from the midline, to the end of line profile and vice versa, employing only TIB nub maneuvering, with none at all, eye manipulation.

If it’s going to be used in this unprocessed form, i would suggest to be loaded from the figure eight side.

Now, inducing some eye manipulation, to dispense with the remnant overhand, one might convert the inline structure to a double splayed loop bowline variant, by simply folding the eye and pulling the eye leg continuations up through the eye, which now becomes the bowline collar (first two images).

If a geometrically shaped, inline profile, free of overhands is a necessary condition, then the eye legs of the knot at reply#83, shoud swap positions, and the eye should be reeved from the overhand side.

Interpretation of eye leg swapping/eye reeving through the overhand side.

In more detail, start with the figure eight, eye leg continuation by placing it over the other.
Then extend the other overhand eye leg continuation, forming a bight, fold it under the core nub, and pass the eye throuh this very bight.

Of course, there is another TIB tying method, which leads directly to third, fourth image, midline knot formation.


i really like your use of the arrowheads in the illustration,
which is much clearer than use of a single line and arrow

Hi all,

Showing here is the February Butterfly Midline Loop Knot. The loop passes through three eyes.

Happy Knotting
yChan


FebBufly1.jpg

FebBufly2.jpg

FebBuflyFront.jpg

FebBuflyBack.jpg

Thank you Alana, i ain’t really known for my illustration skills, but i’m trying my best.

Hi Ychan, i’m glad to see you experimenting with these forms.

I think it’s somewhat arbitrary to use a plain butterfly descriptor for two reasons.

  1. None of your loops are interlocked to one other.

  2. If you remove the first turn of the left link, (shown in the attached image), you will find that the parent knot is the false butterfly.

So, in my view, an identifier like “false”, before the butterfly term, would be more meaningful.

In other respects, the knot is pretty good, clearly an enhancement to false butterfly, because one of its overhand components, more specifically the left one, is being transformed to a more pliable form of a figure nine, with this extra turn, and an “easy to handle”, figure nine collar.

Loading it from the figure nine side, in my view, would be a jam-safe way.

Well done!!


Hi Kost-Greg

I have had tried and tied several knots like the February Butterfly Midline Loop Knot including this February Butterfly Beta Midline Loop Knot. I did not put it up here because of the interlink loops or non-interlink loops as Moth Midline Loop Knot and Moth Beta Midline Loop Knot. I like Moth MLK more than Moth Beta MLK. Moth has no interlink loops, but Moth Beta has interlink loops. Same as these February Butterfly MLK and February Butterfly Beta MLK.

Happy Knotting
yChan


FeBuflyBeta1.jpg

FeBuflyBeta2.jpg

FeBuflyBetaFront.jpg

FeBuflyBetaBack.jpg

Hi Kost_Greg

I like the right SPart be placed under the diagonal line that forms the appearance of a Clove Hitch. That is why I like February Butterfly MLK.

Happy Knotting
yChan


11.jpg

22.jpg

Hi Ychan, it’s good that you have included the interlinked configuration as well, providing a compehensive picture of these structures.

The “Beta”, butterfly-ish variation, although it looks more compact, in Mobius, crossed-line style, i believe it blocks the access to the figure-9 collar, therefore, i also agree with your preference to the other one.

Afterall, what’s the point of inducing additional complexity to 1053, which would probably render the untying situation, more challenging than the parent knot?

On the contrary, at the february structure, the 9-collar is completely accessible, with no direct linkage to SParts, and moreover, it operates as a blocking component against the distancing developed between the two non-interlinked overhands of false butterfly, holding them close to one other.

To see what i mean, try to form the figure nine, this time from the right side of the knot, incorporating an S-half hitch.

You will rather uncover a knot, not so stable, as the one with the Z-half hitch, that you have very smartly intergrated from the left side of the original knot.

One other interesting aspect is, that if the double splayed loop, bowline version is obtained from the original, inline, source knot, this figure-9 form, is transformed to Alpineer’s nipping structure.

Moving to more conventional, hybrid, butterfly forms that synthesize interlinked figure eights and overhands, i have attached the precedent state of this form in first image, just before the reeving of the central bight through both interlinked loops.

Note 1: The right Z loop is twisted, and gets the crossing knot state, before the reeving, for the figure eight to be materialized.

Note 2: If the left S loop is twisted, one might expect a geometrically different result.

As i have explained in previous replies, the hybrid form, (which comes from the previous stage), is subjected to some core modifications, whereon the figure eight is flipped and the eye legs swap positions as illustated in second image.

Finally, the overhand, eye leg continuation, is extended, forming a bight, which in sequence is being folded under the nub, with the finishing reeving of the eye down through this bight.(third image, loose form).

In my view, despite the complexity, this is another interesting mode to interlace figure eight with overhand components, in butterfly-ish style to produce stable, yet jam-safe, midline knot structures.

Looking for a simple tying method that leads directly to third knot, bypassing the intervening stages.


Last, but not least at this series of knots is the one that points directly to the butterfly Knot.

Perhaps i should have started with this one, as the primary profile in this group of knots, nonetheless, i have mostly favoured the hybrid forms because their interlinked figure eight components, appear to form more pliable core nubs, compared to plain ,raw, overhands.

However, if someone wishes to improve butterfly’s jamming profile at about 50% max (theoretically, by leaving only one overhand in action), he does have the option to put this specific profile to the test.

About the tying method, i shall join hands with Alan Lee and follow his tying procedure when forming his inline link bowline, just simply adding an S half hitch at the left SP continuation, as shown in first image mat (three times twist and folding under the main line is the initial mat creation, one more twist compared to the original butterfly method).

Note 1: Remove the collar that encircles the eye legs, in order to materialize the butterfly knot.

Note 2: If you wish to get rid of the remnant overhand, remove the first, left SP HH, and allow inline Lee’s link bowline to take on form.


This reply is about inline knot formation with a toggle mechanism, that’s tailored to butterfly tying method.

First stage, (first image) is the well known, precedent butterfly mat, with the two, different polarity, interlinked loops, just before the final, central bight reeving.

  1. Twist the right (Z) loop, anti-clockwise and turn it into the bight state, shown in second image mat.

  2. Pass the central bight through this formation in the following order, over, under, under, over.

This is another, butterfly oriented, TIB tying method for the first knot of this thread.


How about inducing a clockwise twist, at the left, S loop component of the previous pre-stage, of the butterfly knot?

Such action would shape the first image mat scheme, while the toggling action, would push the central bight to be passed under the left bight, in exactly the previously described order (over, under, under, over), generating the fully featured profile of the next two images.

While this knot’s response to BTL loading appears to lack the stability and the compactness of the previous knot ar reply#93, it is clear that the eye loading profile outweighs the previous one, from a jam resistance point of view.

Although both knots feature a resemblance in their structural topology and construction (no overhands), their jamming profiles appear to diverge, with the latter being more pliable than the the former despite its strange appearance.

PS: Siriuso would be pleased to find out that one more twist at the left component, would form the Z to Z mat, while toggling the central bight in exactly the same fashion as previously, the Mantis loop would take on form.

However, i think i shall insist on the pliability of the second nub at this reply.


Sheepshank variation

As shown in first image’s initial configuration, the first two loops are of same (S) polarity while the distinction, compared to a conventional sheepshank, lies to the third loop which is formed with inversed (Z) polarity.

Obviously, the left part of the middle loop is threaded down through the left loop, while the right part of the middle loop is threaded down through the right loop.

This sheepshank variant appears to maintain a more stable form when bi-axially through loaded, with the two sheepshank bights (the alleged damaged part of the rope) in a vertical axial alignment.

Xarax has been there before, because his sheepshank bowline is formed by pushing one bight through the other.

https://forum.igkt.net/index.php?topic=4680.msg30254#msg30254


  Hi Greg, Yes, this is an improved version of sheepshank. Great work. I like it.
                  alanleeknots.

Thank you Alan for your feedback.

I’ll have to point out that even this apparently more stable sheepshank, is always a sheepshank, so one has to be very cautious when using it.

Relation between Abok#1049 Span loop and Abok#1055

This is not an obvious or direct correlation, one has to work with both knots to establish it.

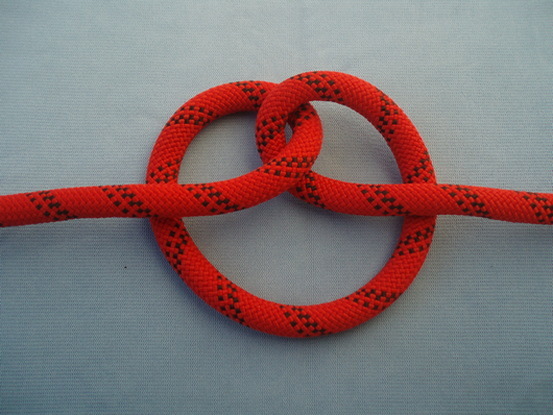
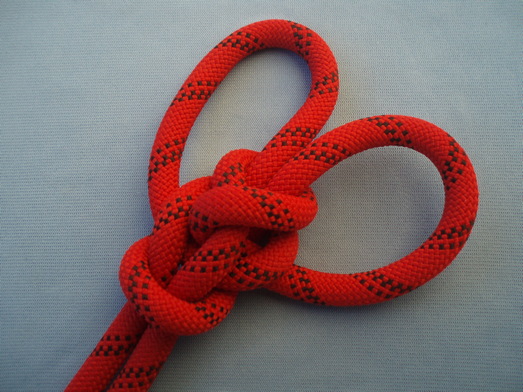
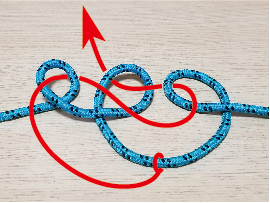
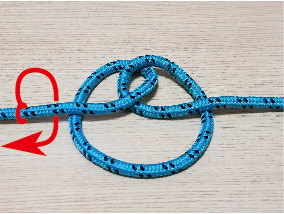
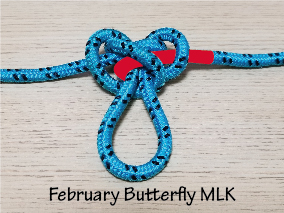
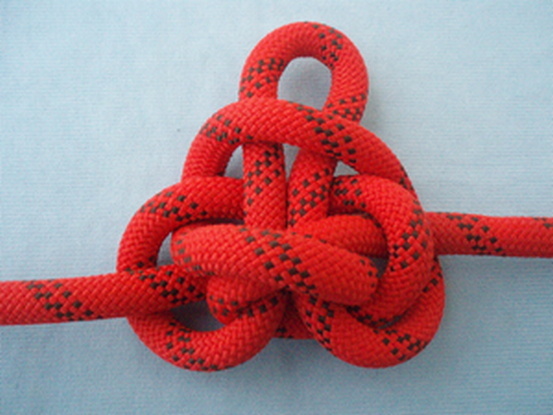
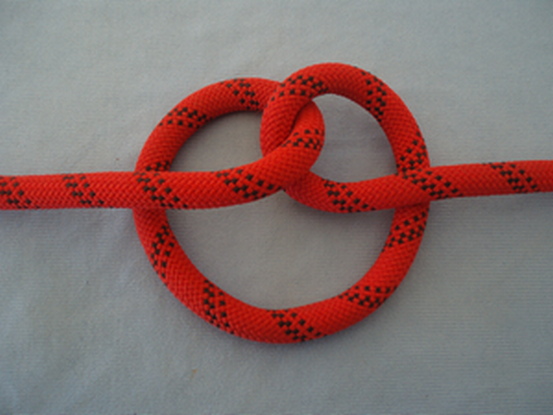
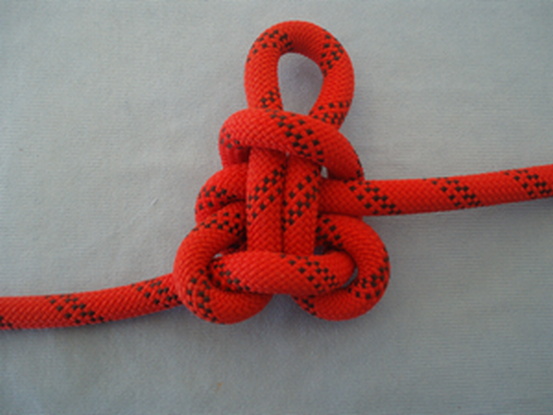
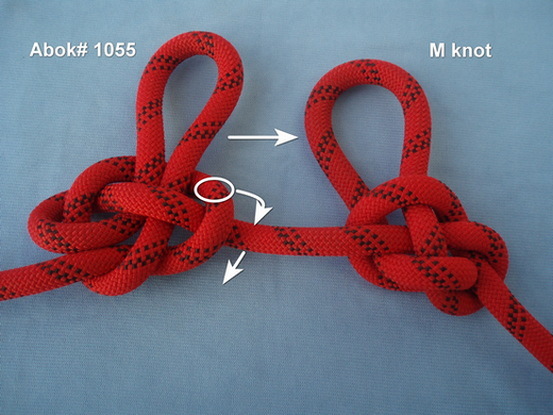
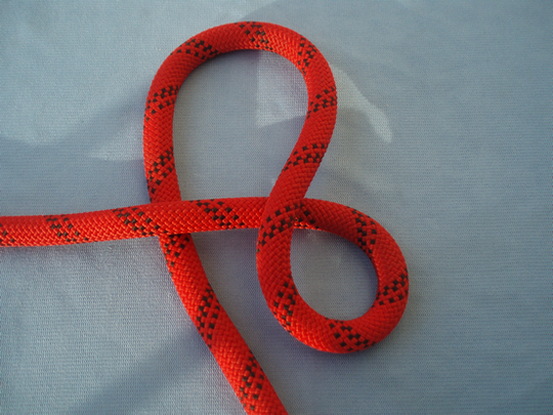
Starting with Abok#1055 (left of first image), tied exactly as described in Ashley book of knots, the collar encircling the eye legs is flipped for the M, rightmost knot derivative to be created.

This simple maneuver, induces a radical change in the knot’s core, with the latter being more stable than the former in all loading directions.

For example, at the left knot (Abok#1055), the nipping loop is a direct continuation of the right SP, with one rope diameter passing through, while at the right knot (M knot), the nipping loop is a direct continuation of the left SP with two rope diameters passing through.

So, which knot might be associated with the so called M knot?

Answer: The M knot, is the direct inline derivative of Mobius M bowline.

Link: https://forum.igkt.net/index.php?topic=6193.msg41584#msg41584

But in what way exactly, does Abok#1049, Span loop jump in this equation?

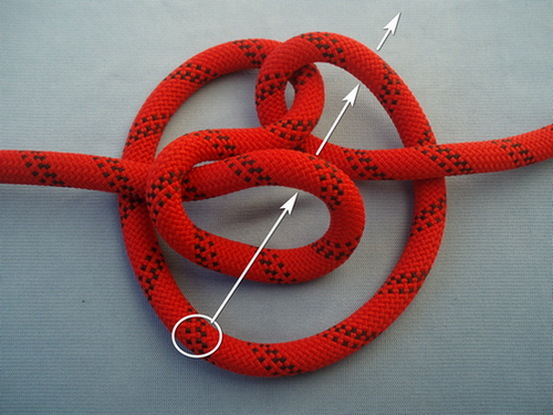
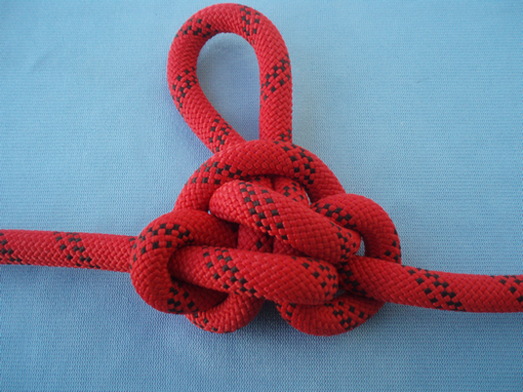
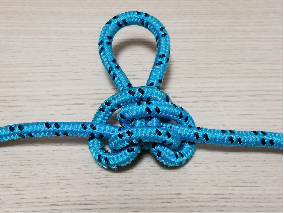
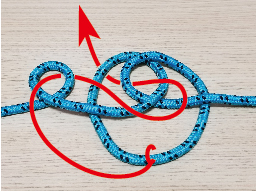
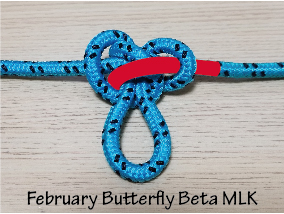
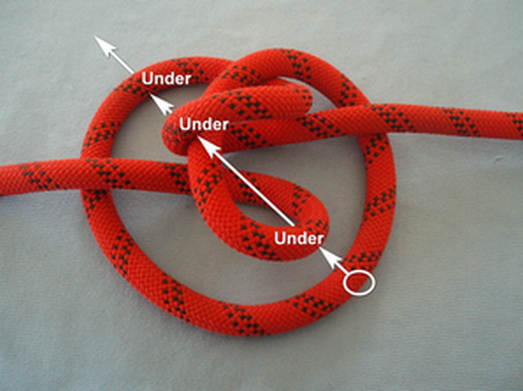
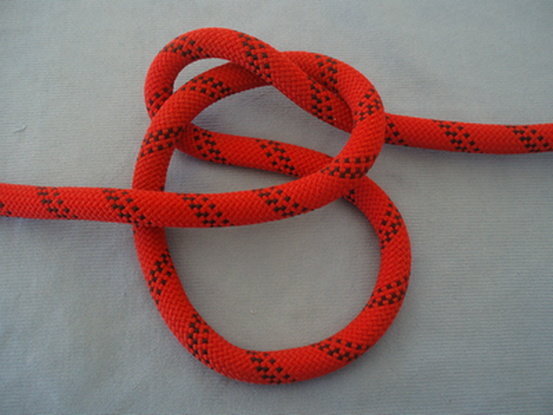
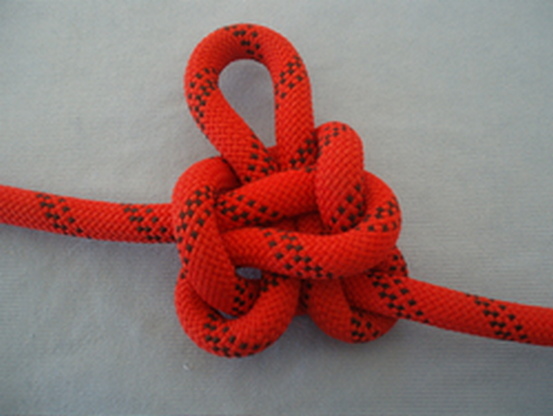
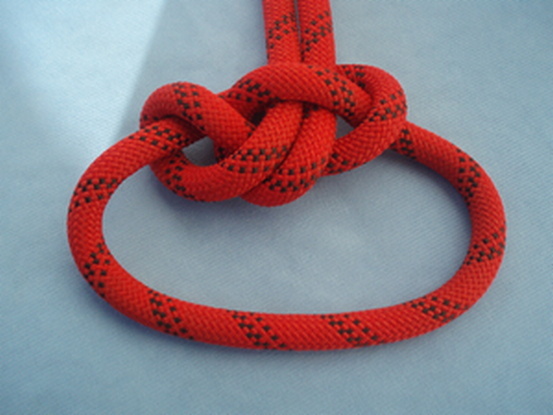
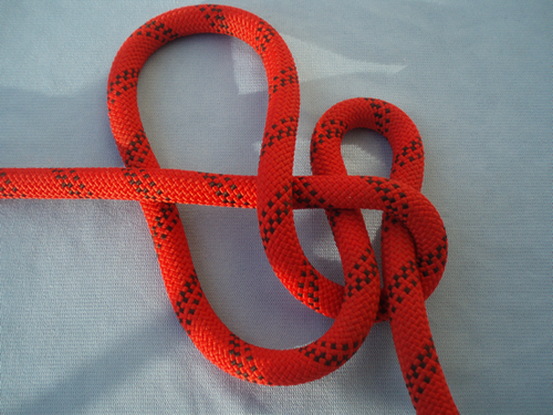
If the M loop is subjected to an additional collar flip, a Xarax Samisen TIB bowline is shaped, which is dressed and illustrated in a way to highlight the correlation with Abok#1049 (second image).

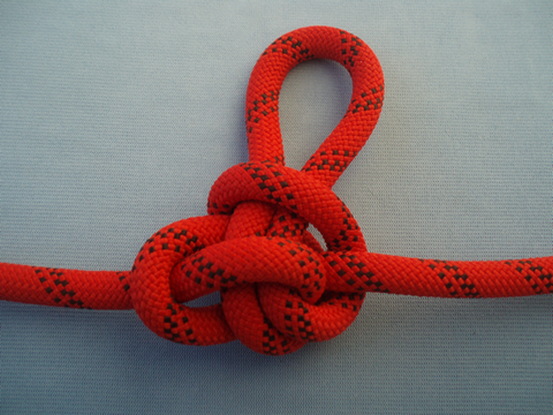
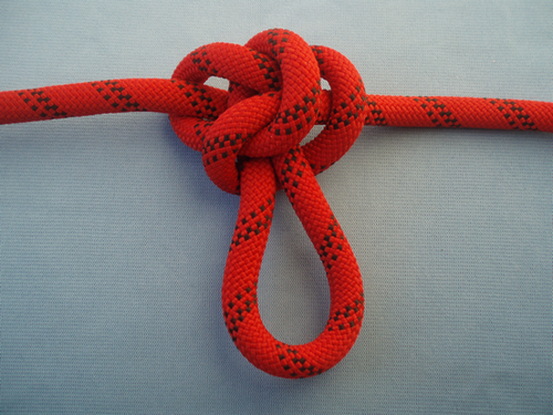
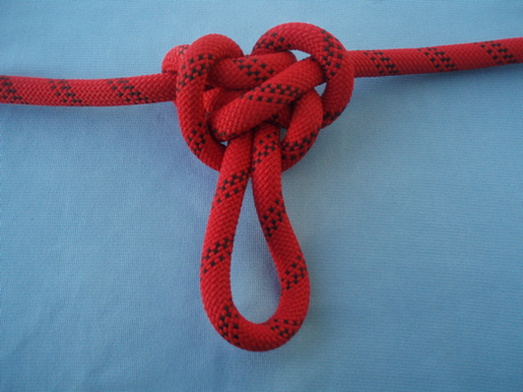
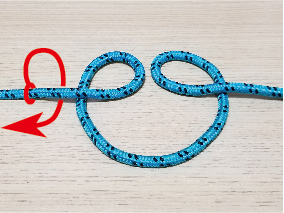
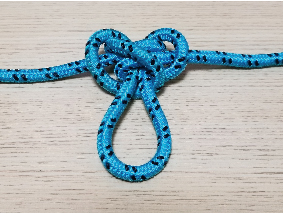
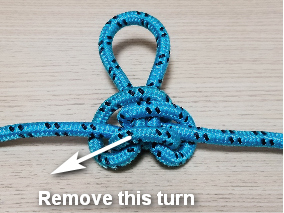
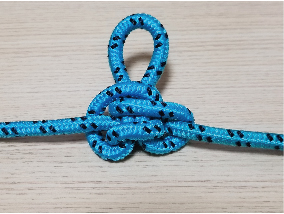
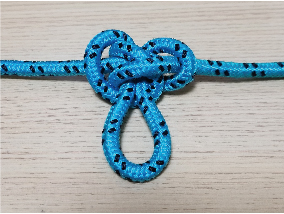
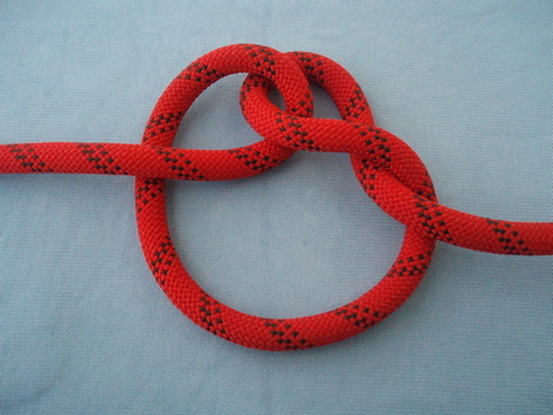
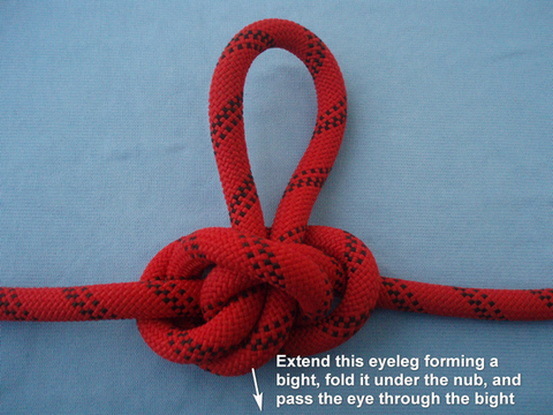
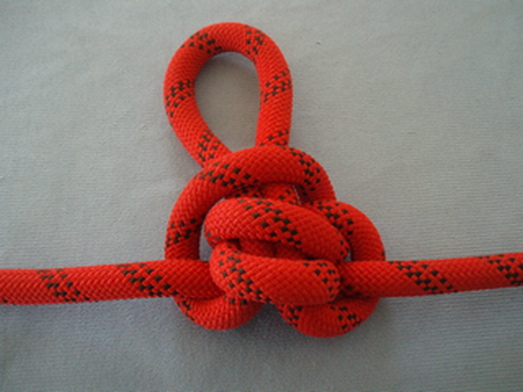
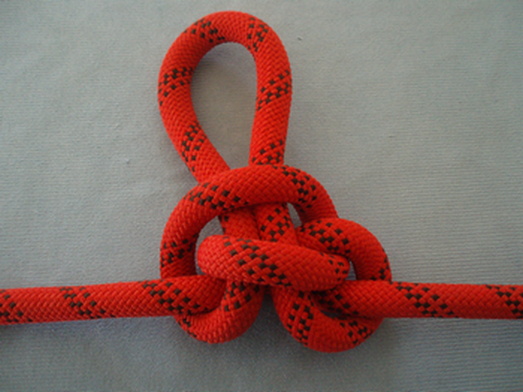
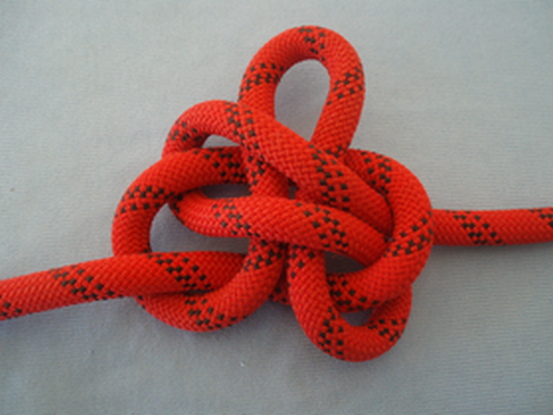
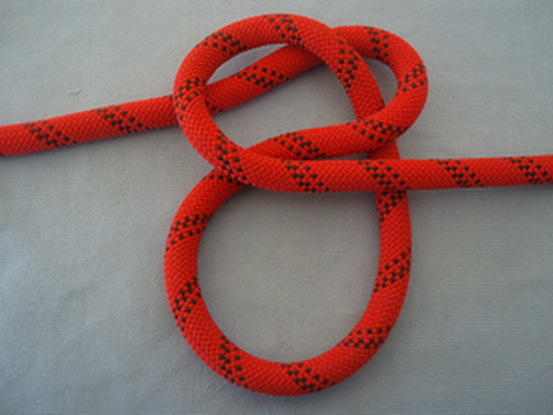
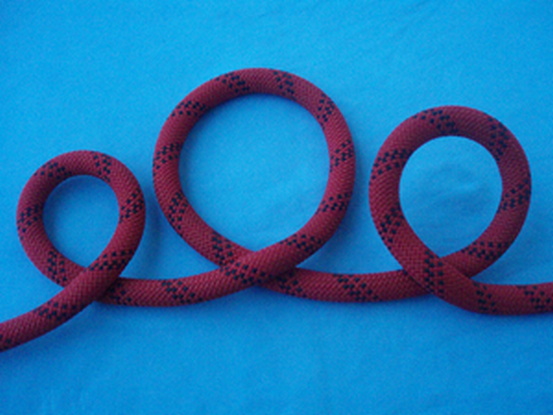
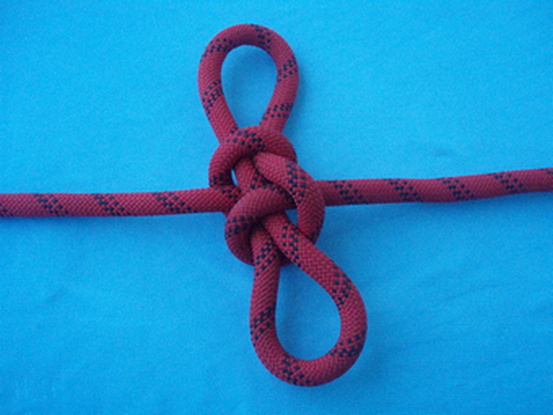
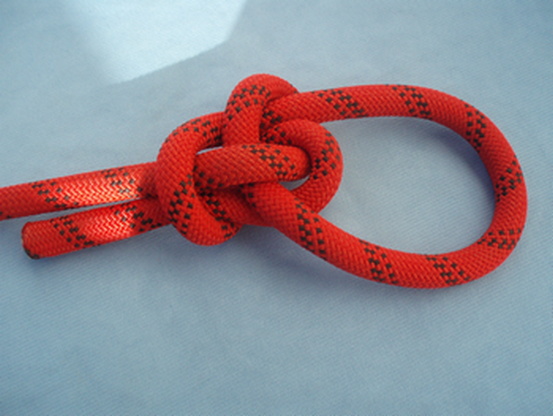
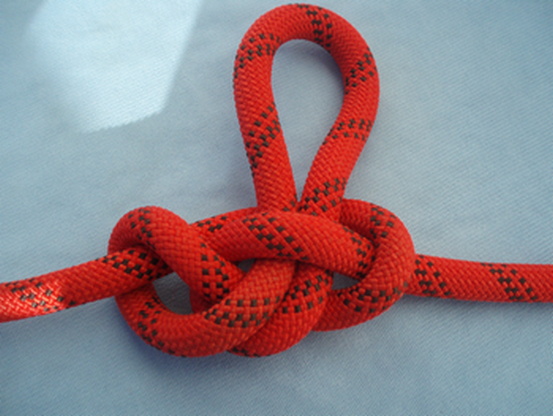
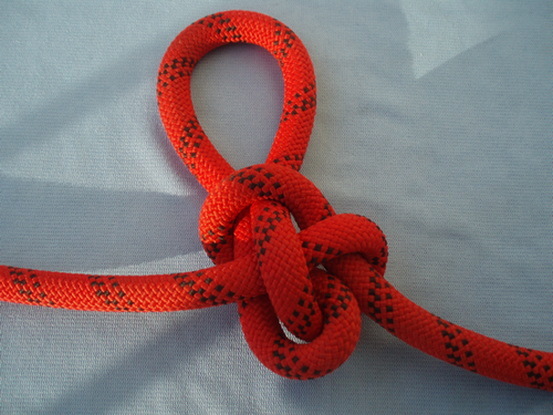
In other words, while the M core of third image bowline is not pseudo symmetrical, meaning that it’s not feasible to progress directly from end of line to midline (same cores) and vice verca, it might be associated with two inline knots, the midline M (mM), and the Span loop (fourth image) and Abok#1055 by extension.

Loading all three inline knots in various loading modes, i would guesstimate that the mM, appears to respond more solidly, with respect to consistency and stability to the initial form.

In conclusion, i would confirm the following “in the bight” core transformations…

1.Inline Abok#1055 <======> Inline M <======>End of line Xarax’s Samisen bowline.

2.End of line Abok#1055 <======>End of line M bowline <======> Inline Span loop Abok#1049.

I wonder, if the original creator Mobius, had investigated all these aspects.


As shown at previous reply, Abok#1049 Span loop and Abok#1055, they both point to the M core, end of line or in line respectively, which somehow stays hidden in between these inline profiles.

Suppose, someone desires a straight TIB tying method for this Carrick like structure without having to pre-form Abok#1055, there is also a simple TIB method that leads directy to mM.

  1. Form the bight, loop system shown in first image.
    Basically, it is a dual loop system of same polarity, where the left one is designated as the final eye, and the smaller right loop is capsized.

  2. Form a bight on the right SP continuation and push it down through the small centered loop.

  3. Feed the left loop down through this bight from the previous step.